ODAF (Omnidirectional Autonomous Fishbowl)
WTF is an ODAF?
An ODAF, is a multi-year joke project started during a conversation at the Santa Clara University Graham Hall front desk in Winter Quarter 2017. A conversation along the lines of "Bro wouldn't it be hilarious if you put a fishbowl on a roomba?" was had. From there I thought, in fact, it would be hilarious if such a robot existed. And so began the multi-year journey of building ODAF, an omnidirectional autonomous fishbowl.
Inspiration
Before I dive into the project, I would like to acknowledge my two sources of inspiration, from whom I stole many ideas:
- Scot Tomer (blog) - Scot's Master's thesis from the SCU RSL (Santa Clara Univeristy Robotics Systems Lab) was called Decabot. This madman built 10 omnidirectional robots to provide the RSL a testbed to experiment with robotic swarm control techniques. My first iteration shared many items in its BOM (bill of materials). Fun fact, I now work with Scot at OnePointOne, Inc and get to witness his engineering prowess daily.
- Kris Temmerman - Kris posted 4 YouTube videos featuring 2 omnidirectional robots he built. I highly recommend watching his videos if you are interested in robotics or the Maker movement in general. I am blown away by Kris's abilities, and hope to maybe one day be half the engineer he is. My second iteration stole many ideas and components from his design.
The Early Years
Sophomore Year: Winter Quarter 2017 - May 2017
Since this project was started, 4 years have gone by. I only work on this project when I am bitten by the bug, and as a result it has drawn out over the years. In the photos below I will try to give an idea of where it all started, and how things progressed to where I am with the project today.
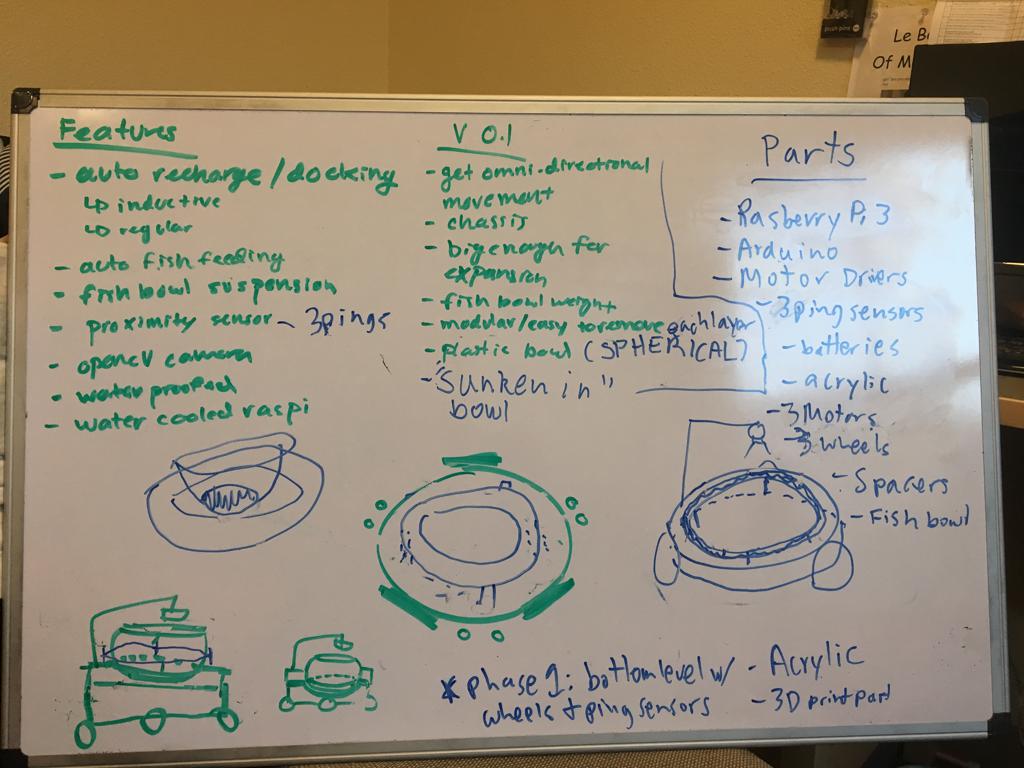
Like many projects, this too started on a whiteboard. On the lefthand side is a list of features that were desired, many of which were purely out of scope. For example, suspension, or water cooling would be cool, but do I really want to spend thousands of dollars and hours to prove that out? No. So we're left with the features that at the time I thought would be dead simple to implement under the hilariously labeled "v0.1":
- omnidirectional wheels
- support the weight of a few gallons of water for the fish
- can be disassembled for maintenance (i.e. no glue allowed)
- fish bowl is low to the ground to keep center of gravity low
"Easy enough!" Thought the 19 year old. Little did I know what journey I was embarking on.
Iteration 1 - A Rough Cut
Junior Year: July 2017 - February 2018
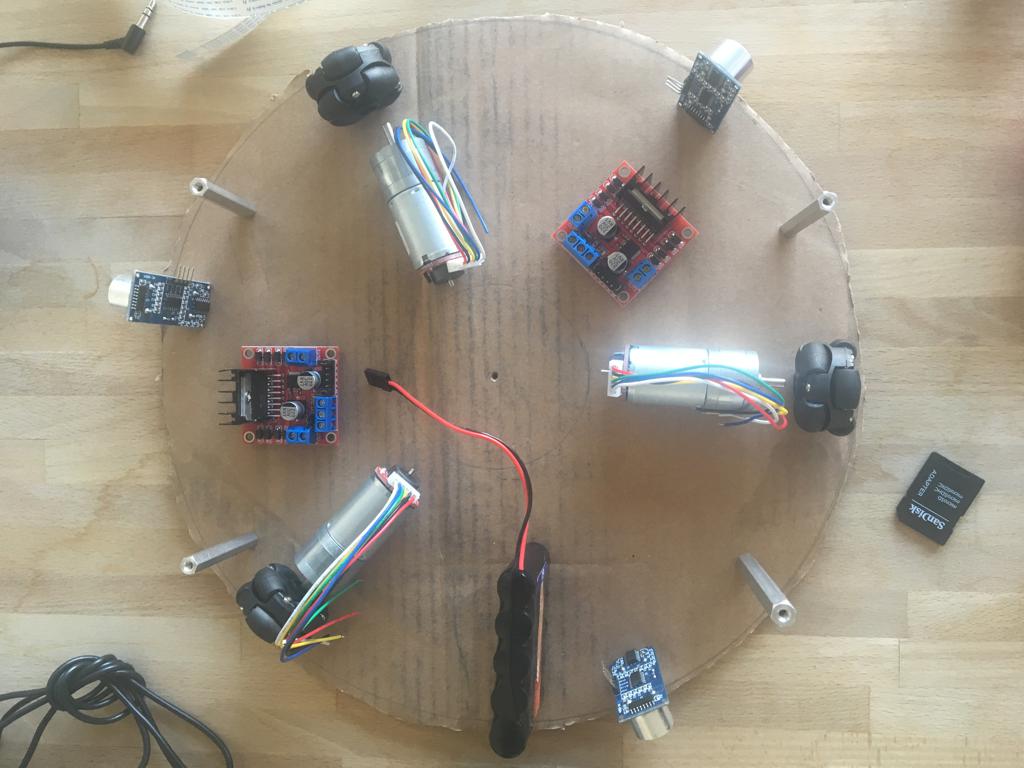
Here was how I planned to lay out the robot. At this point I was just trying to get a feel for how much space I would need. Seems simple enough.
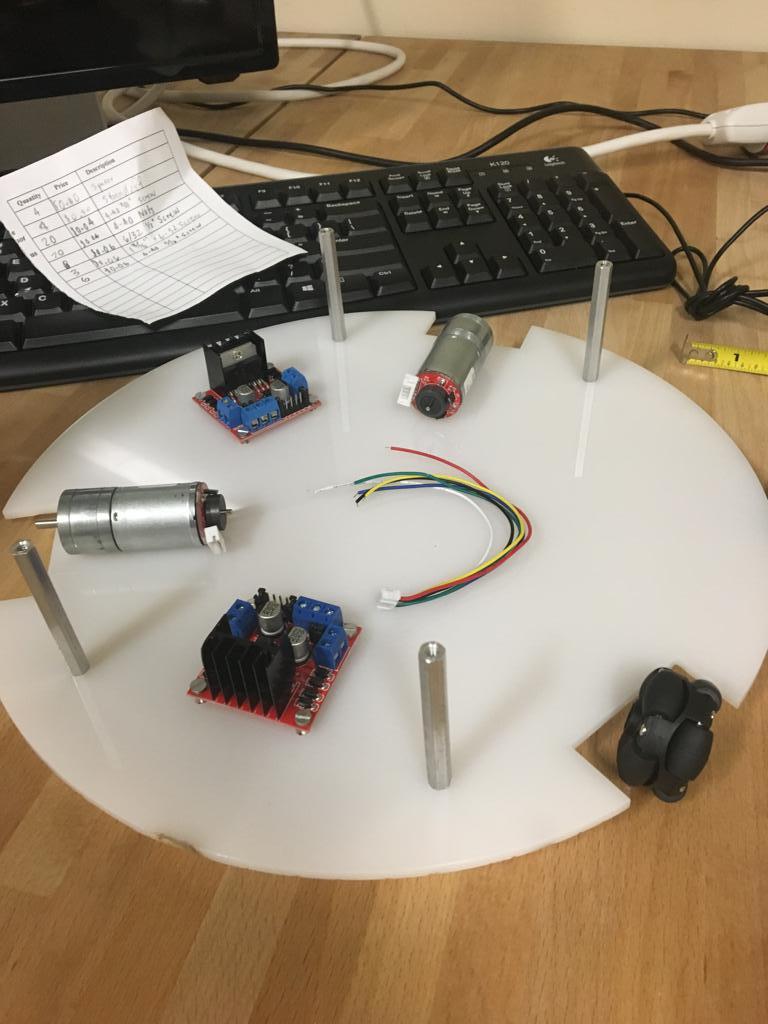
Here I had gone ahead and laser cut some acrylic and well as tried to start figuring out where spacers would go to help support the upper layer of the robot that would help stabilize the fish tank.
Here we can see 2 new acrylic sheets were laser cut to form the chassis. Additionally, some motor mounts were also cut out from acrylic and hot glued to keep everything in place. Sadly, you will notice that the wheels in the second photo barely make more contact with the ground than the acrylic it is mounted to. As a result, I had to ditch this design because it simply wouldn't get enough traction to move.
Iteration 2 - Bigger Wheels
Junior Year: February 2018 - May 2018
Here you can see the next version which features much larger wheels and motors.
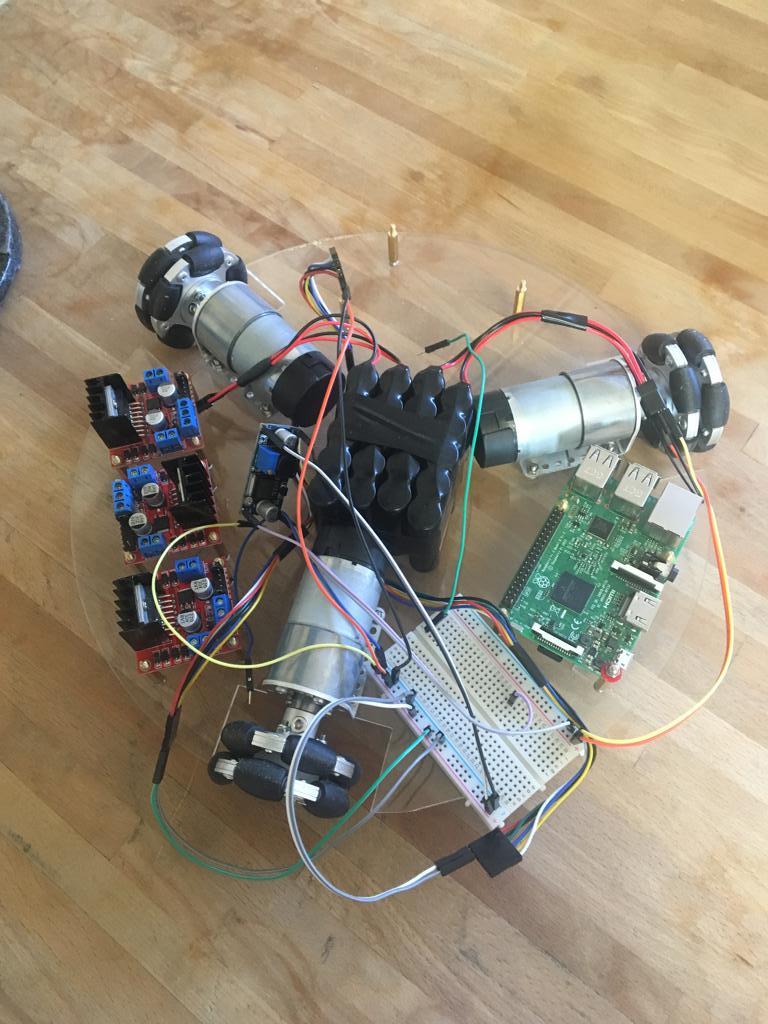
Here, the robot is wired and ready to do some basic testing. The encoders have not been wired, but I started implementing the inverse kinematics to drive the robot via command line, as well as by tilting my phone.
At this point, I had selected L298N's as my motor driver, or in other words: Amazon's Choice Motor Driver. Same thing with the LM2596 buck converters. While these components were great for prototyping, there was no chance I would be able to fit a fish tank on top of this rats nest of wires.
Iteration 3 - Planning in 3D
Senior Year: September 2018-June 2019
In this video, I am attempting to make use of the oscilloscope I have. I was looking at the duty cycle of the PWM signal, but there was really no point to doing this. I think I was just trying to make a technically complicated looking video. Although it doesn't convey anything technically useful, I do enjoy this video because this features a good look at my favorite workbench I've had for this project. A tiny little desk salvaged from the street, cluttered with my hobby :) .
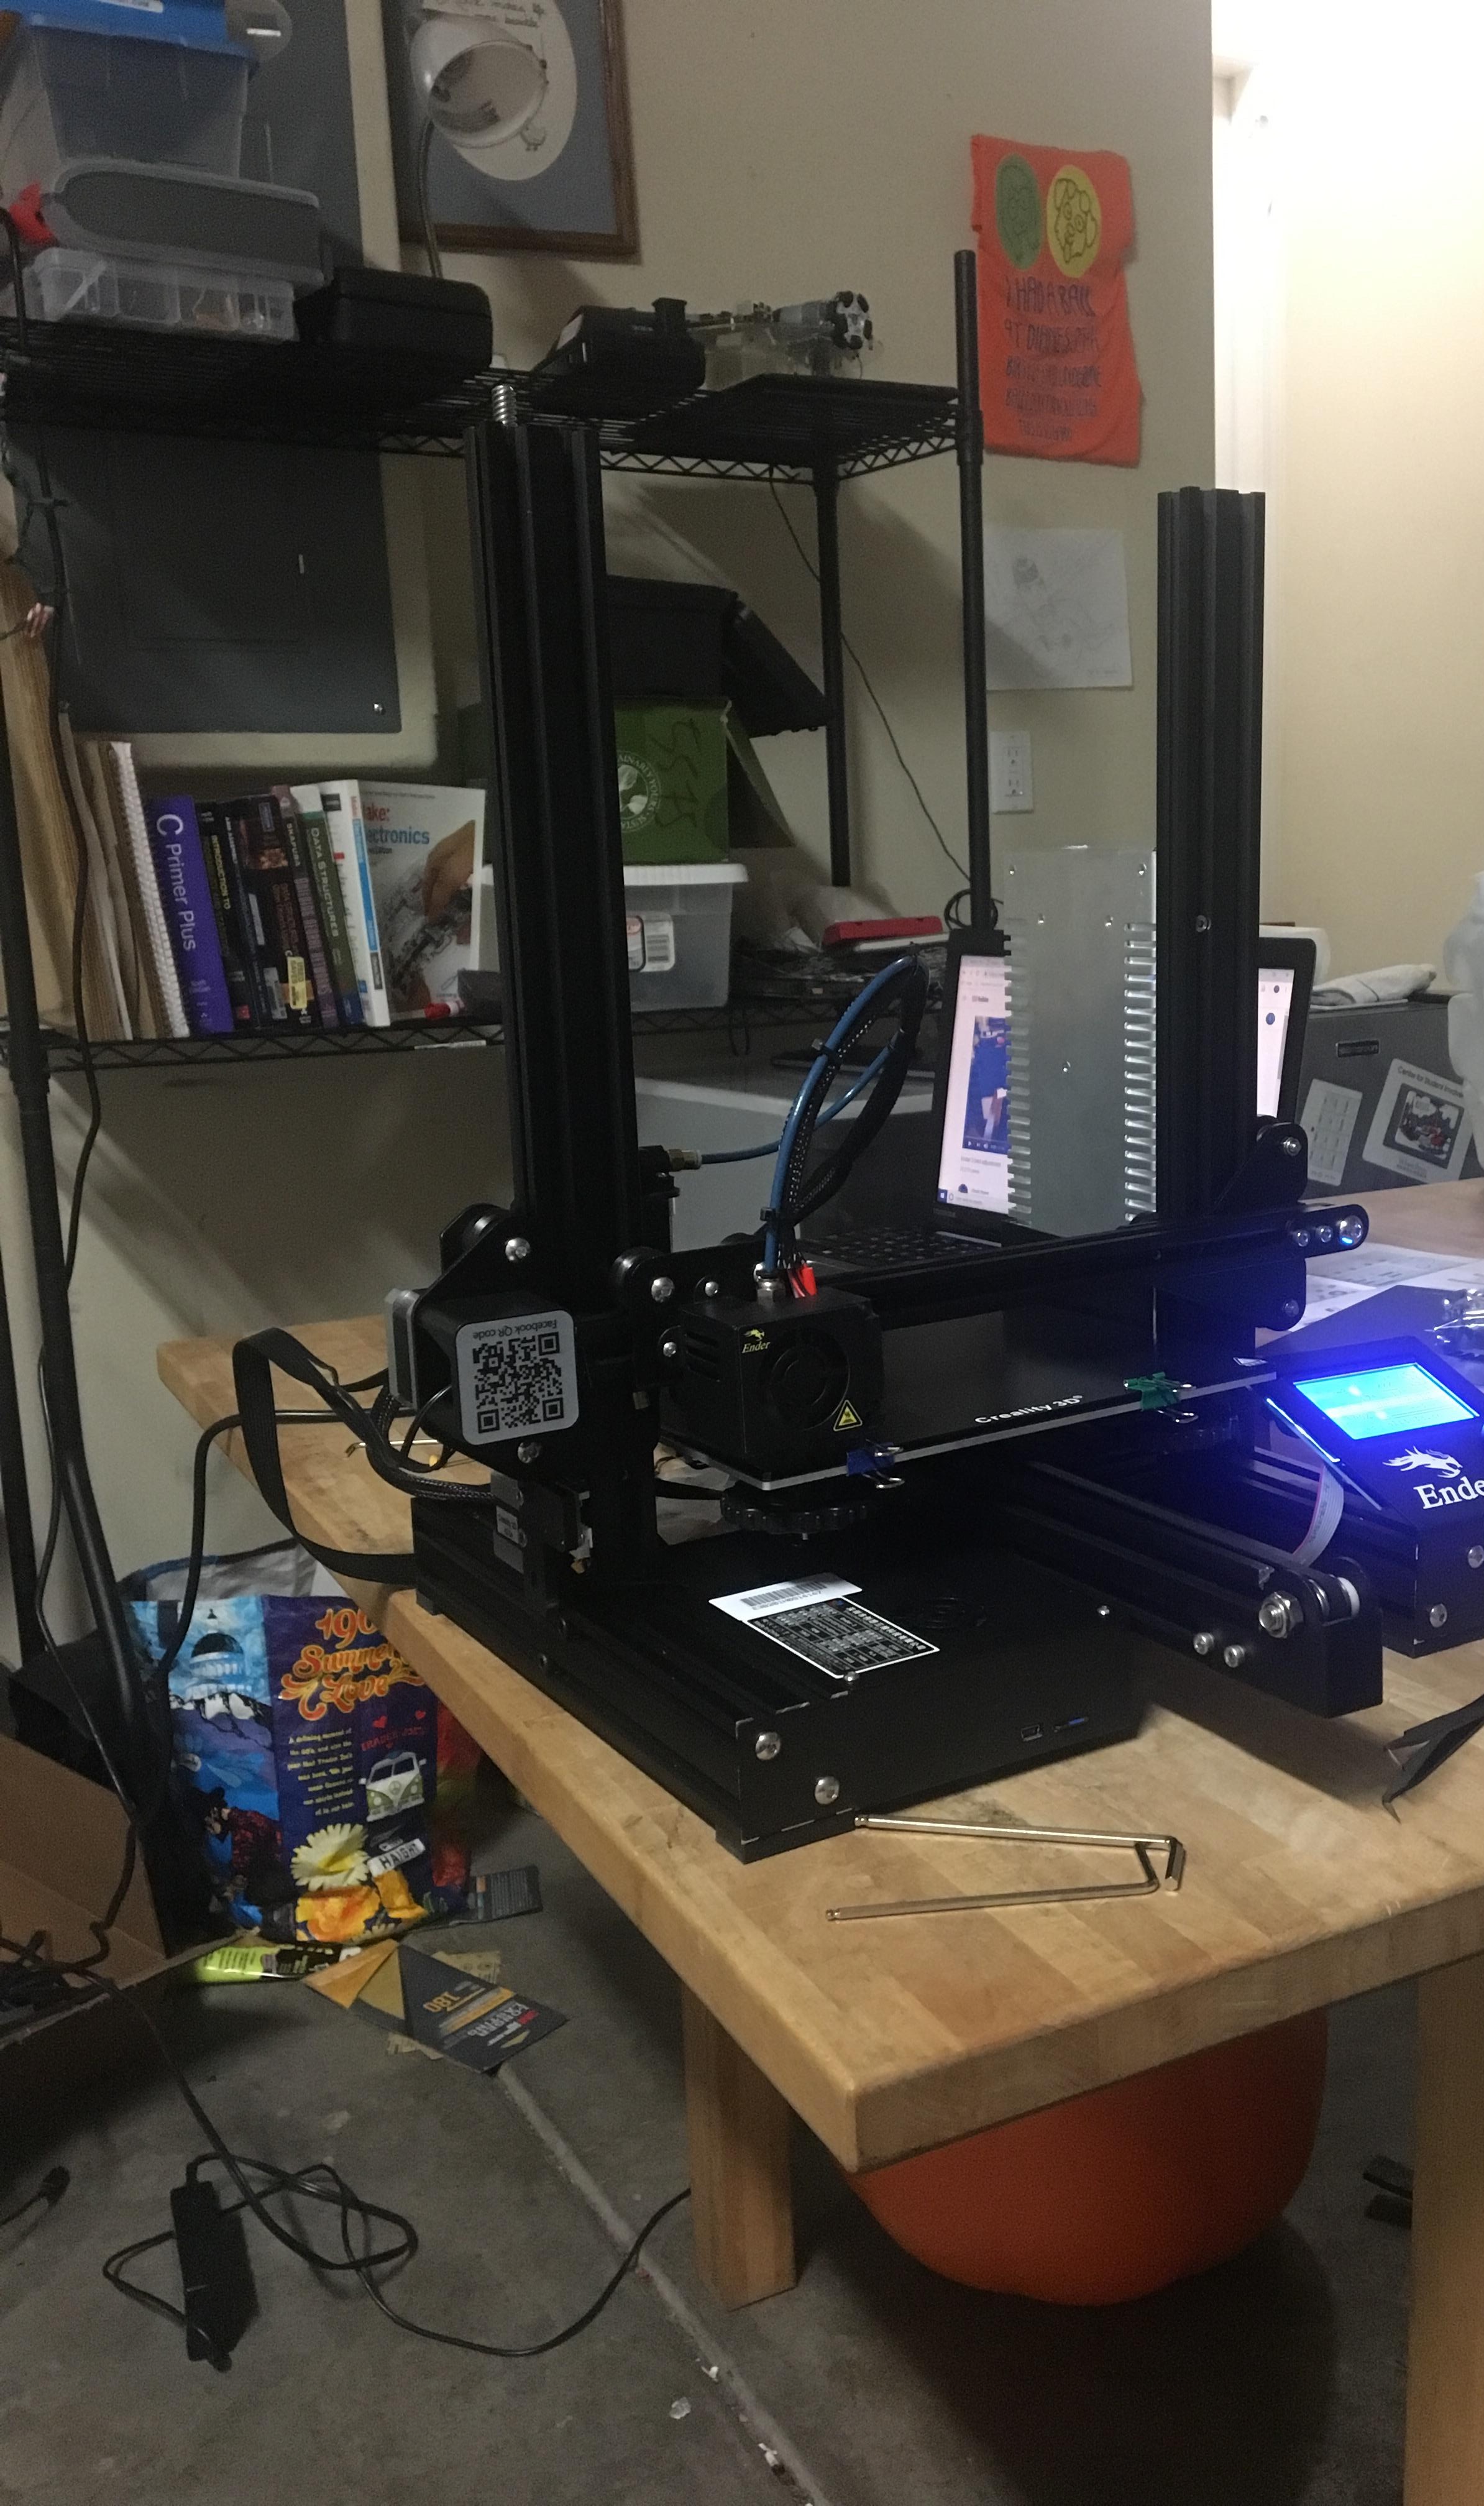
Here is a photo of the broken Ender 3 that I spent many weekends attempting to fix. The issue seemed to be that the print bed and under carriage were warped beyond what the bed leveling springs could account for. I was eventually able to complain to Creality and get something like $60 back, but was still out ~$240. Despite this experience, I purchased a second Ender 3 from Amazon as opposed to Aliexpress, and got it working successfully.
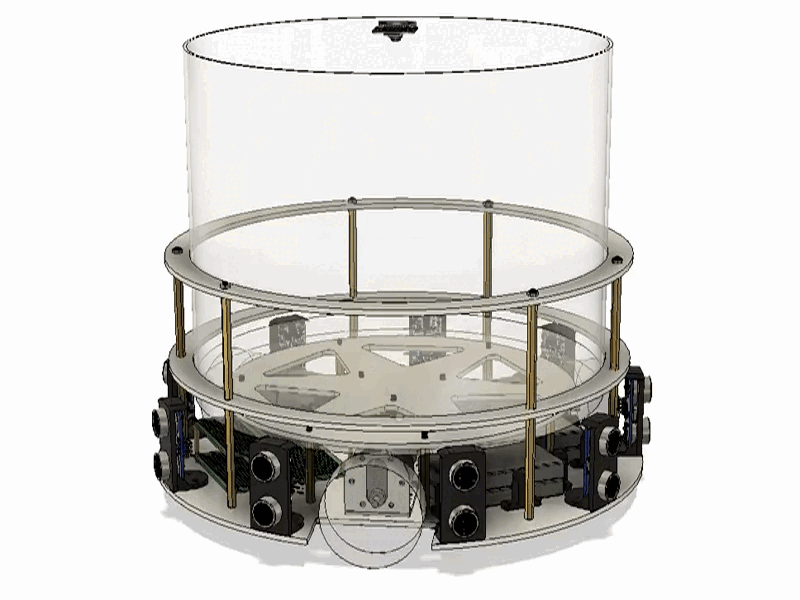
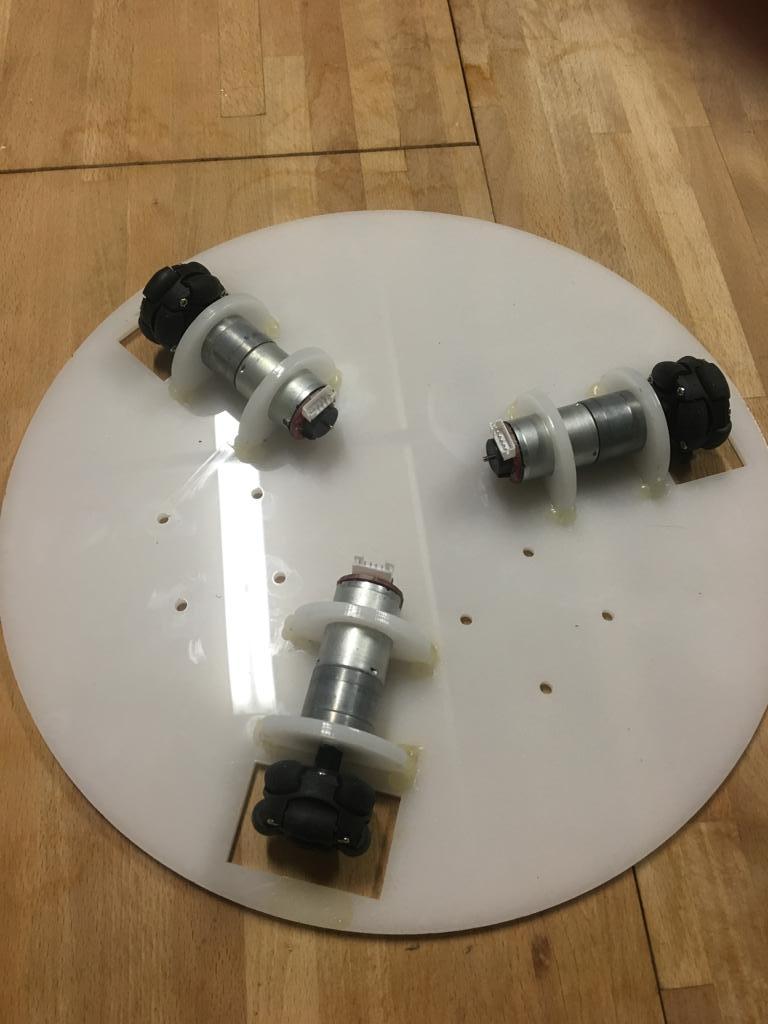
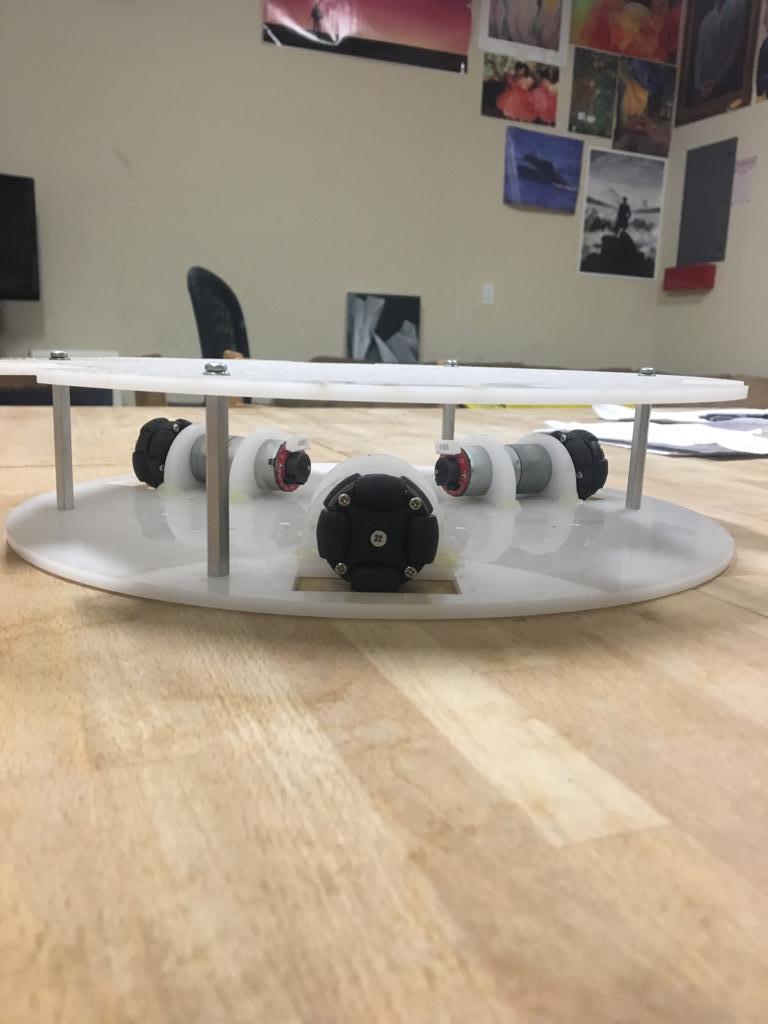
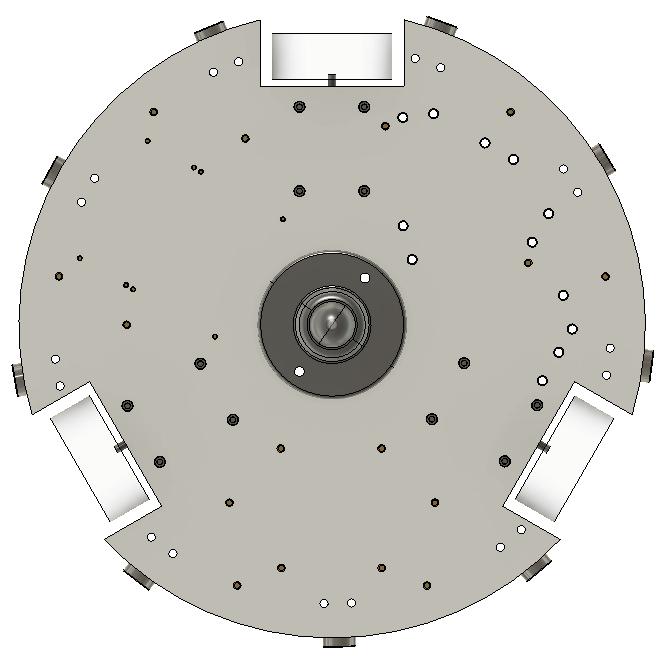
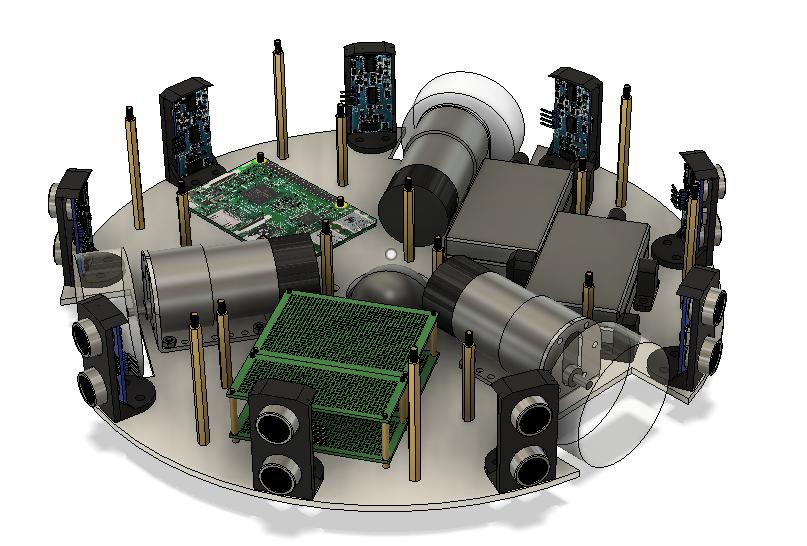
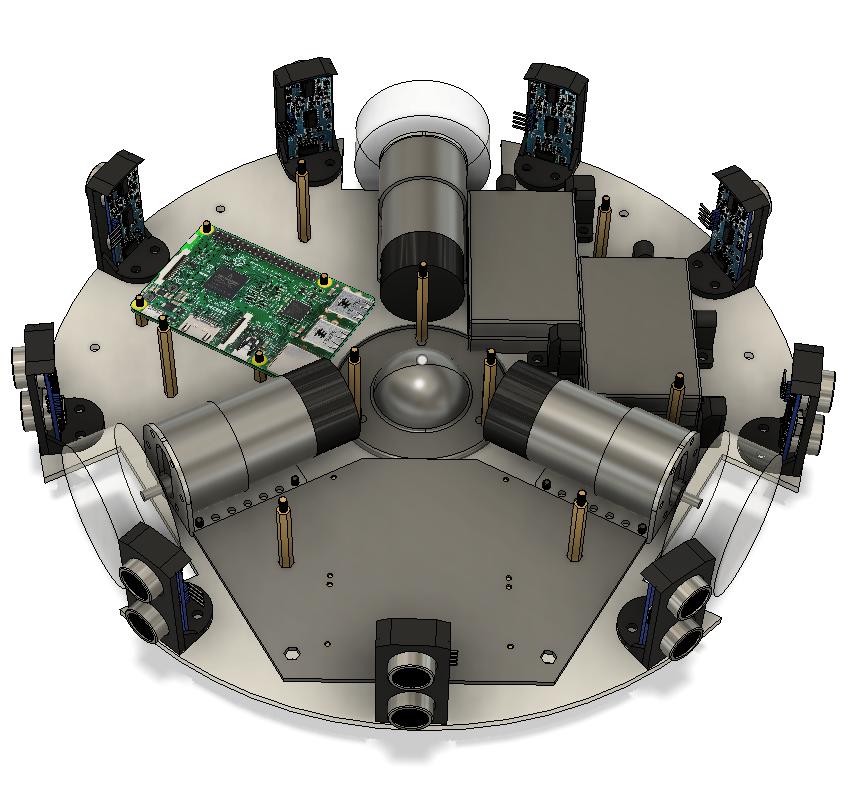
The most I had planned out the robot at this point was the footprint of the components to be laser cut in the acrylic. It was clear I could no longer get away with 2D planning. Over a 3 day weekend I shut myself in my room and wrestled with Fusion 360 to produce the following 3D model.
And after some time, I was able to laser cut the acrylic for the newly designed robot, and assemble the new version.
At this point in my life, I had just graduated with my BS in Computer Science & Engineering. I was going into my 2nd summer internship at Ford Motors, and in the fall would start my 2nd year of my 5 year BS/MS program at SCU. Here I let the project sit for another 3 months before I bothered touching it again.
Grad School and Beyond
Iteration 3, Phase 2 - Wiring the Electronics
Fifth Year (Grad School) and Beyond: June 2019-September 2020
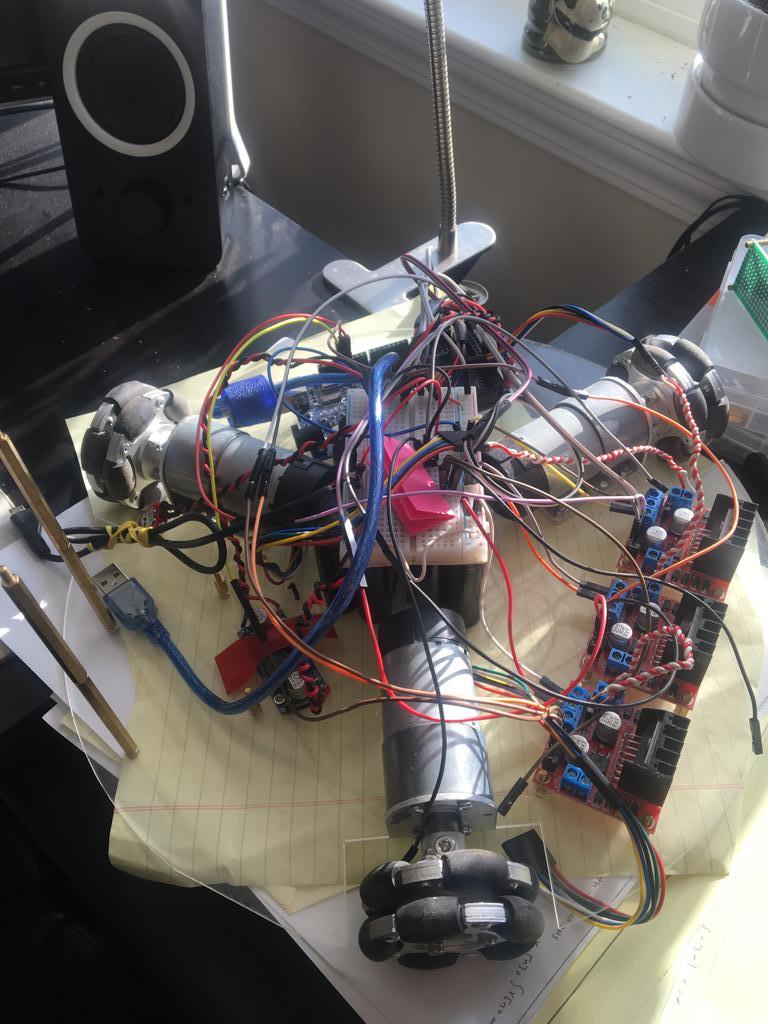
The main motivation behind 3D modeling the robot was so that I would have a solid footprint to laser cut the robot chassis, and not have any issues (although a few times I did have to make some extra holes). Sadly, I slowly realized that because I didn't think much further ahead I was bitten again by not planning ahead.
I neglected to model any of the electronics and their wiring in my 3D model. I figured, "that's a problem for future me", and it sure was!
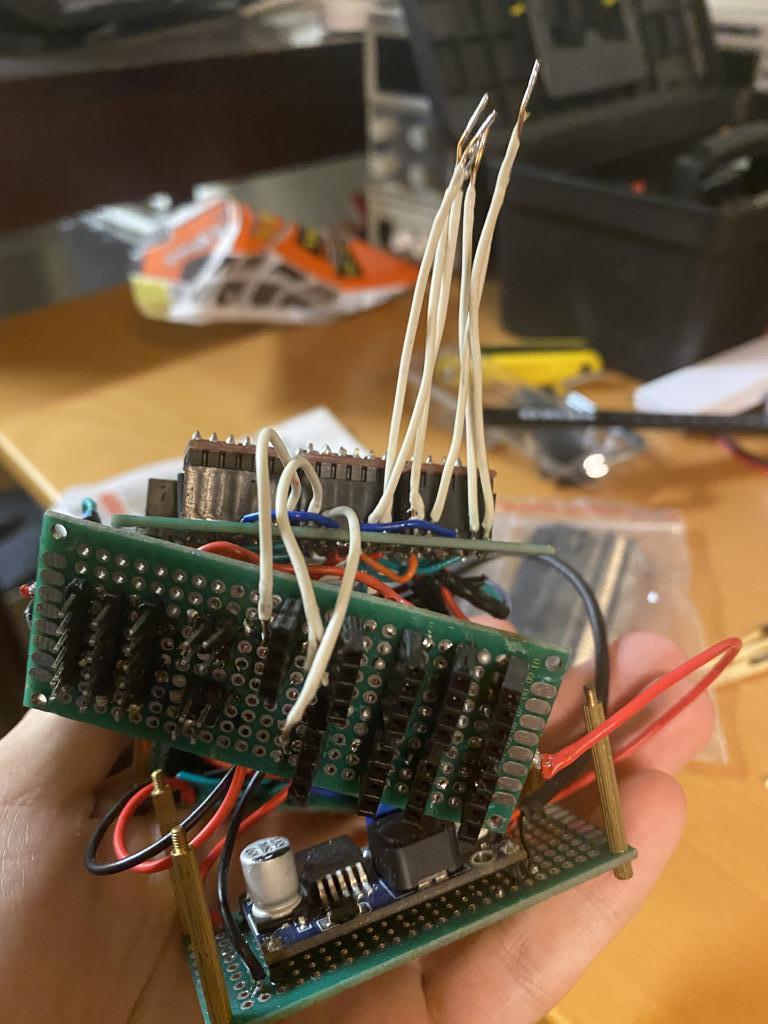
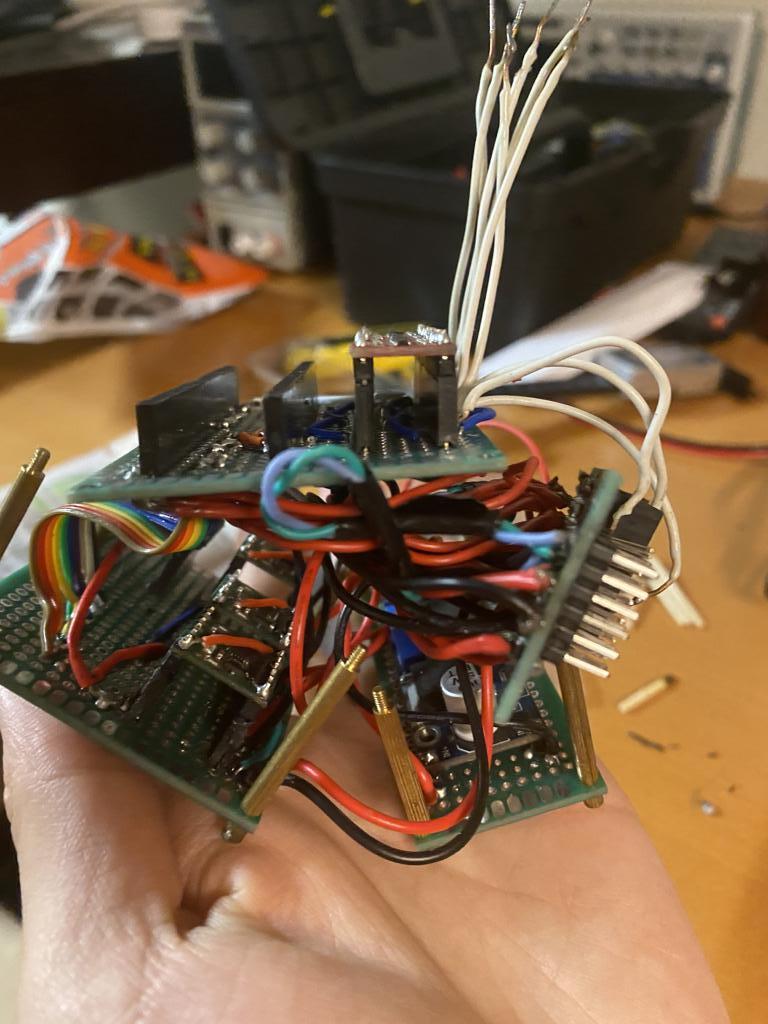
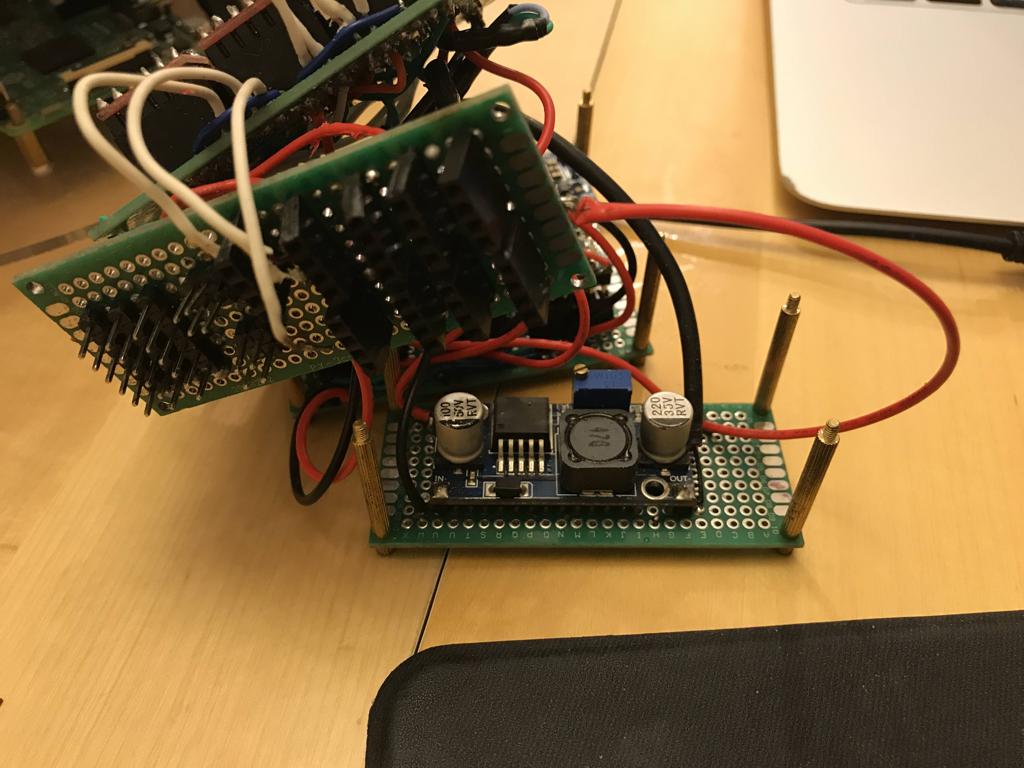
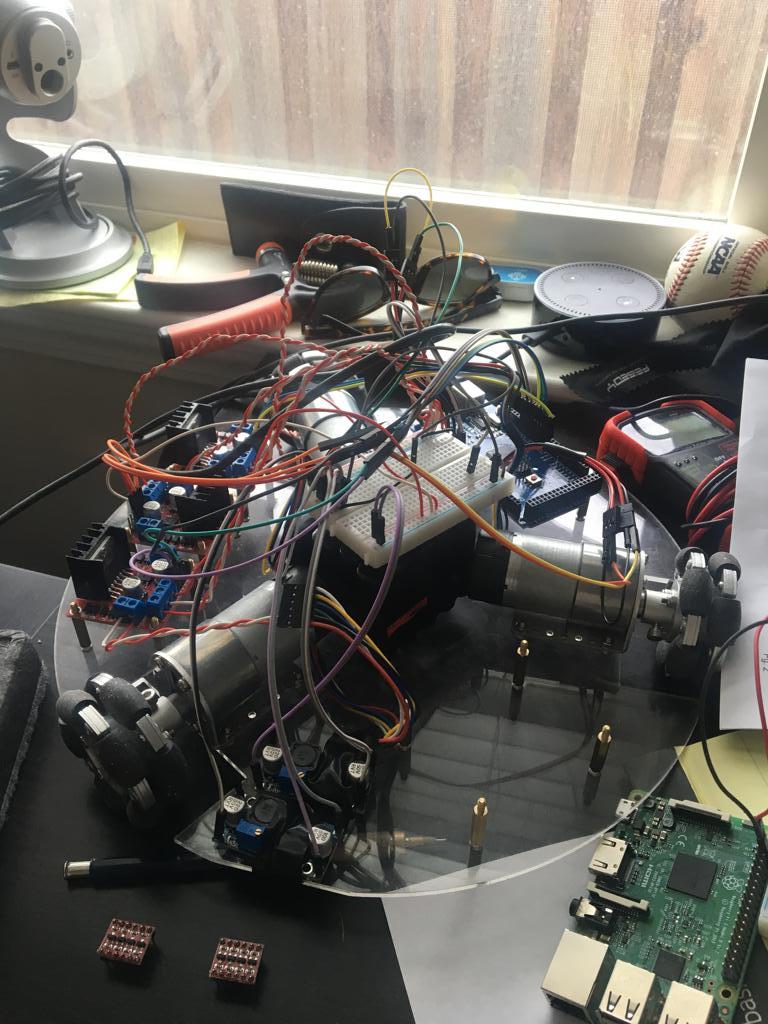
I probably spent a total of 30 hours soldering and desoldering and snipping and folding this garbled mess of copper wire and perf board. I thought maybe I can brute force the solution by carefully fenagling these solid core wires. Eventually, I gave up realizing it was near impossible to solder all of the connections I needed, without burning the insulation off of existing wires with my soldering iron when trying to add new connections.
This point was around September 2019. I was very involved in my master's program and had also temporarily moved in with my girlfriend. As such, I no longer had the time or access to my robot. This was the longest break I had taken from this project, roughly spanning a period of 11 months until July 2020. Toward the latter half of this period, I recall feeling sad that I couldn't work on this project when the energy sprung up.
Once I graduated with my MS, I moved into a place on the Santa Clara/Sunnyvale border and was able to recollect my robot, and resume the project. After being deprived of creative expression via robotics for 11 months, I was enthusiastic to resume the project.
I started by tackling the wiring issue again. The issue was twofold:
- There was simply not enough real estate on the perf boards to lay out all of the electronics that I needed for the robot.
- Hand soldering the wires was simply not dense enough for all of the connections needed.
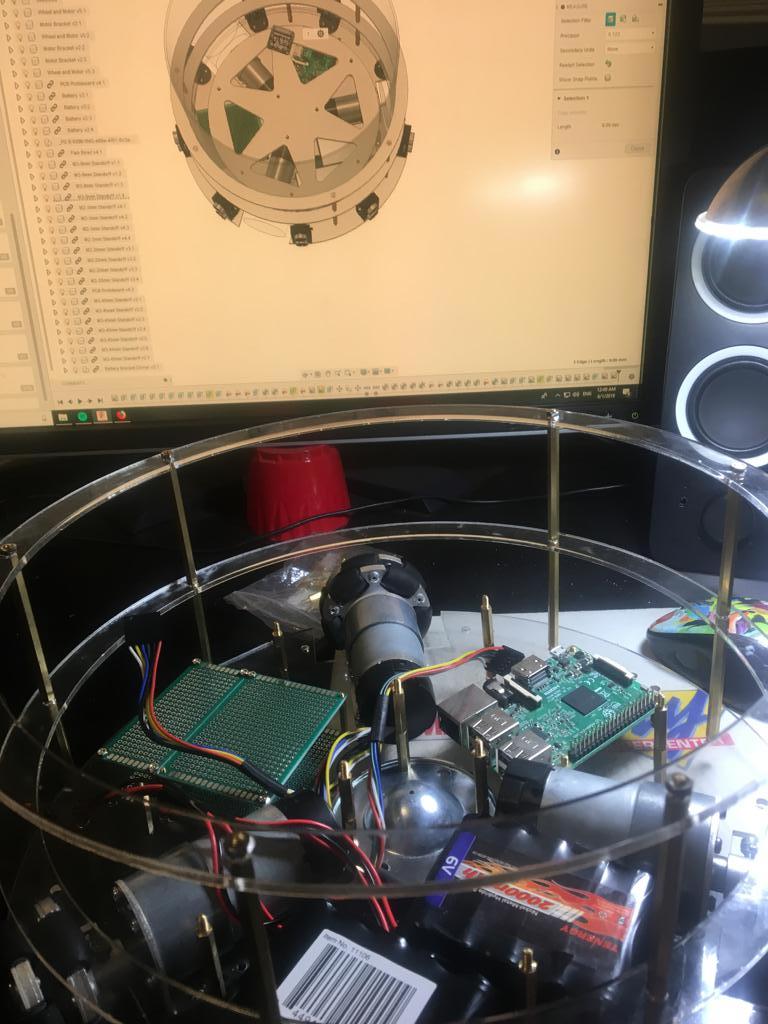
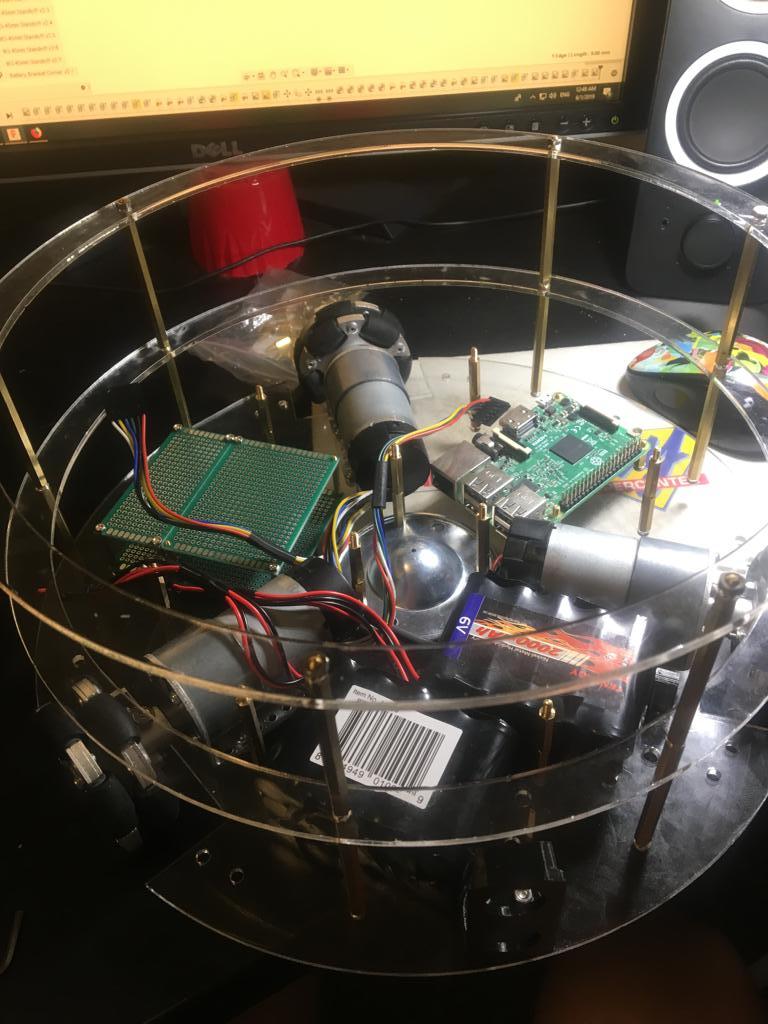
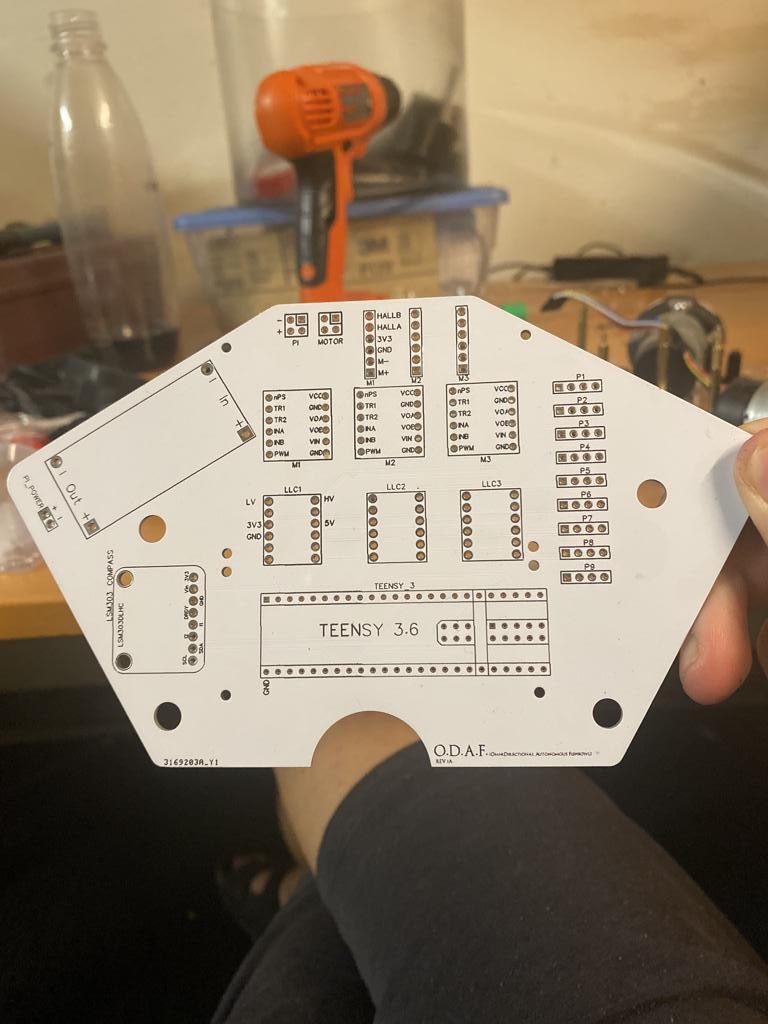
The solution: Build a PCB (printed circuit board) to connect the components, and create a new 3D model to determine the footprint of a PCB.
So here was the new footprint. It would be a rather strange shape, but it would take advantage of as much real estate that was available on this third of the robot chassis.
I reached for yet another Maker tool, which was EasyEDA, to lay out and route my PCB. It was in fact very straight forward to use, and integrated easily with JLCPCB, which is a PCB manufacturer in China that produces PCBs for ridiculously cheap prices. The wiring schematics for the PCB can be seen below:


Unfortunately, I lost the PCB routing (which led to some interesting reverse engineering later on). However, here was how the PCB turned out!
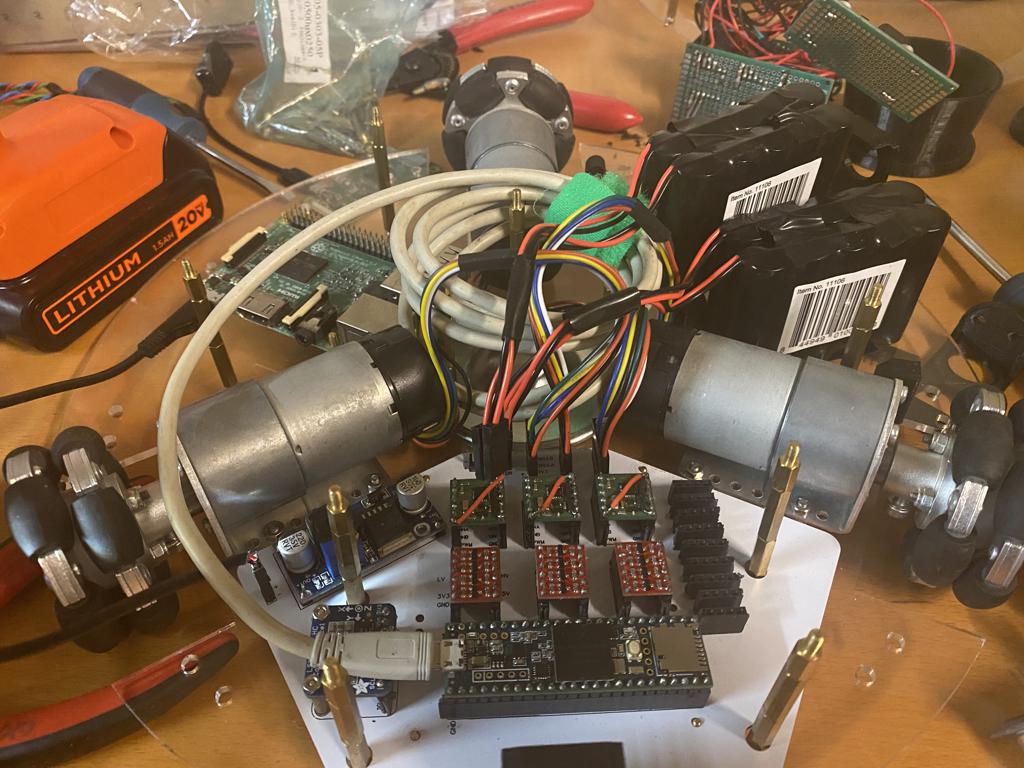
And after adding all of the components:

Iteration 3, Phase 3 - Xbox Controller!
October 2020
Buy and large the wiring problem could be considered solved at this point. The PCB works wonders and has actually made the robot viable again, which is great!
Back in iteration 2 I was able to drive the robot around by SSH'ing into the Raspberry Pi on board and using a little curses program to send commands to the microcontroller to move the robot around. That was two years ago, and I am now finally back at the point where I can drive the robot around. However, this time I have RPM control via PID implemented, so the robot's motion is much more accurate. That said, it does still drift to some degree.
Here was the first test run, with motor power set to about 25% of full power.
Here, I decided to get a little crazy and taped a knife to the robot and had it attack a Trader Joe's Tangerine Juice bottle at ~80% full power. One of the motors isn't working though because the electrical connection kept coming loose. An ultrasonic sensor did break off!
Iteration 3, Phase 4 - Crime and Punishment
August 2021 - California Street Glitter
I had built a pretty cool UI for visualizing the distances that the ultrasonic sensors were reading using konva.js and react. Unfortunately though, I never pushed this code to Github and I lost the code forever when my girlfriend's car was broken into and my backpack was stolen. In the heat of the moment I saw the crime taking place and chased after the criminal, but they got away in their car. In hindsight, that was obviously a bad idea as I could have easily been shot in the face. So next time something like that happens I am really going to have to keep a lid on my primal instincts of wanting to fight.
Luckily my renter's insurance covered $1500 of the ~$2500 that I lost in that incident, so that helped make it a little less painful. Still, being a victim of a crime like that is never fun and always feels violating and infuriating. But, overall I am happy to just be able to continue about my life as if nothing happened aside from the inconvenience of having to buy a bunch of new stuff to replace my old things.
February 2022 - A Day on the Town
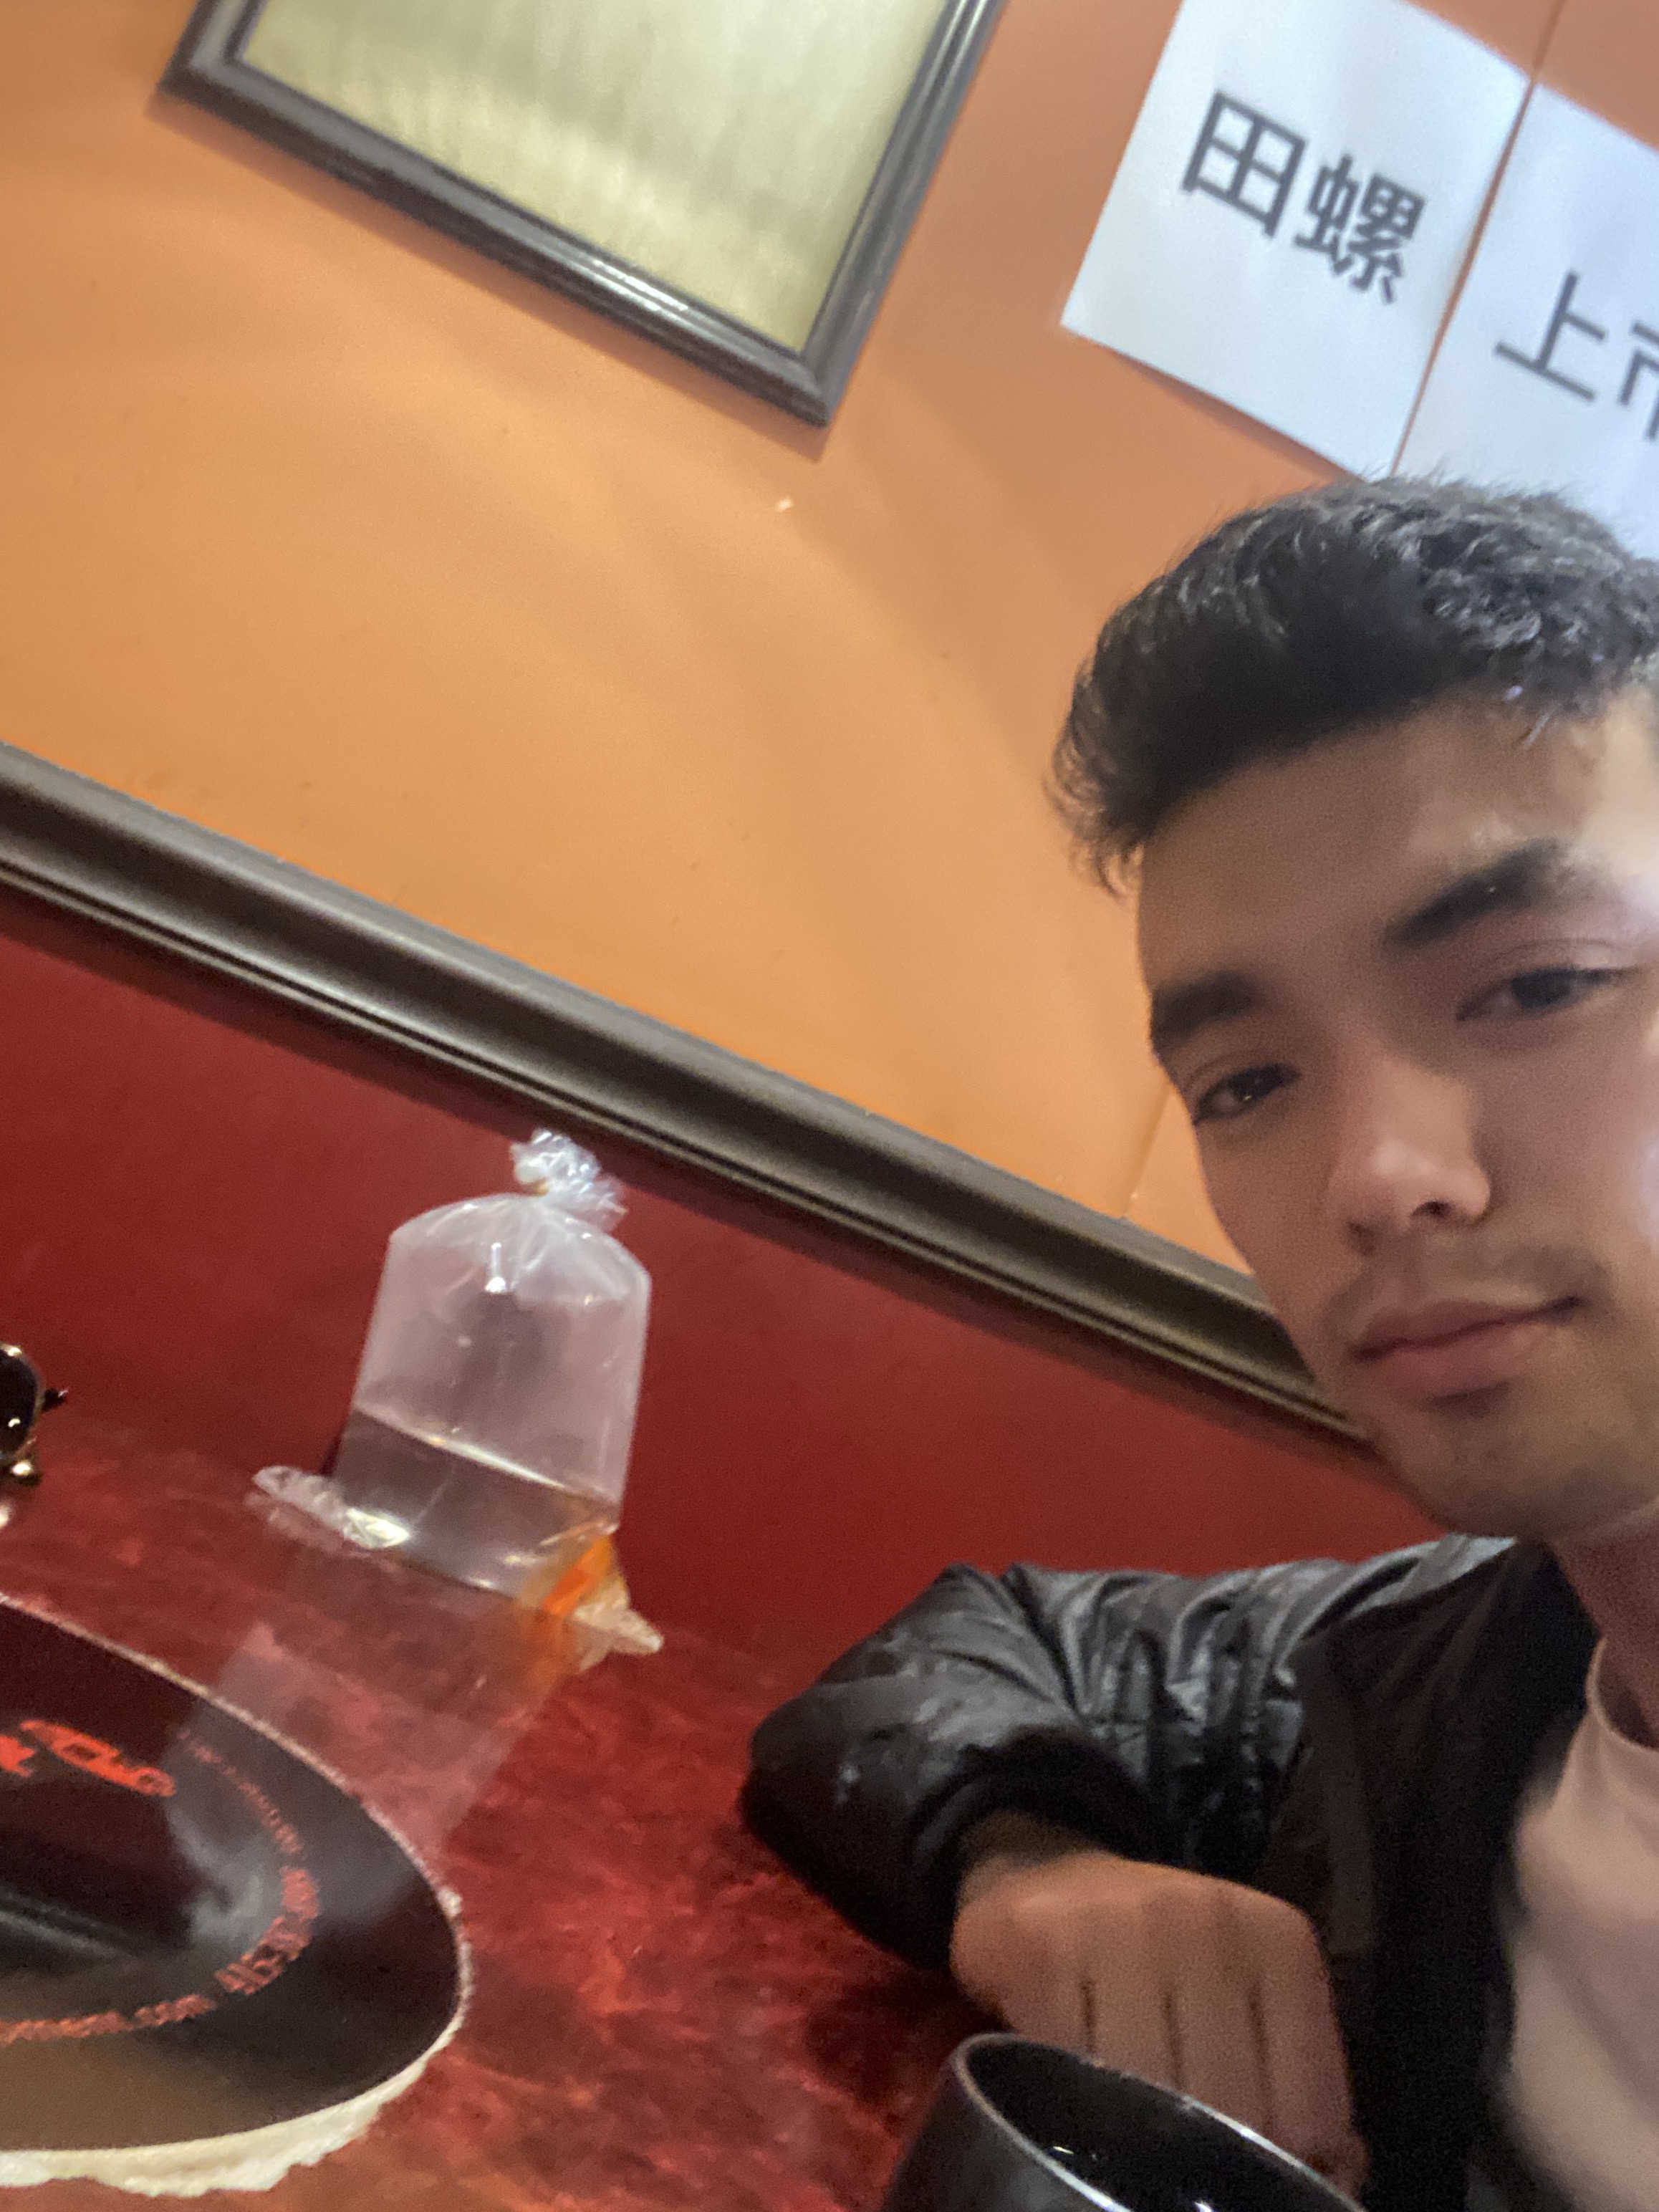
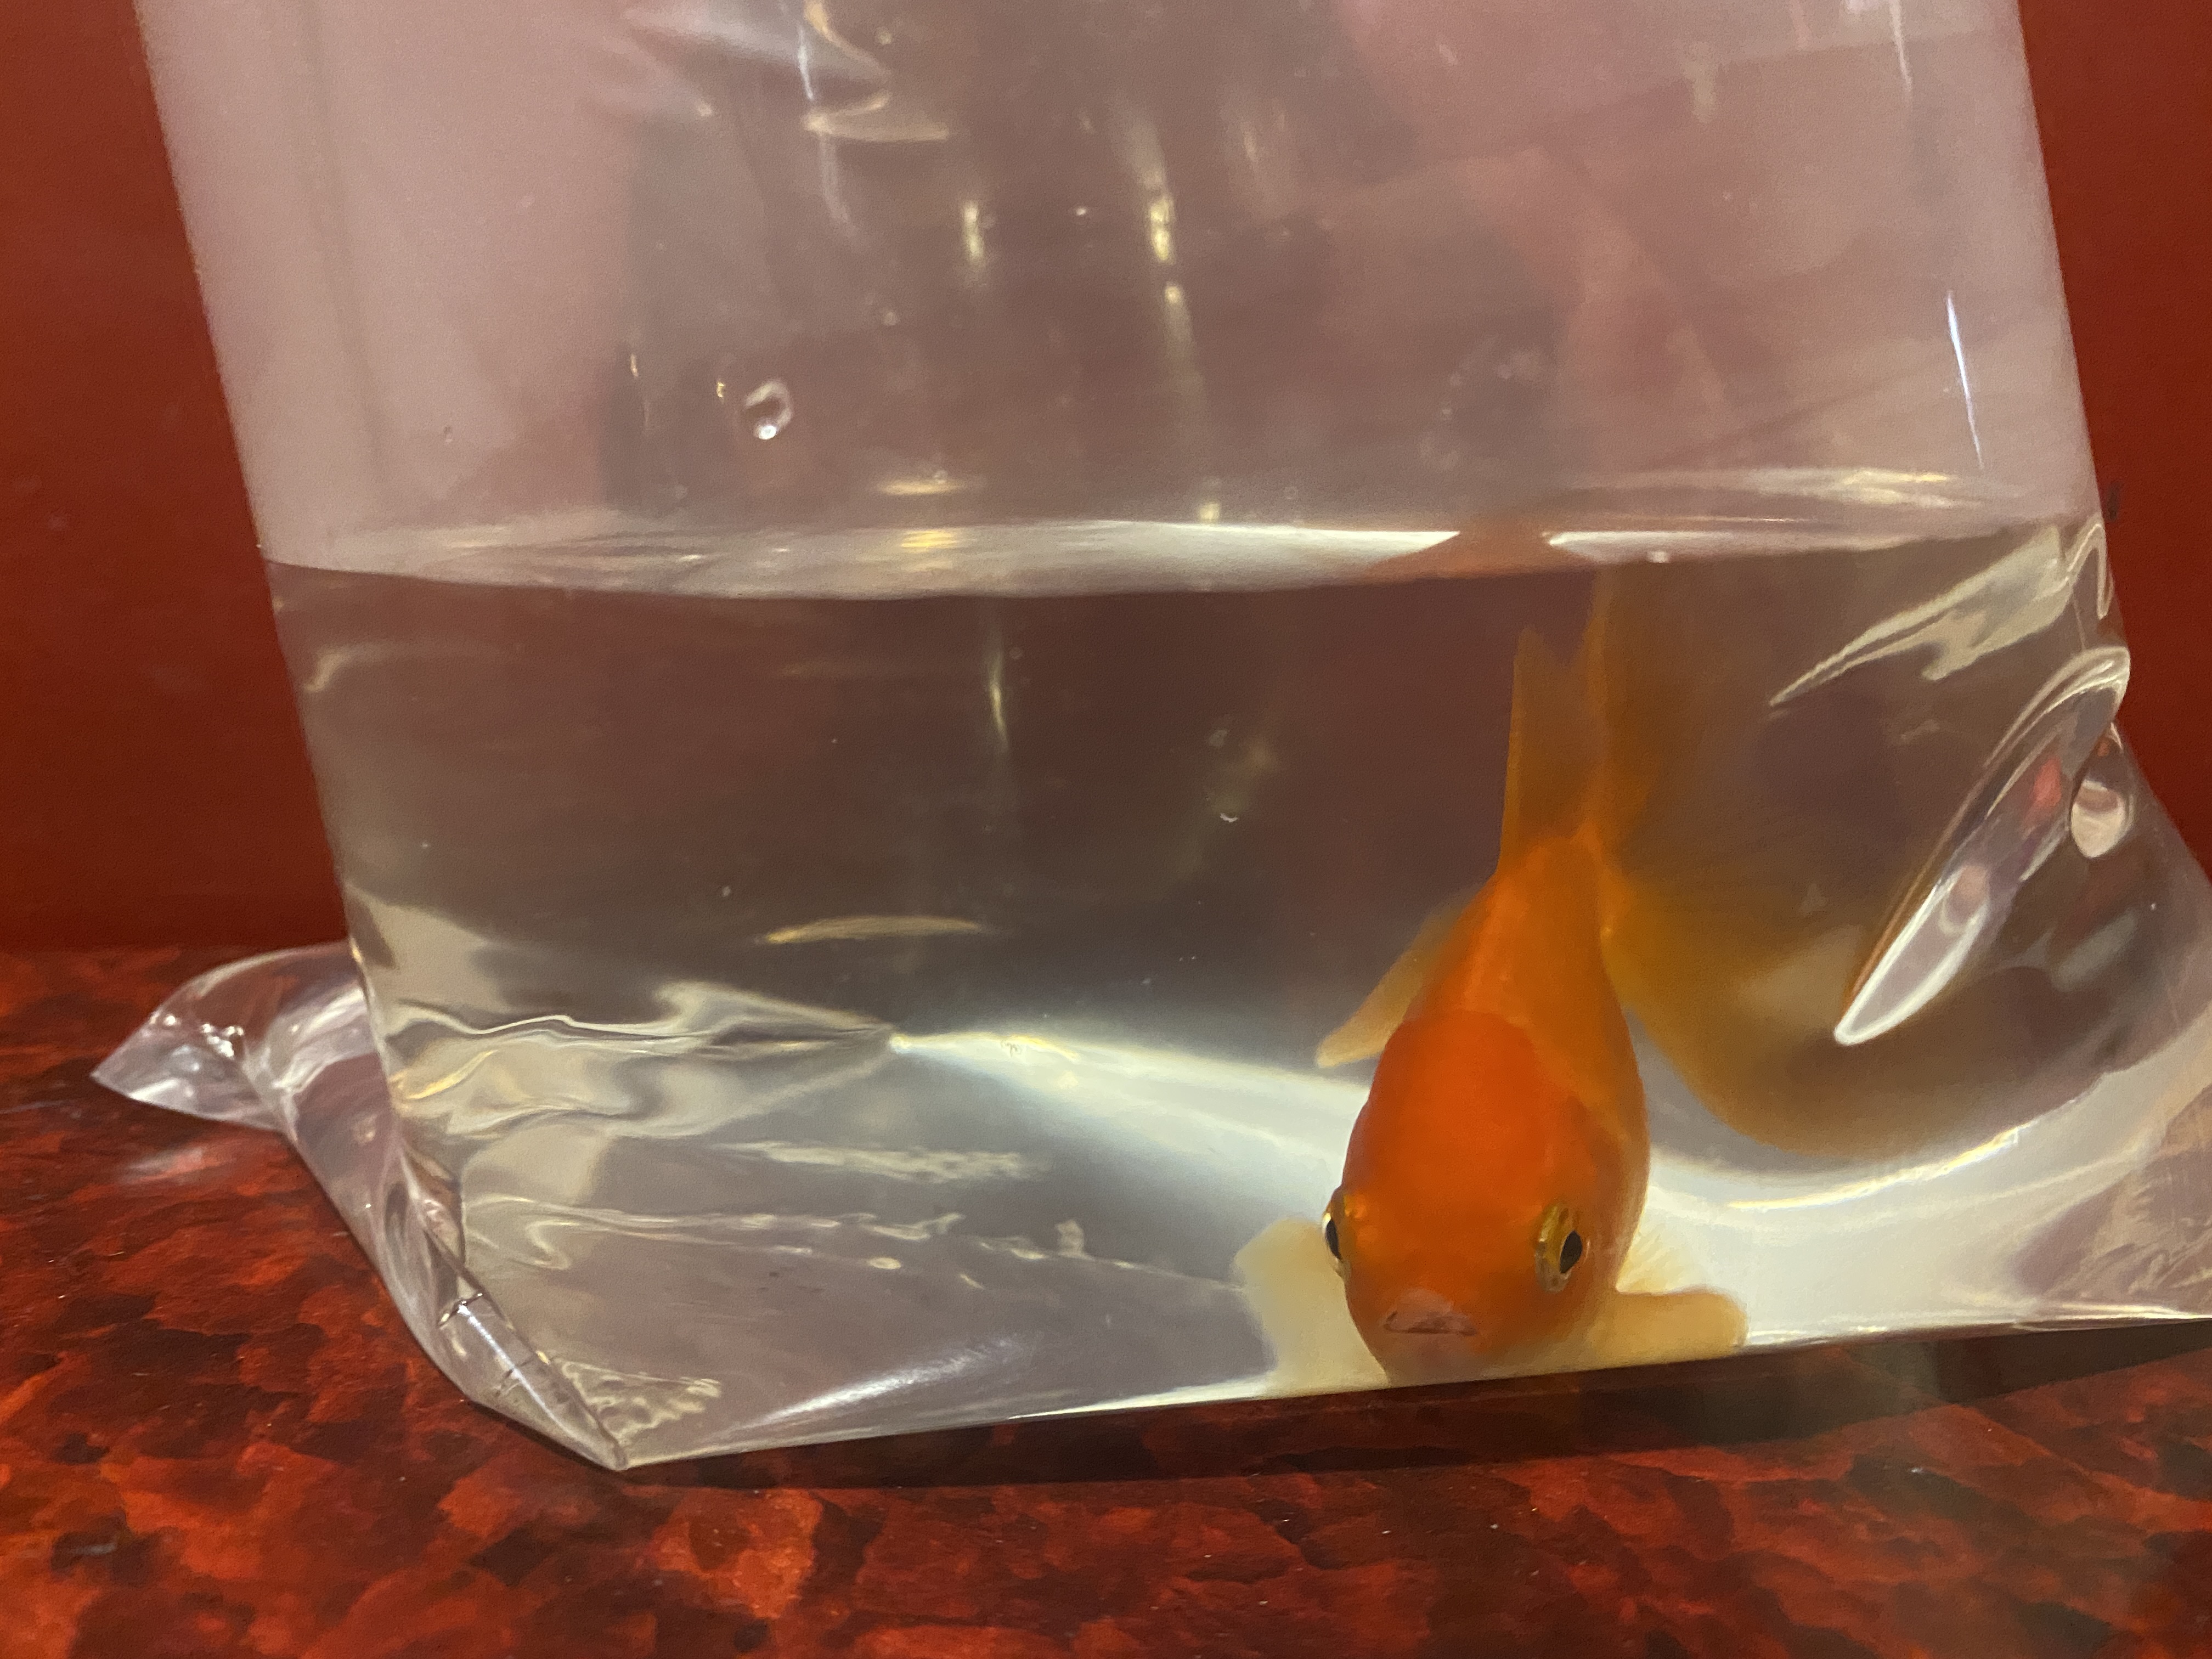
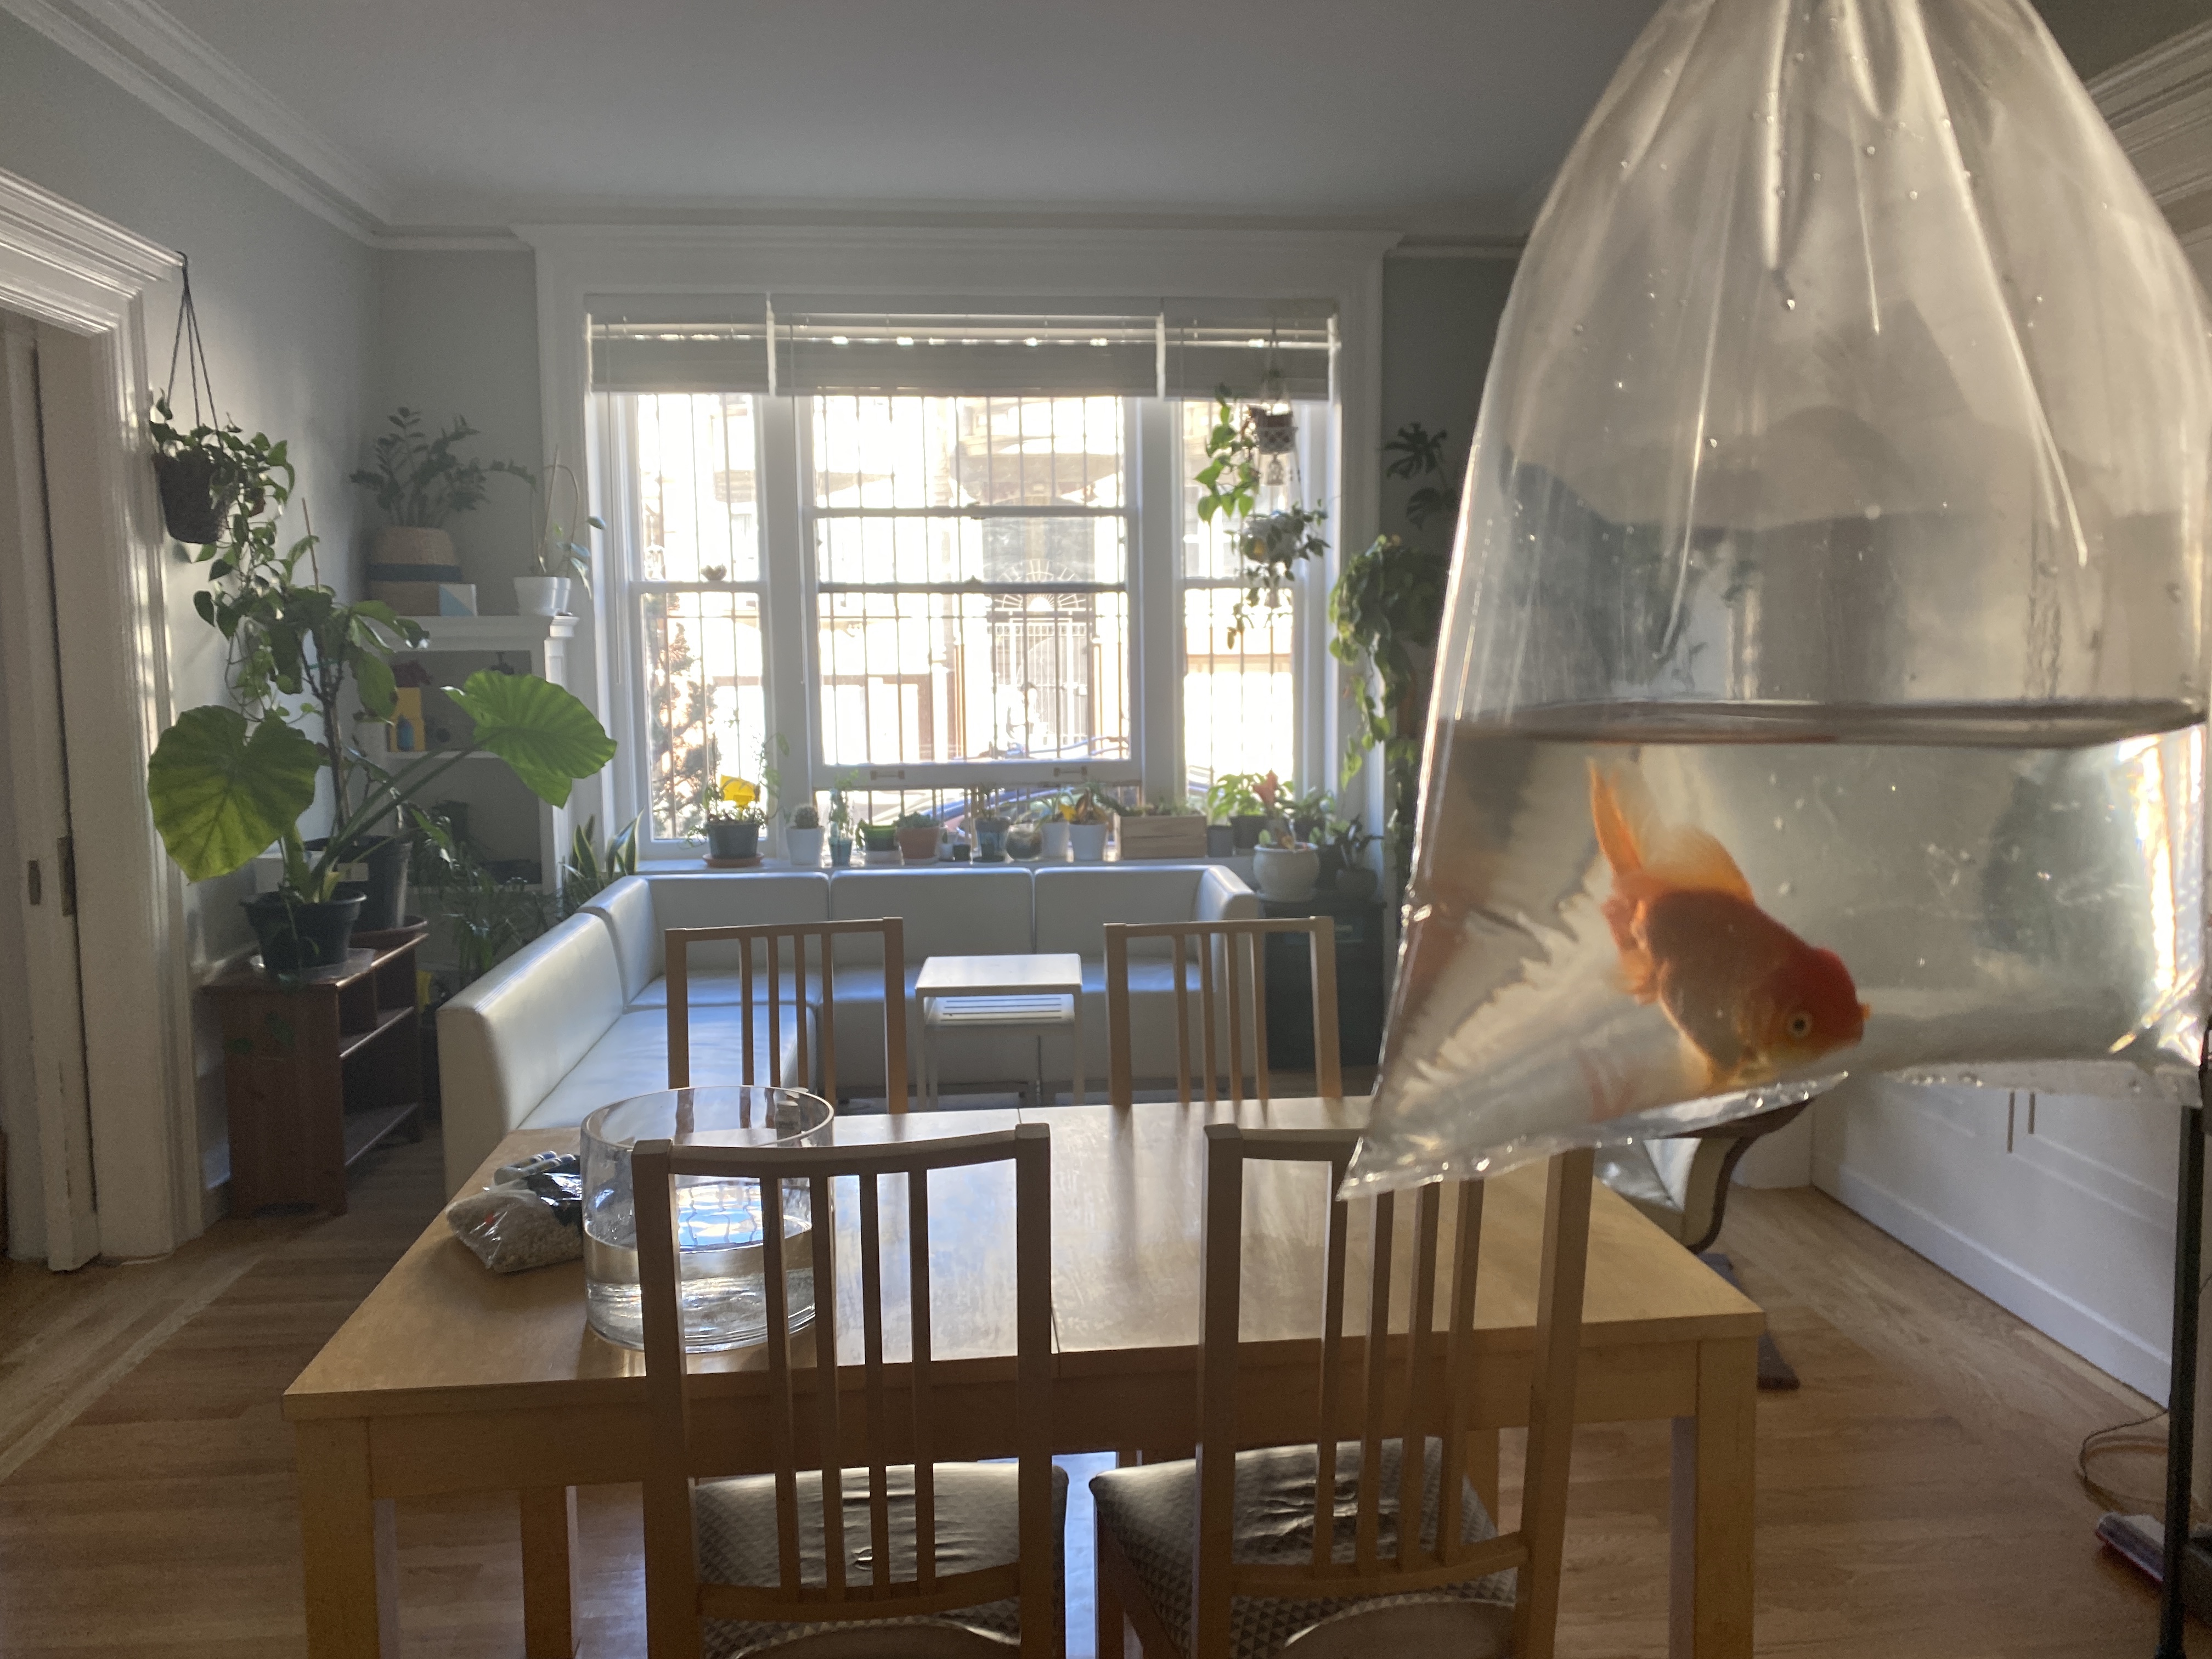
Finally the time had come to actually get a goldfish! I bought Jeff at a pet store in Chinatown in San Francisco. While we were out, I got pretty hungry so I stopped by Hunan House on Washington St. I ordered Szechuan Cold Ramen and Jalapeno with Preserved Eggs.

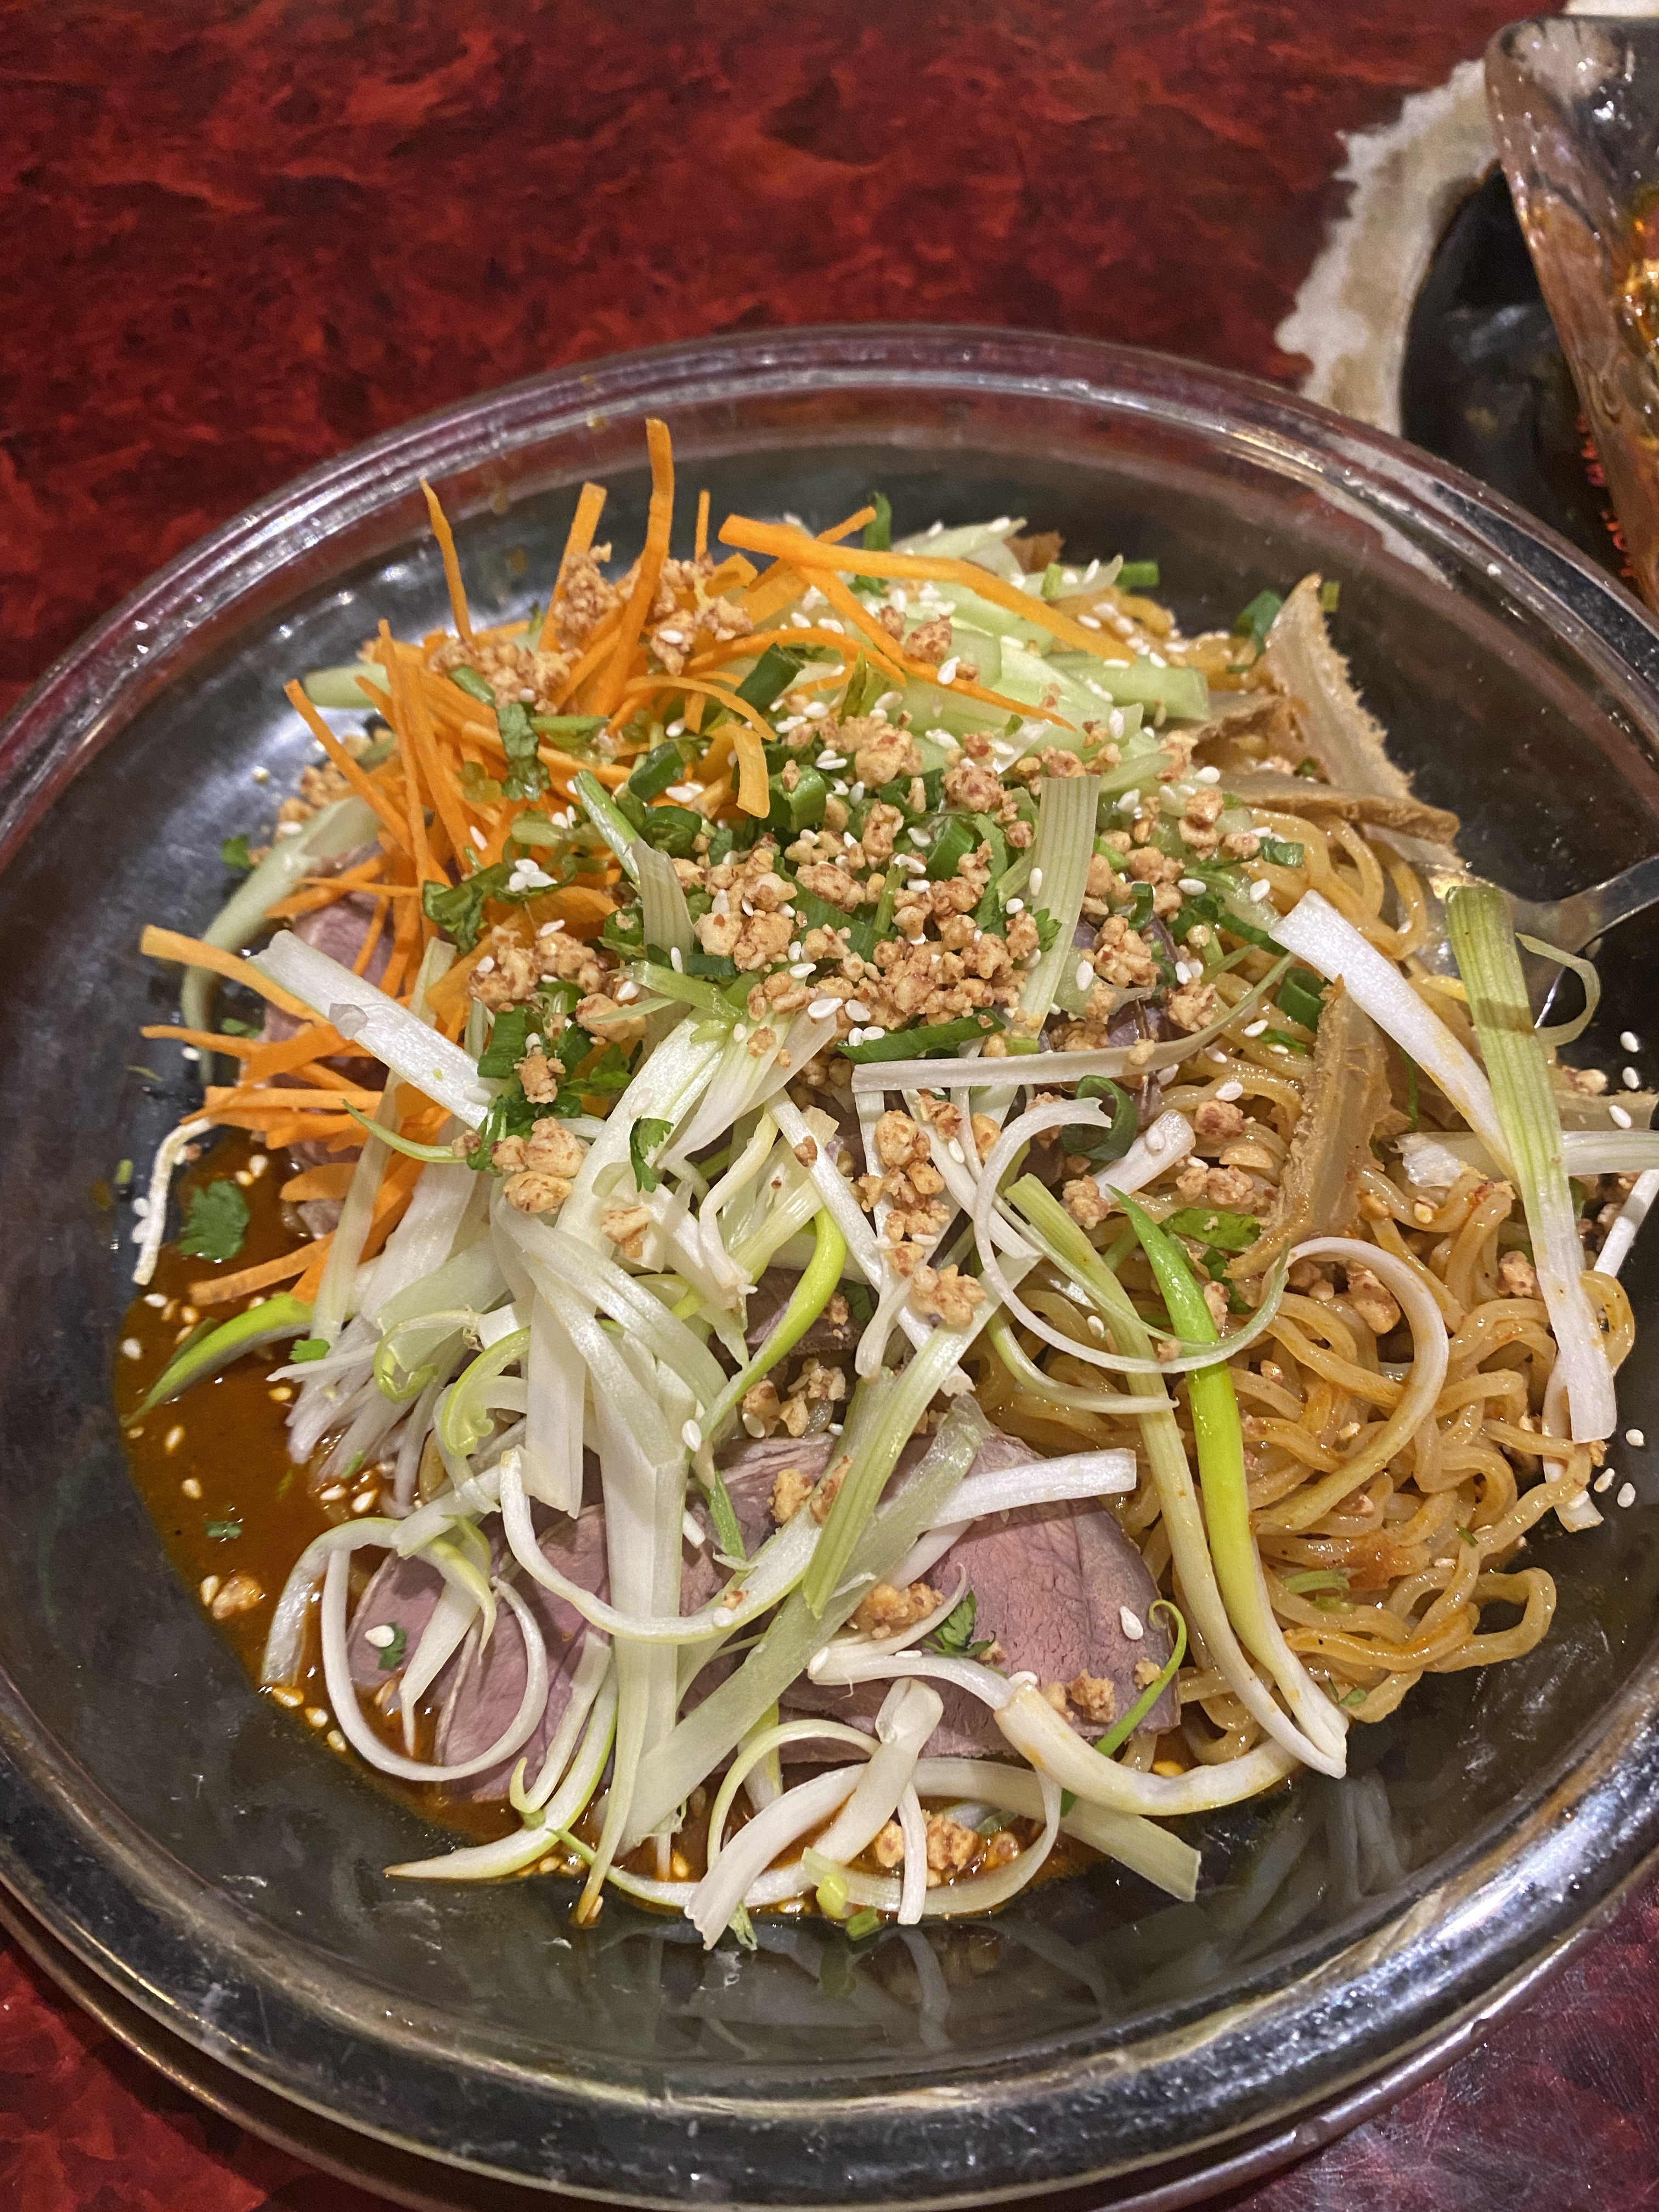
I've never had preserved eggs but I was feeling adventurous. It was definitely off putting because the eggs white were black, but when I ate it it just tasted like a normal egg. The only difference was that the egg was more firm. If you get a chance to go here, I would highly recommend it! I love Chinatown because the food is amazing and then when the bill comes you're pleasantly surprised by how cheap it is!
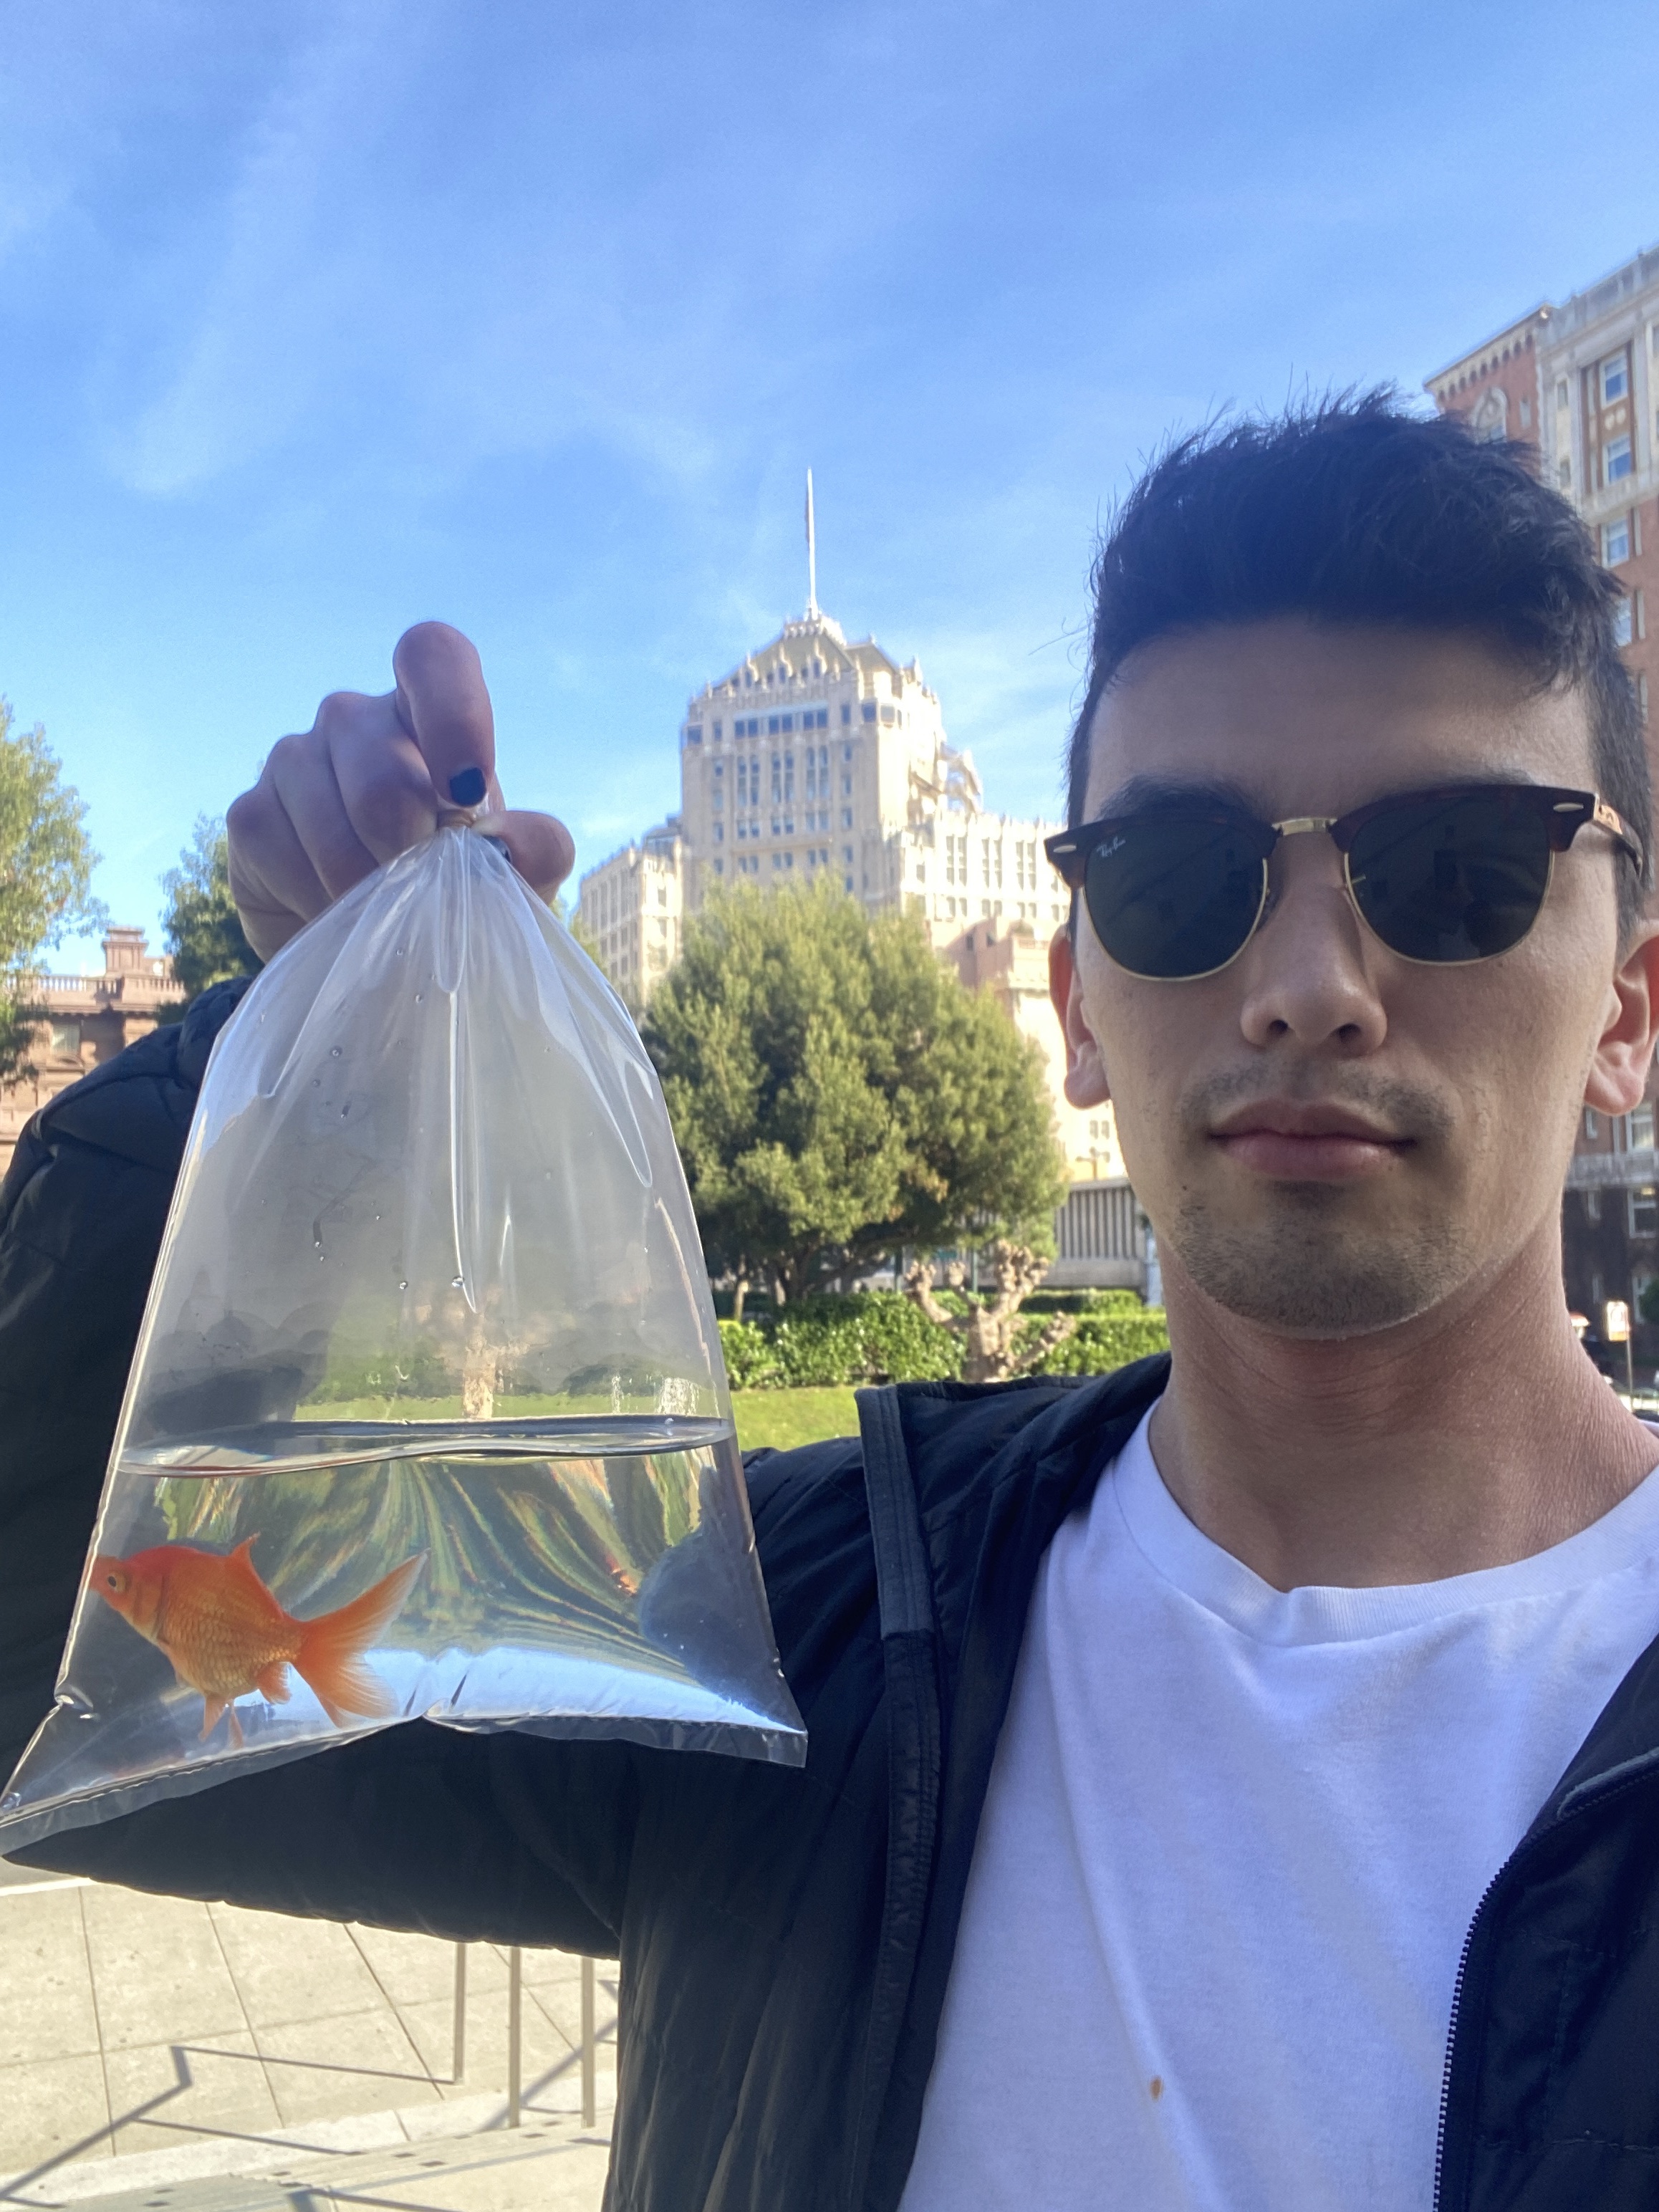
After lunch, I was feeling pretty good and figured Jeff might need some pictures for his Hinge profile. So we went on a bit of a photo shoot around the city.
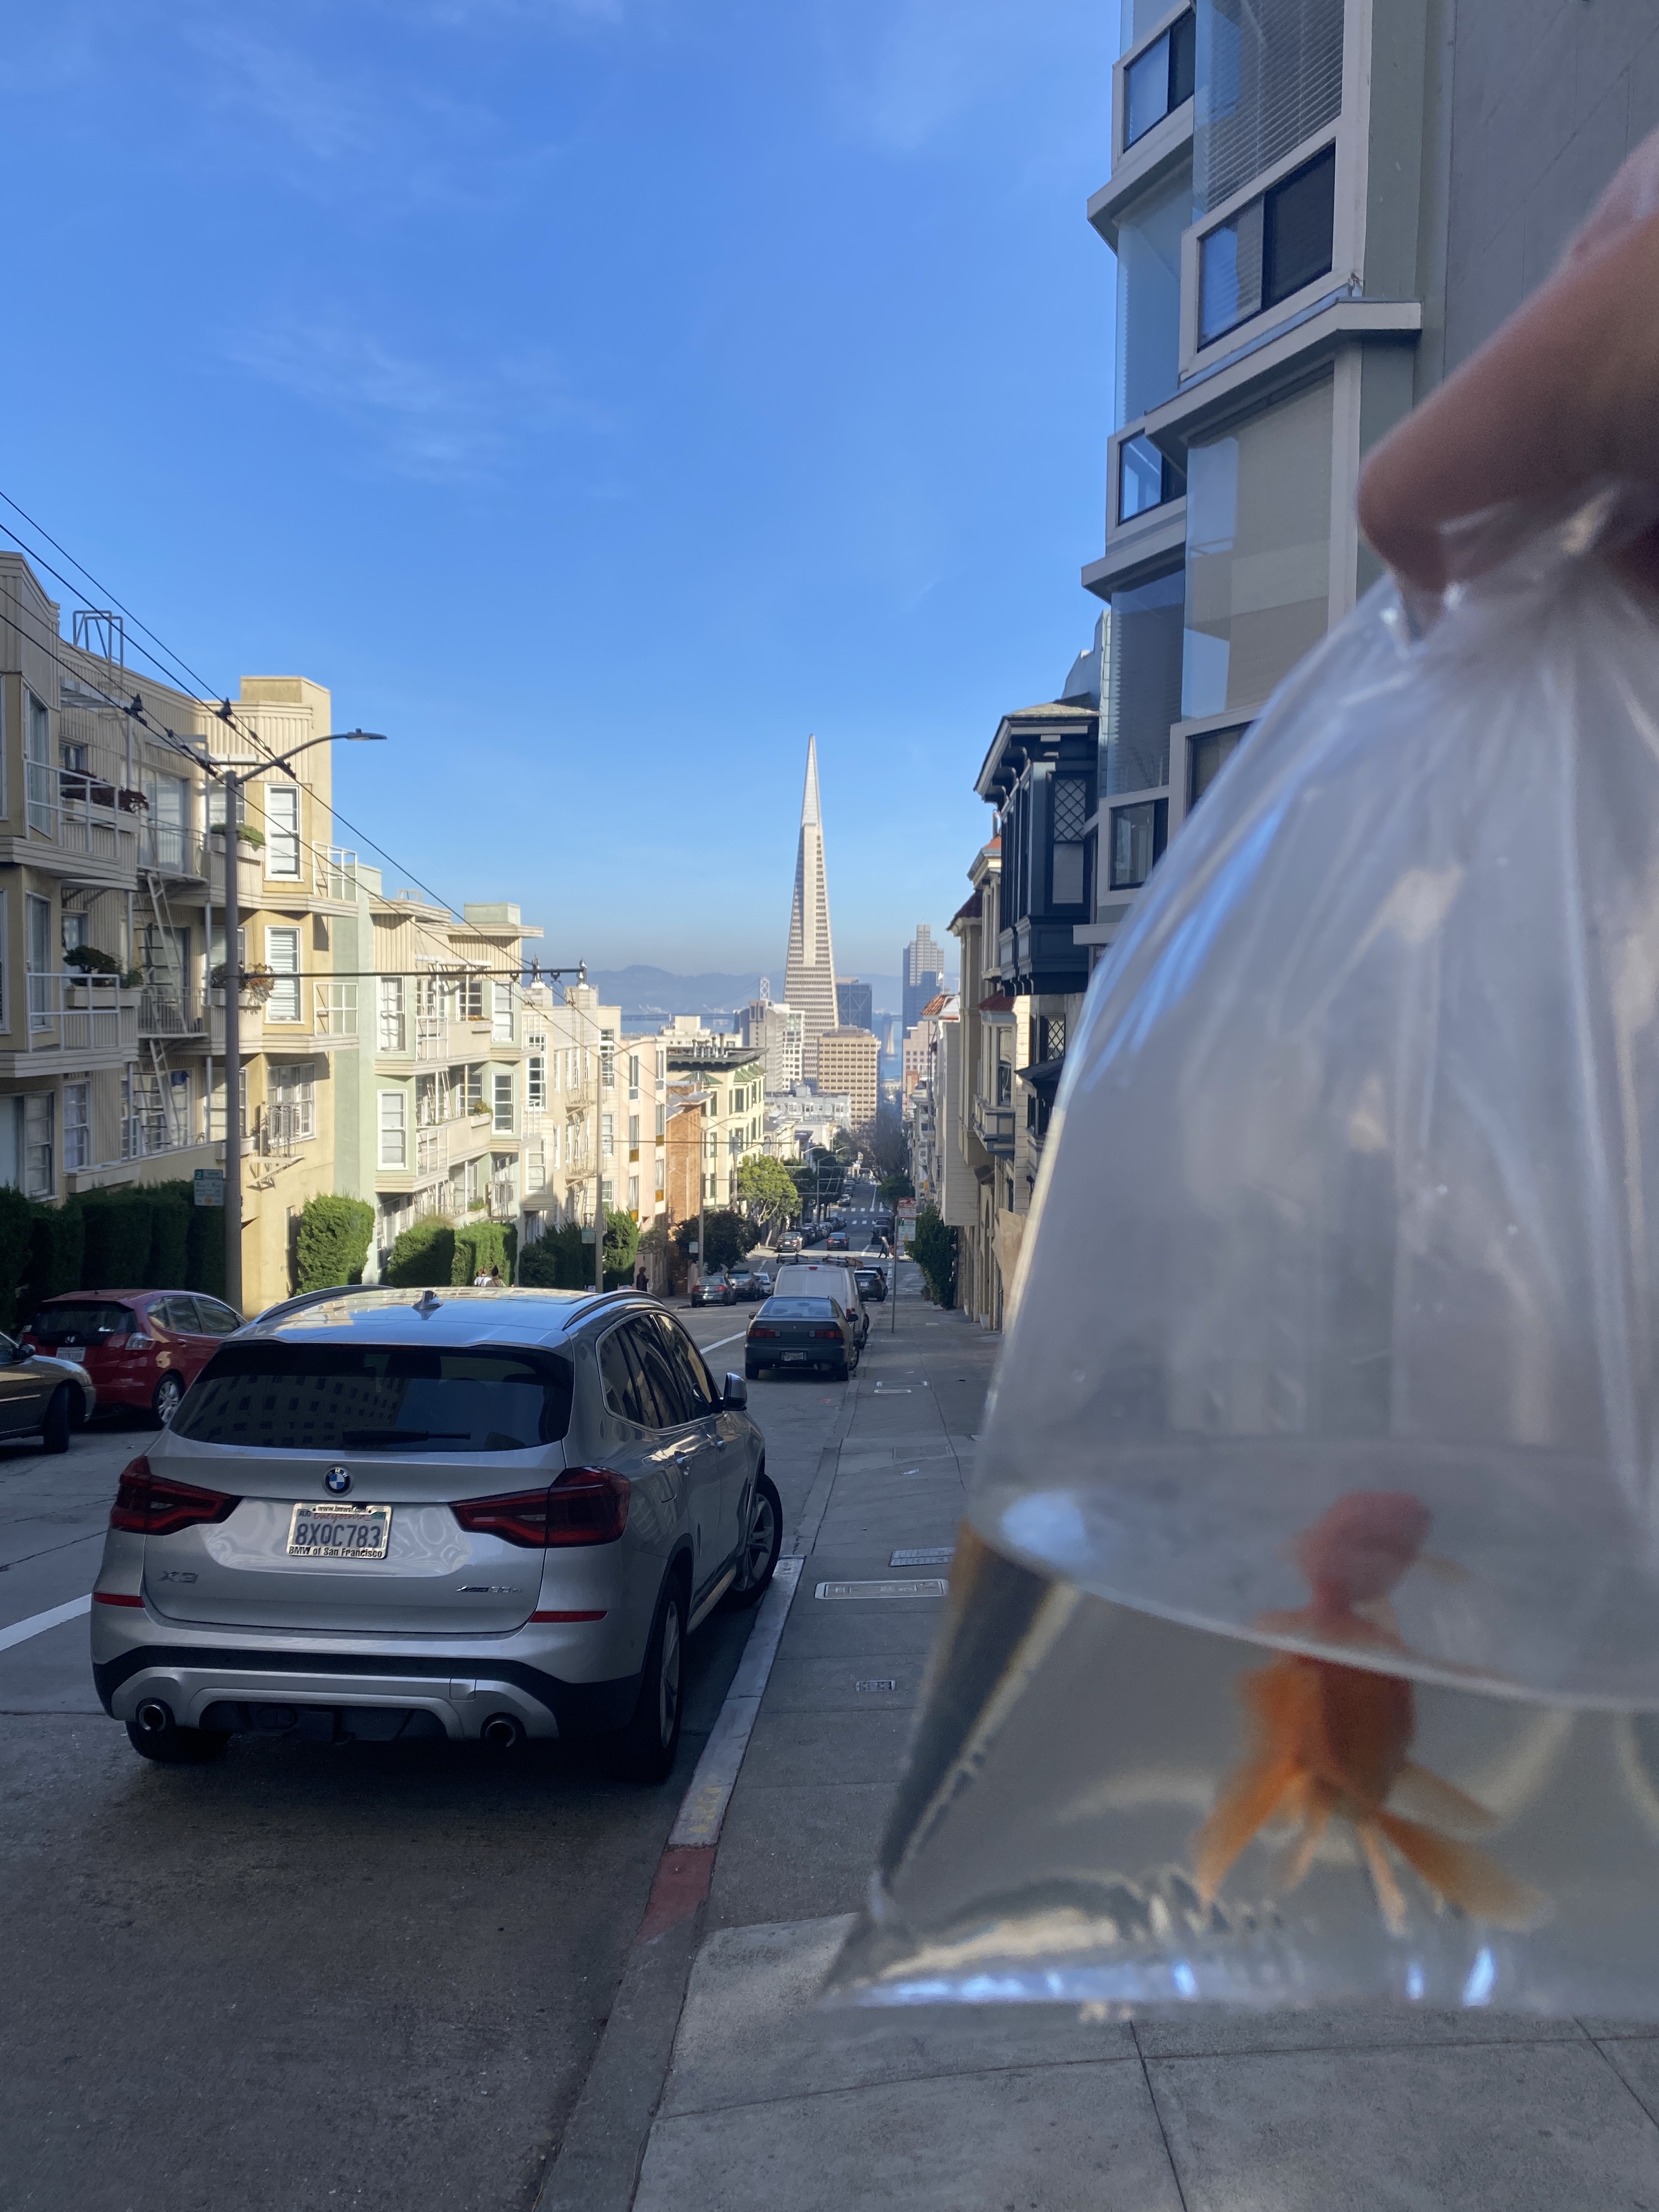
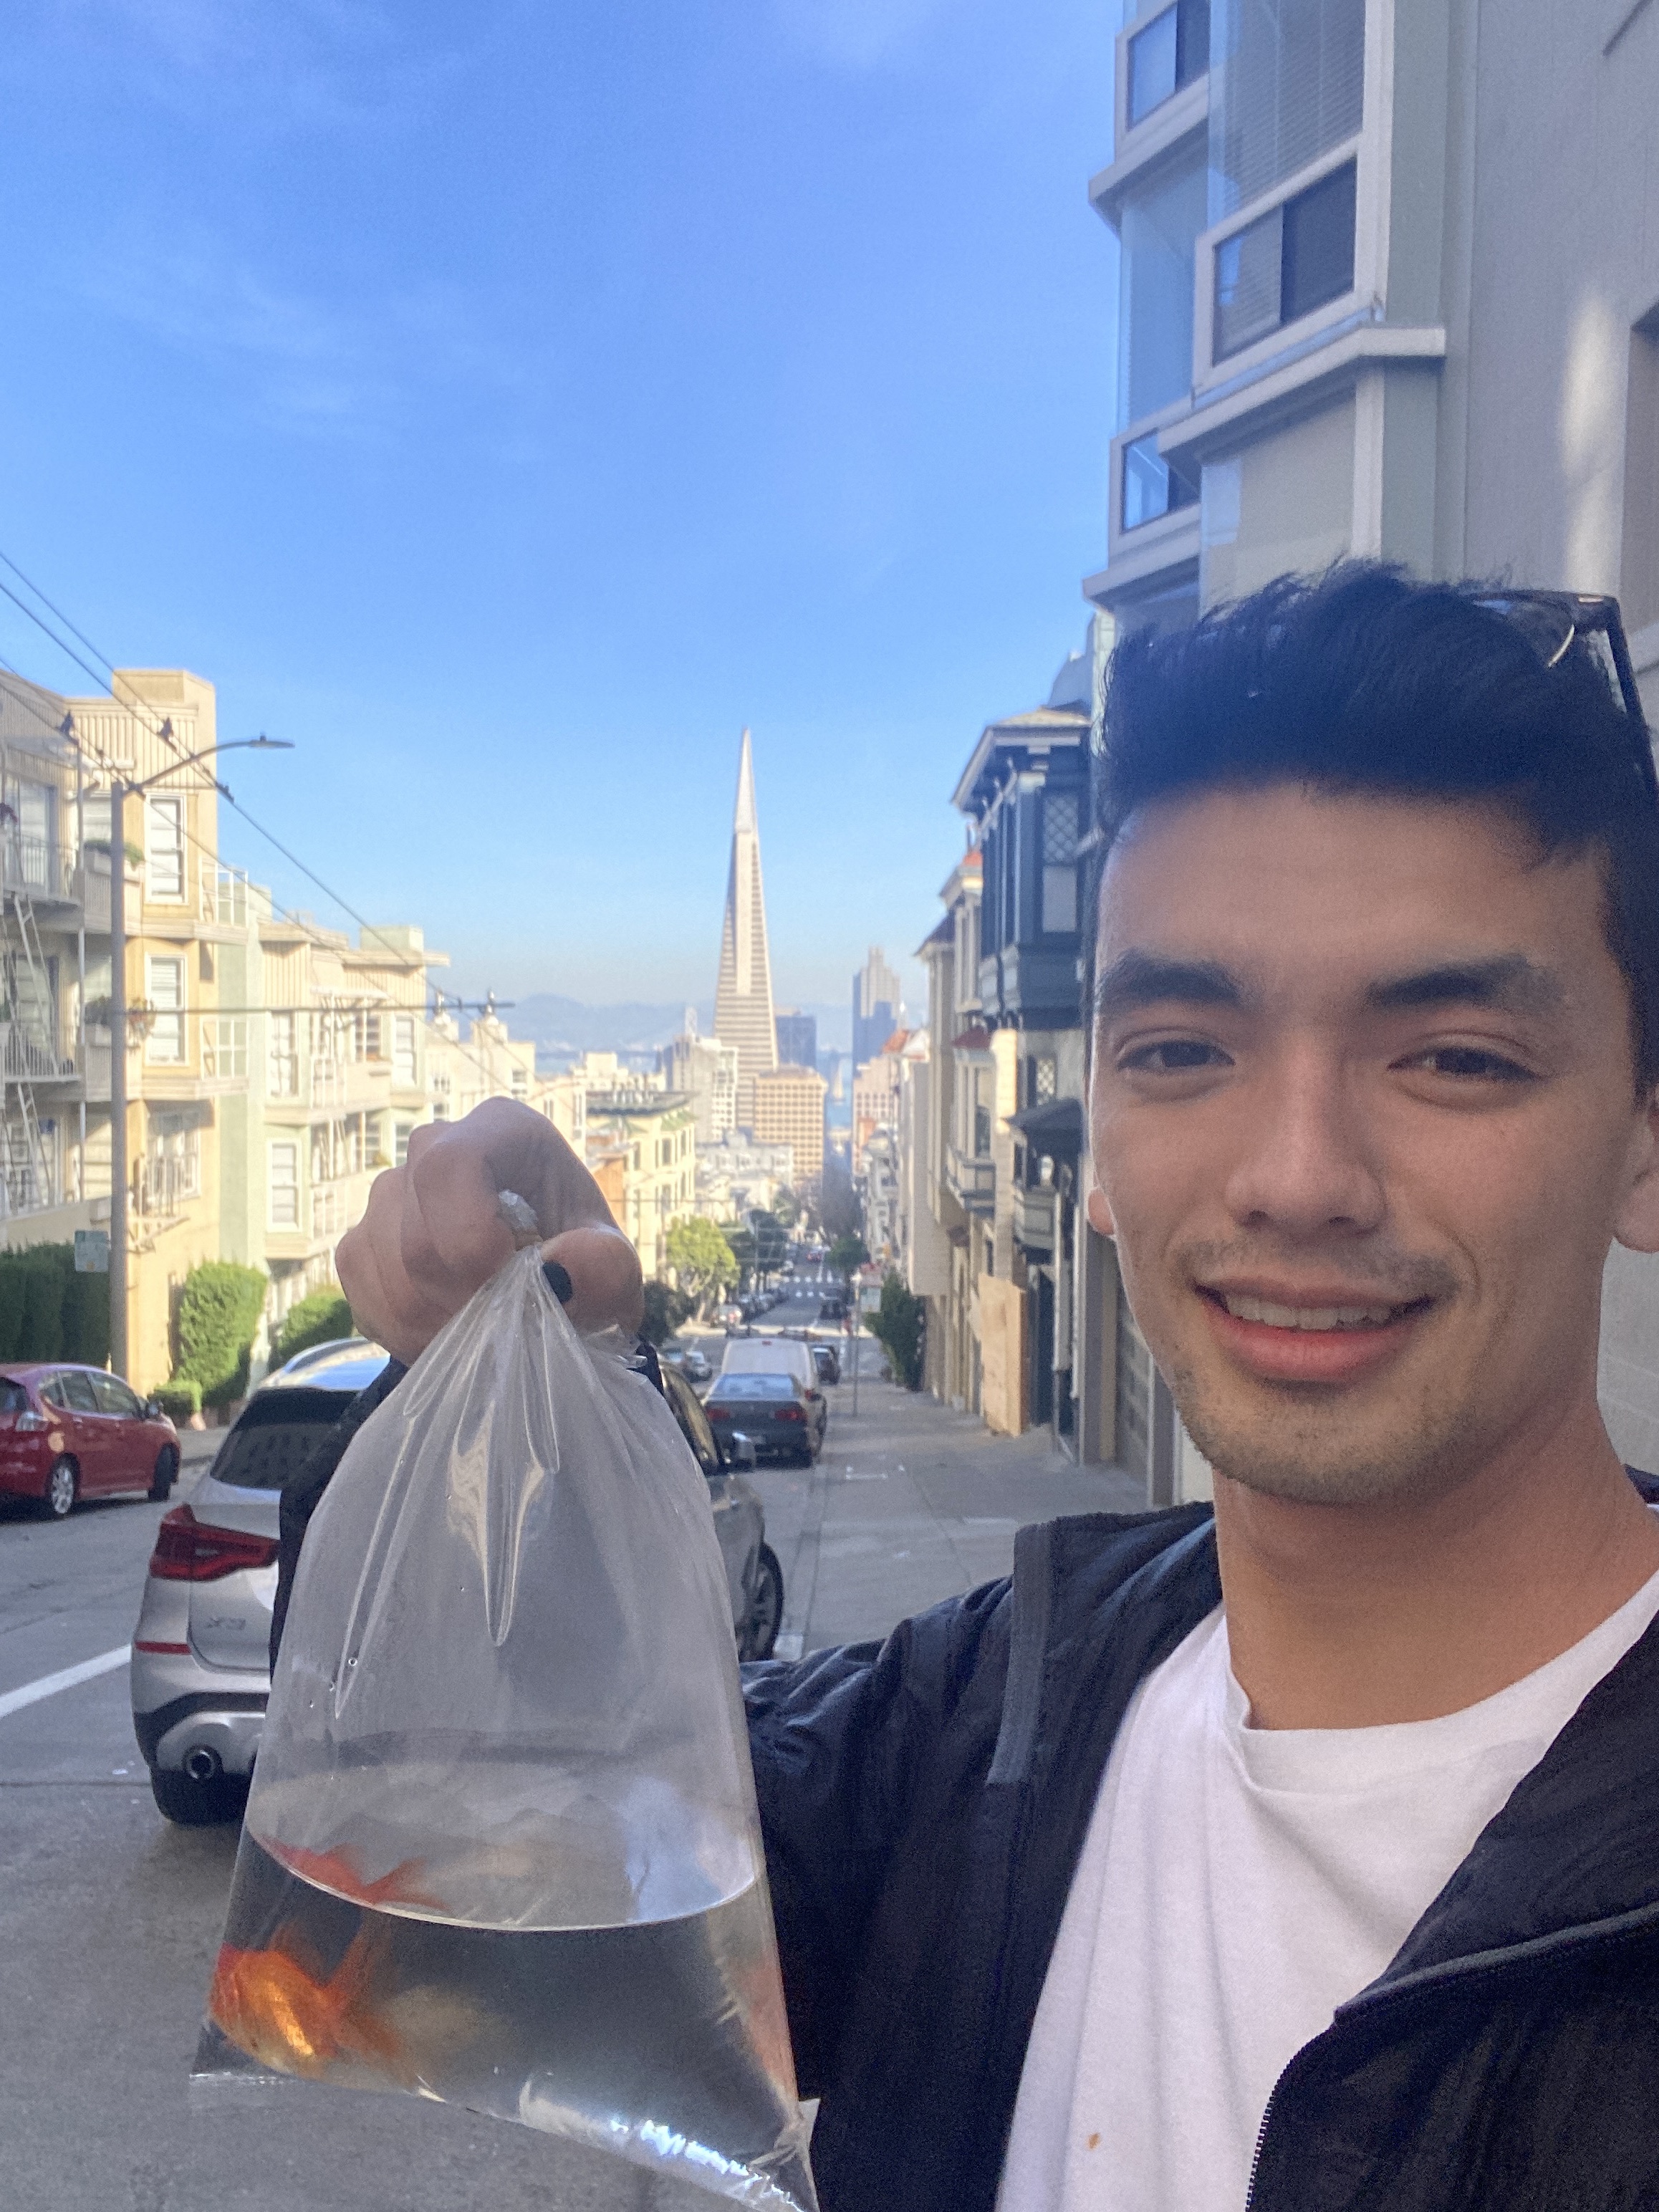
Jeff and I get a good look at the Transamerica Pyramid in the Financial District.

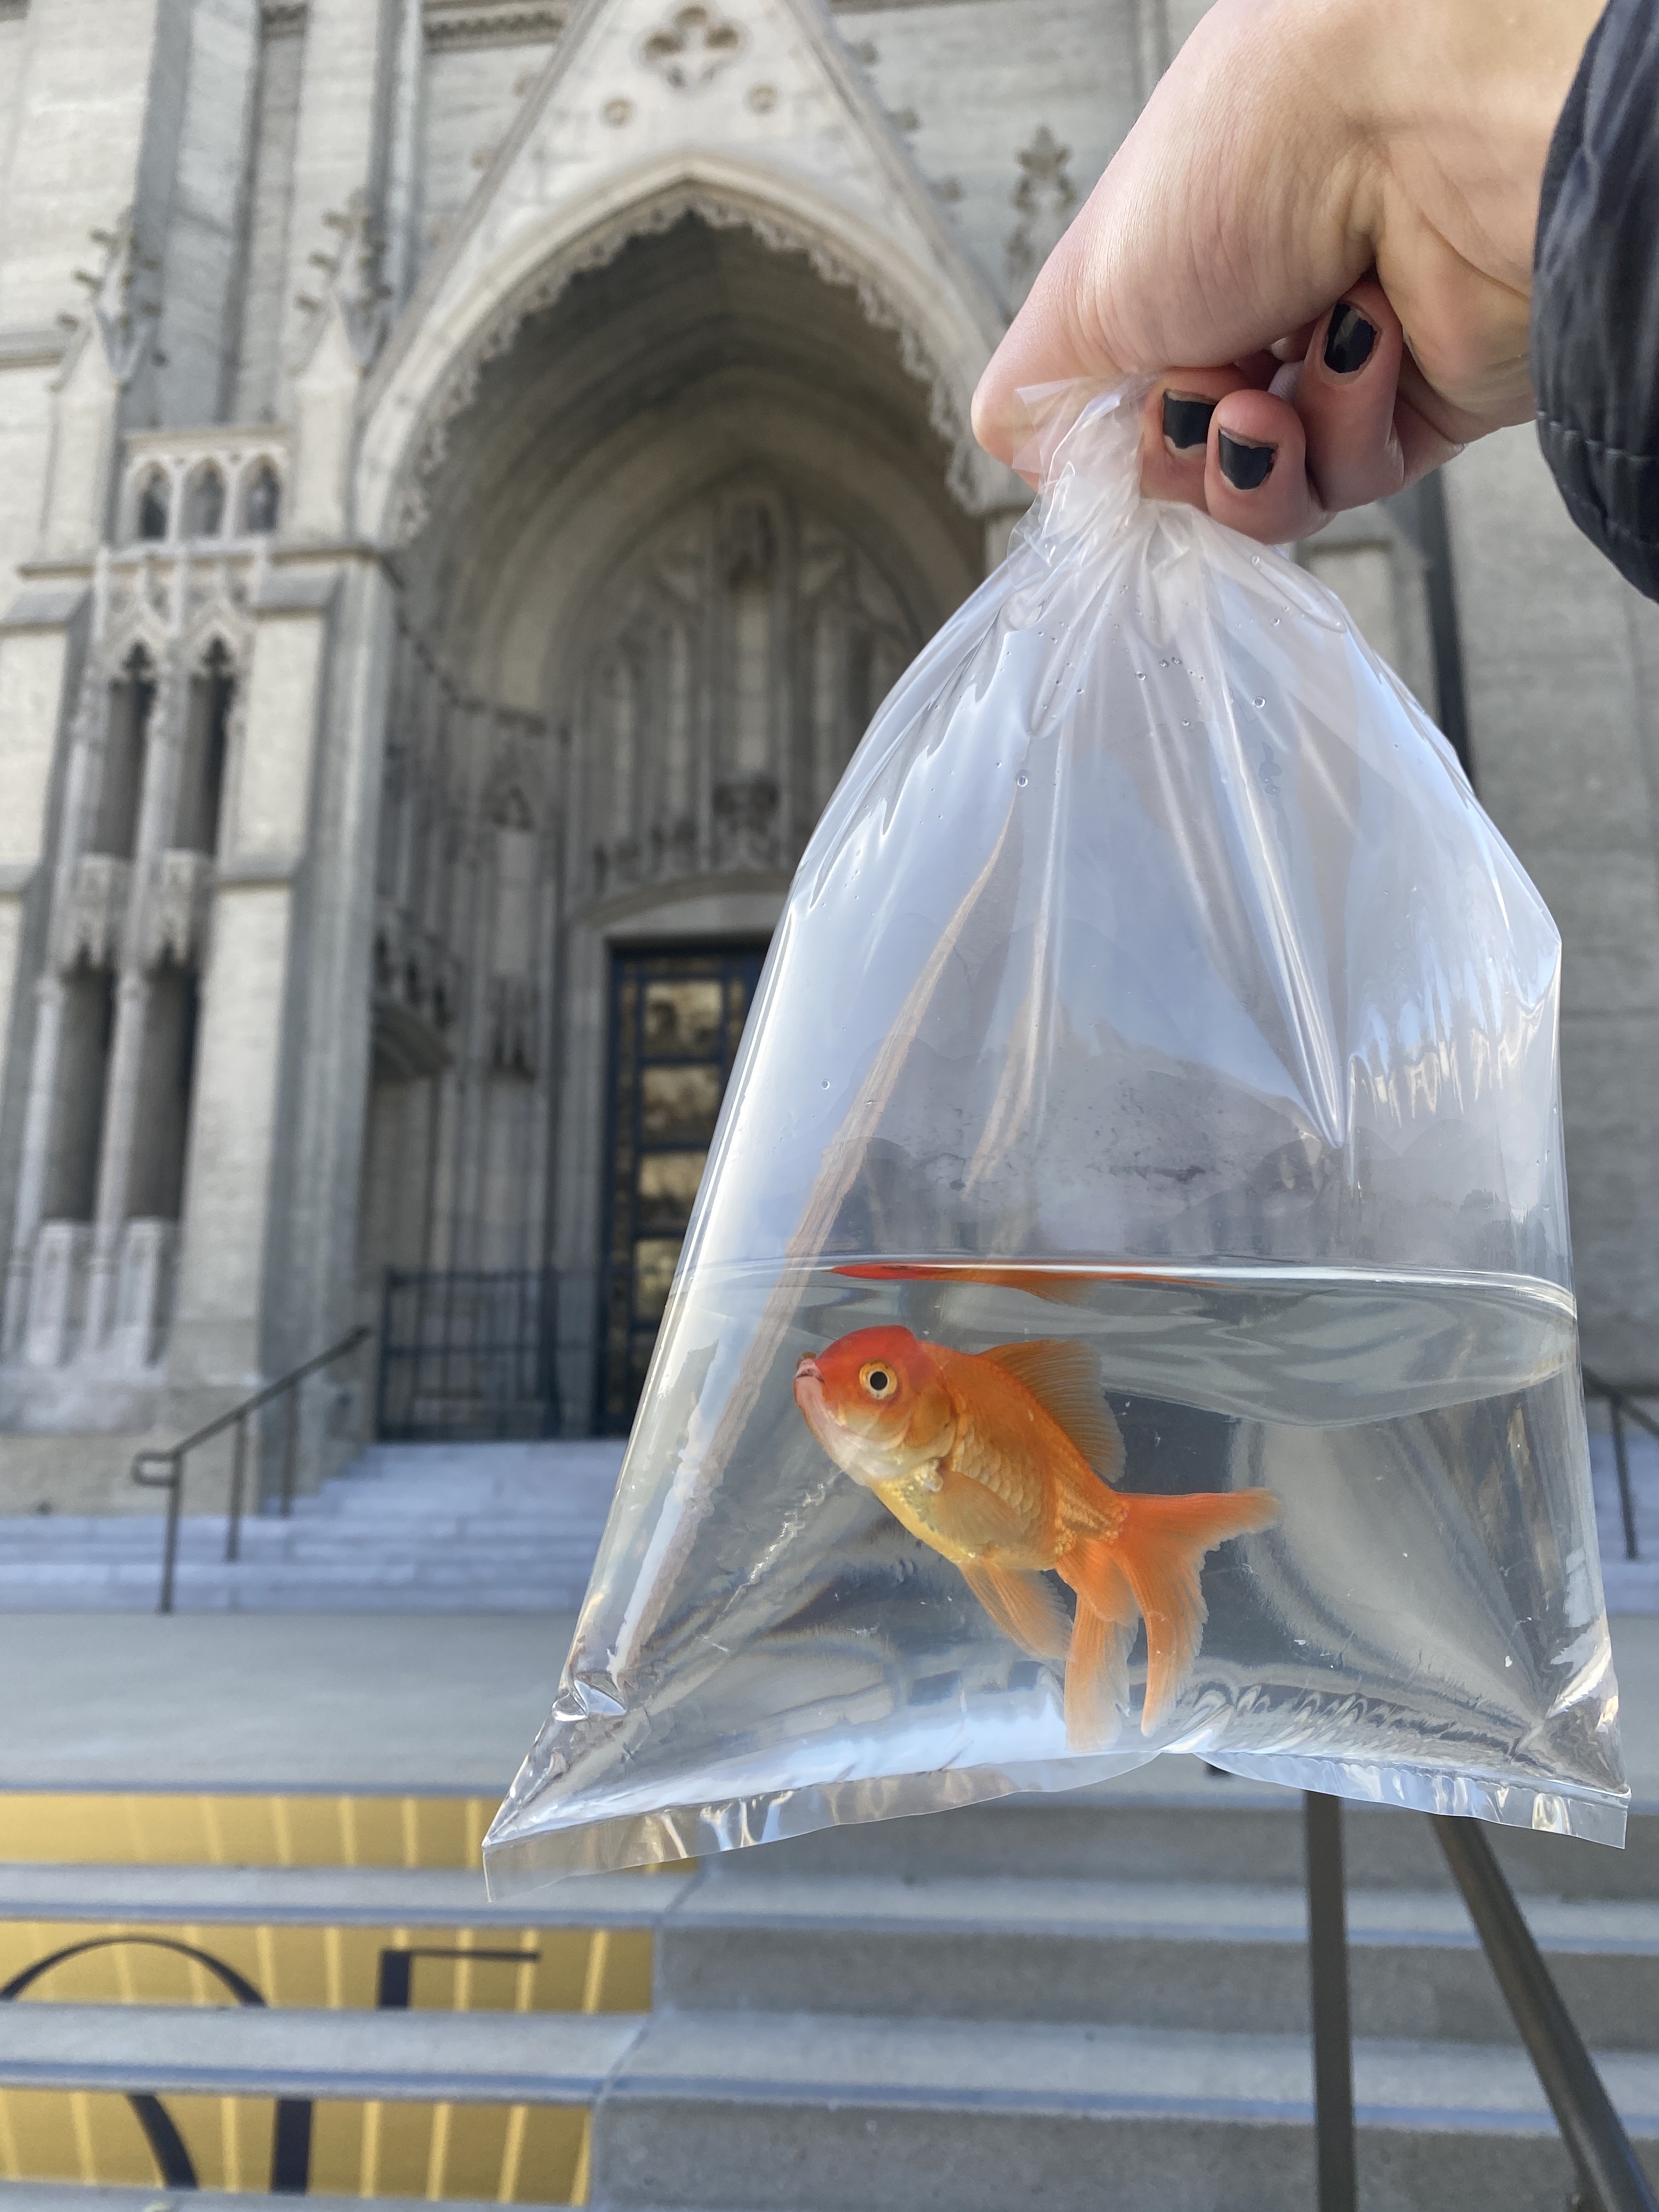
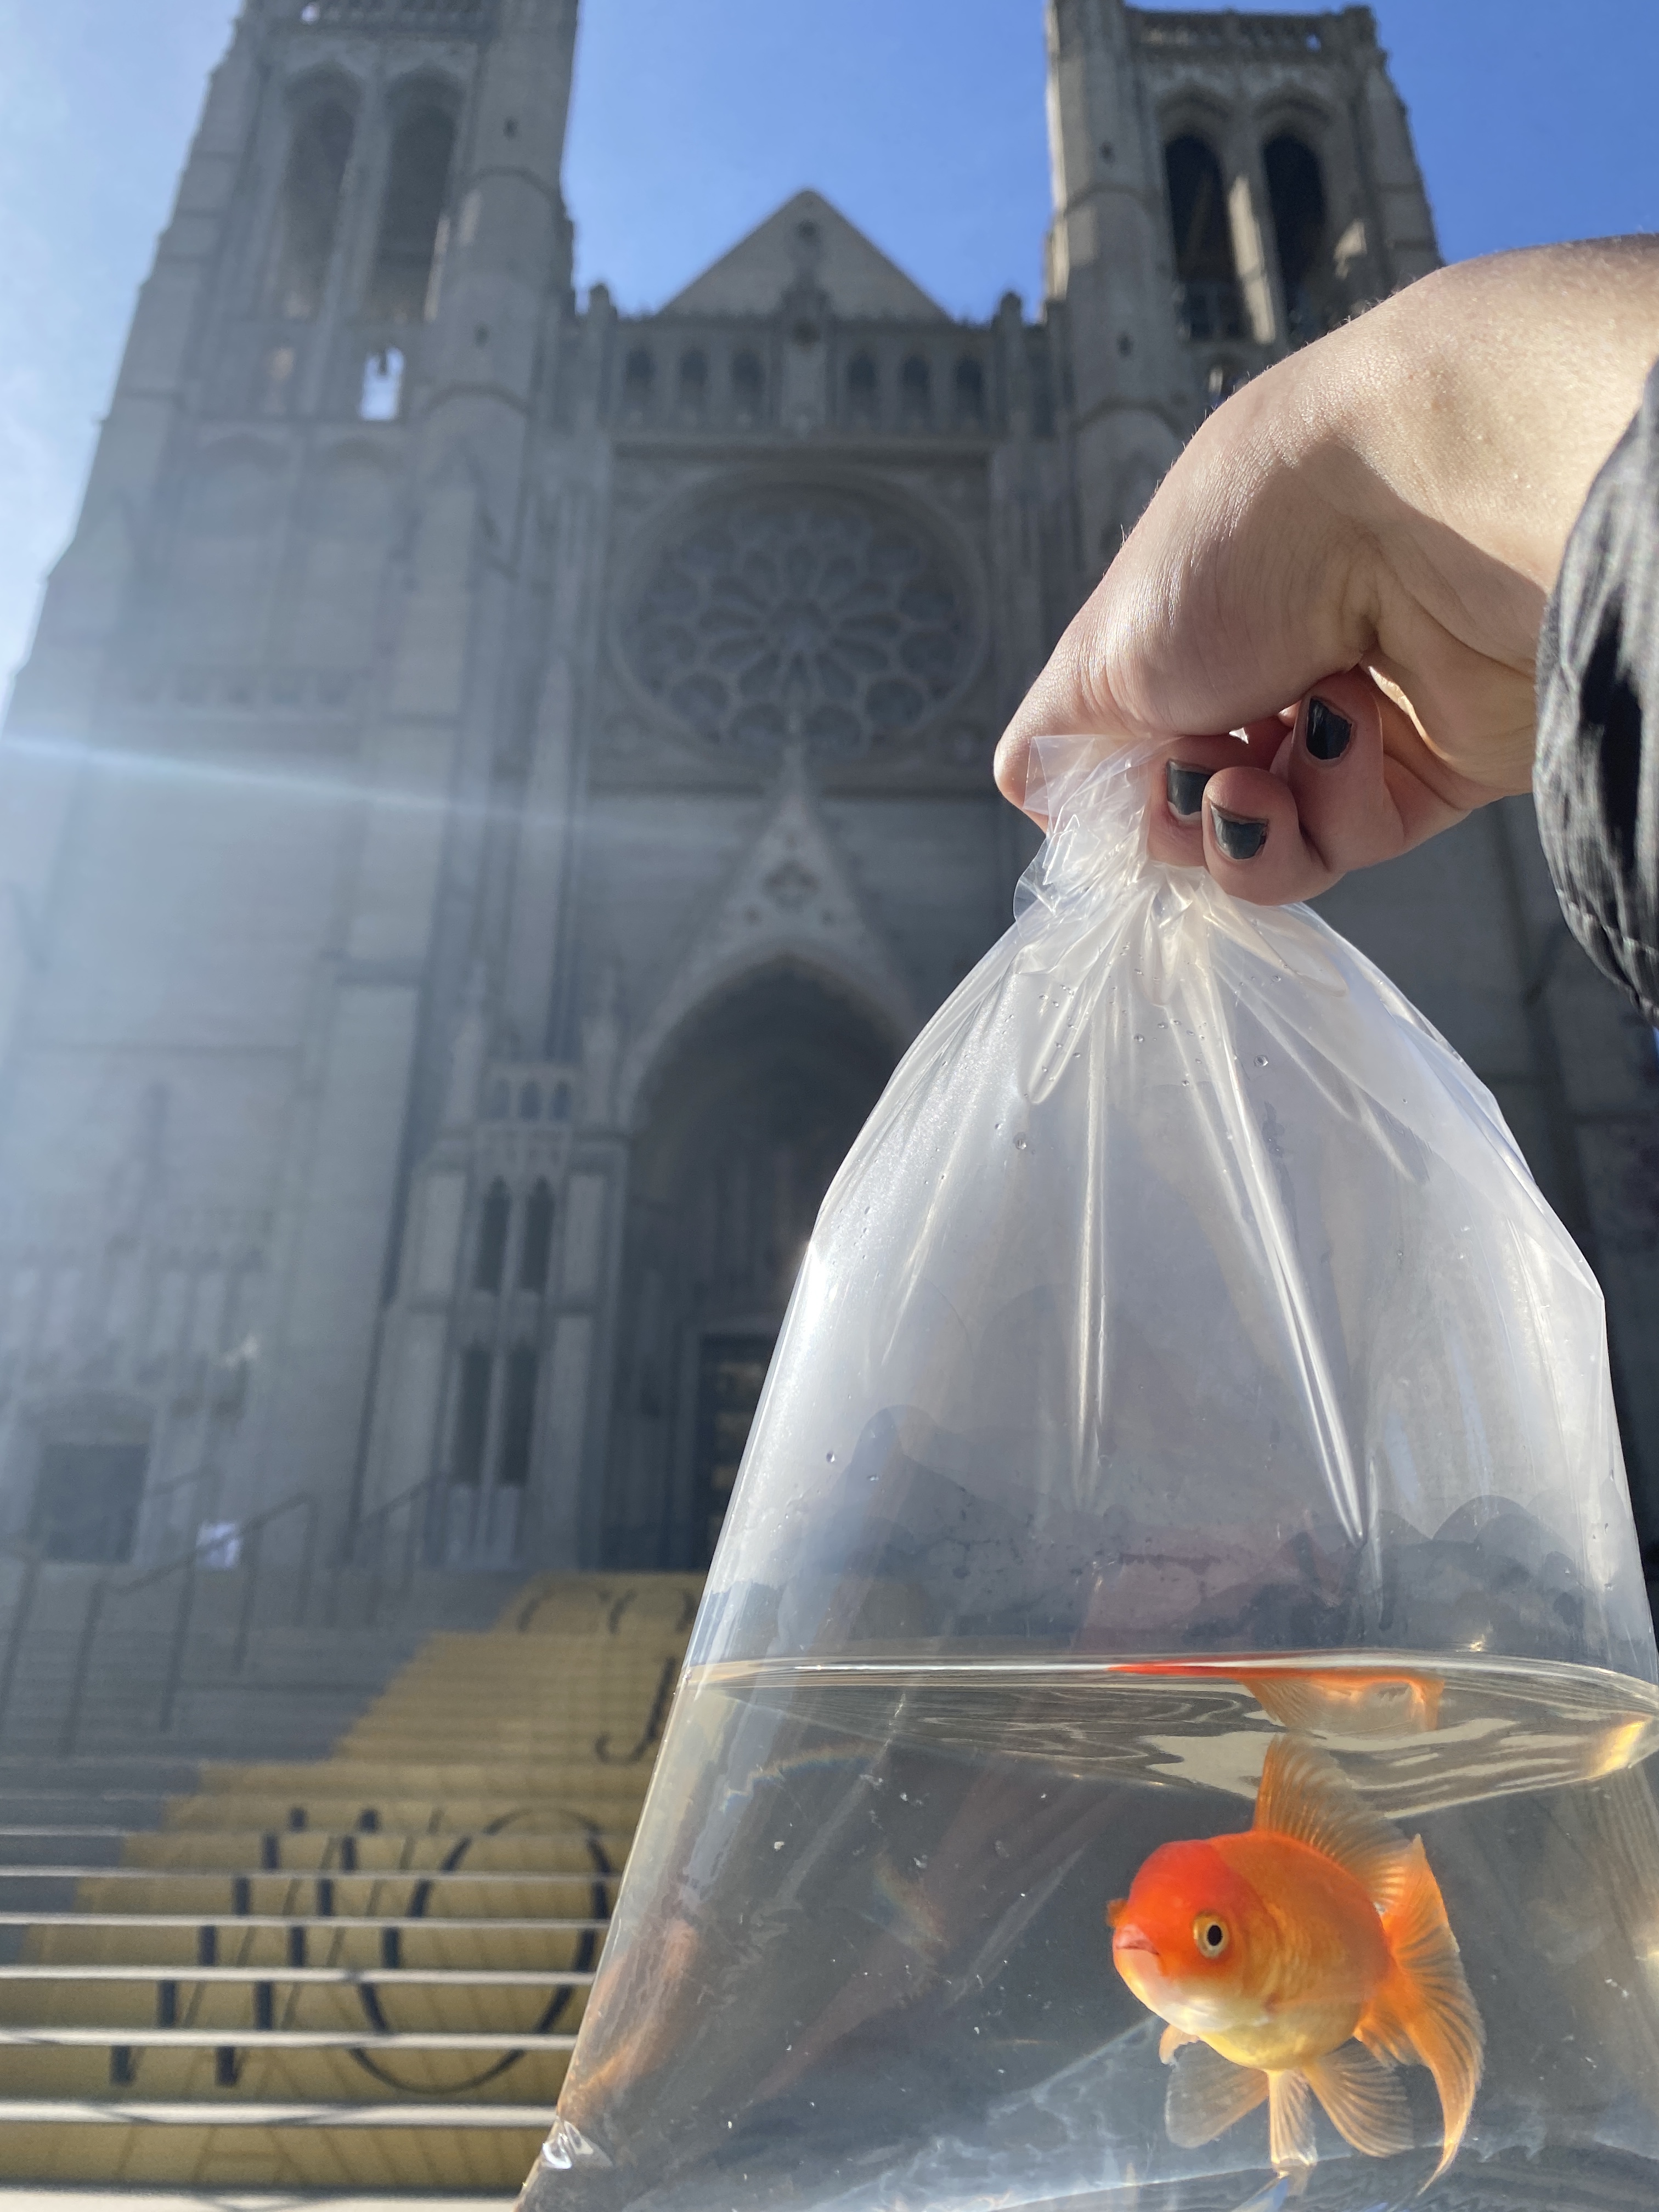
Jeff and I check out Grace Cathedral.
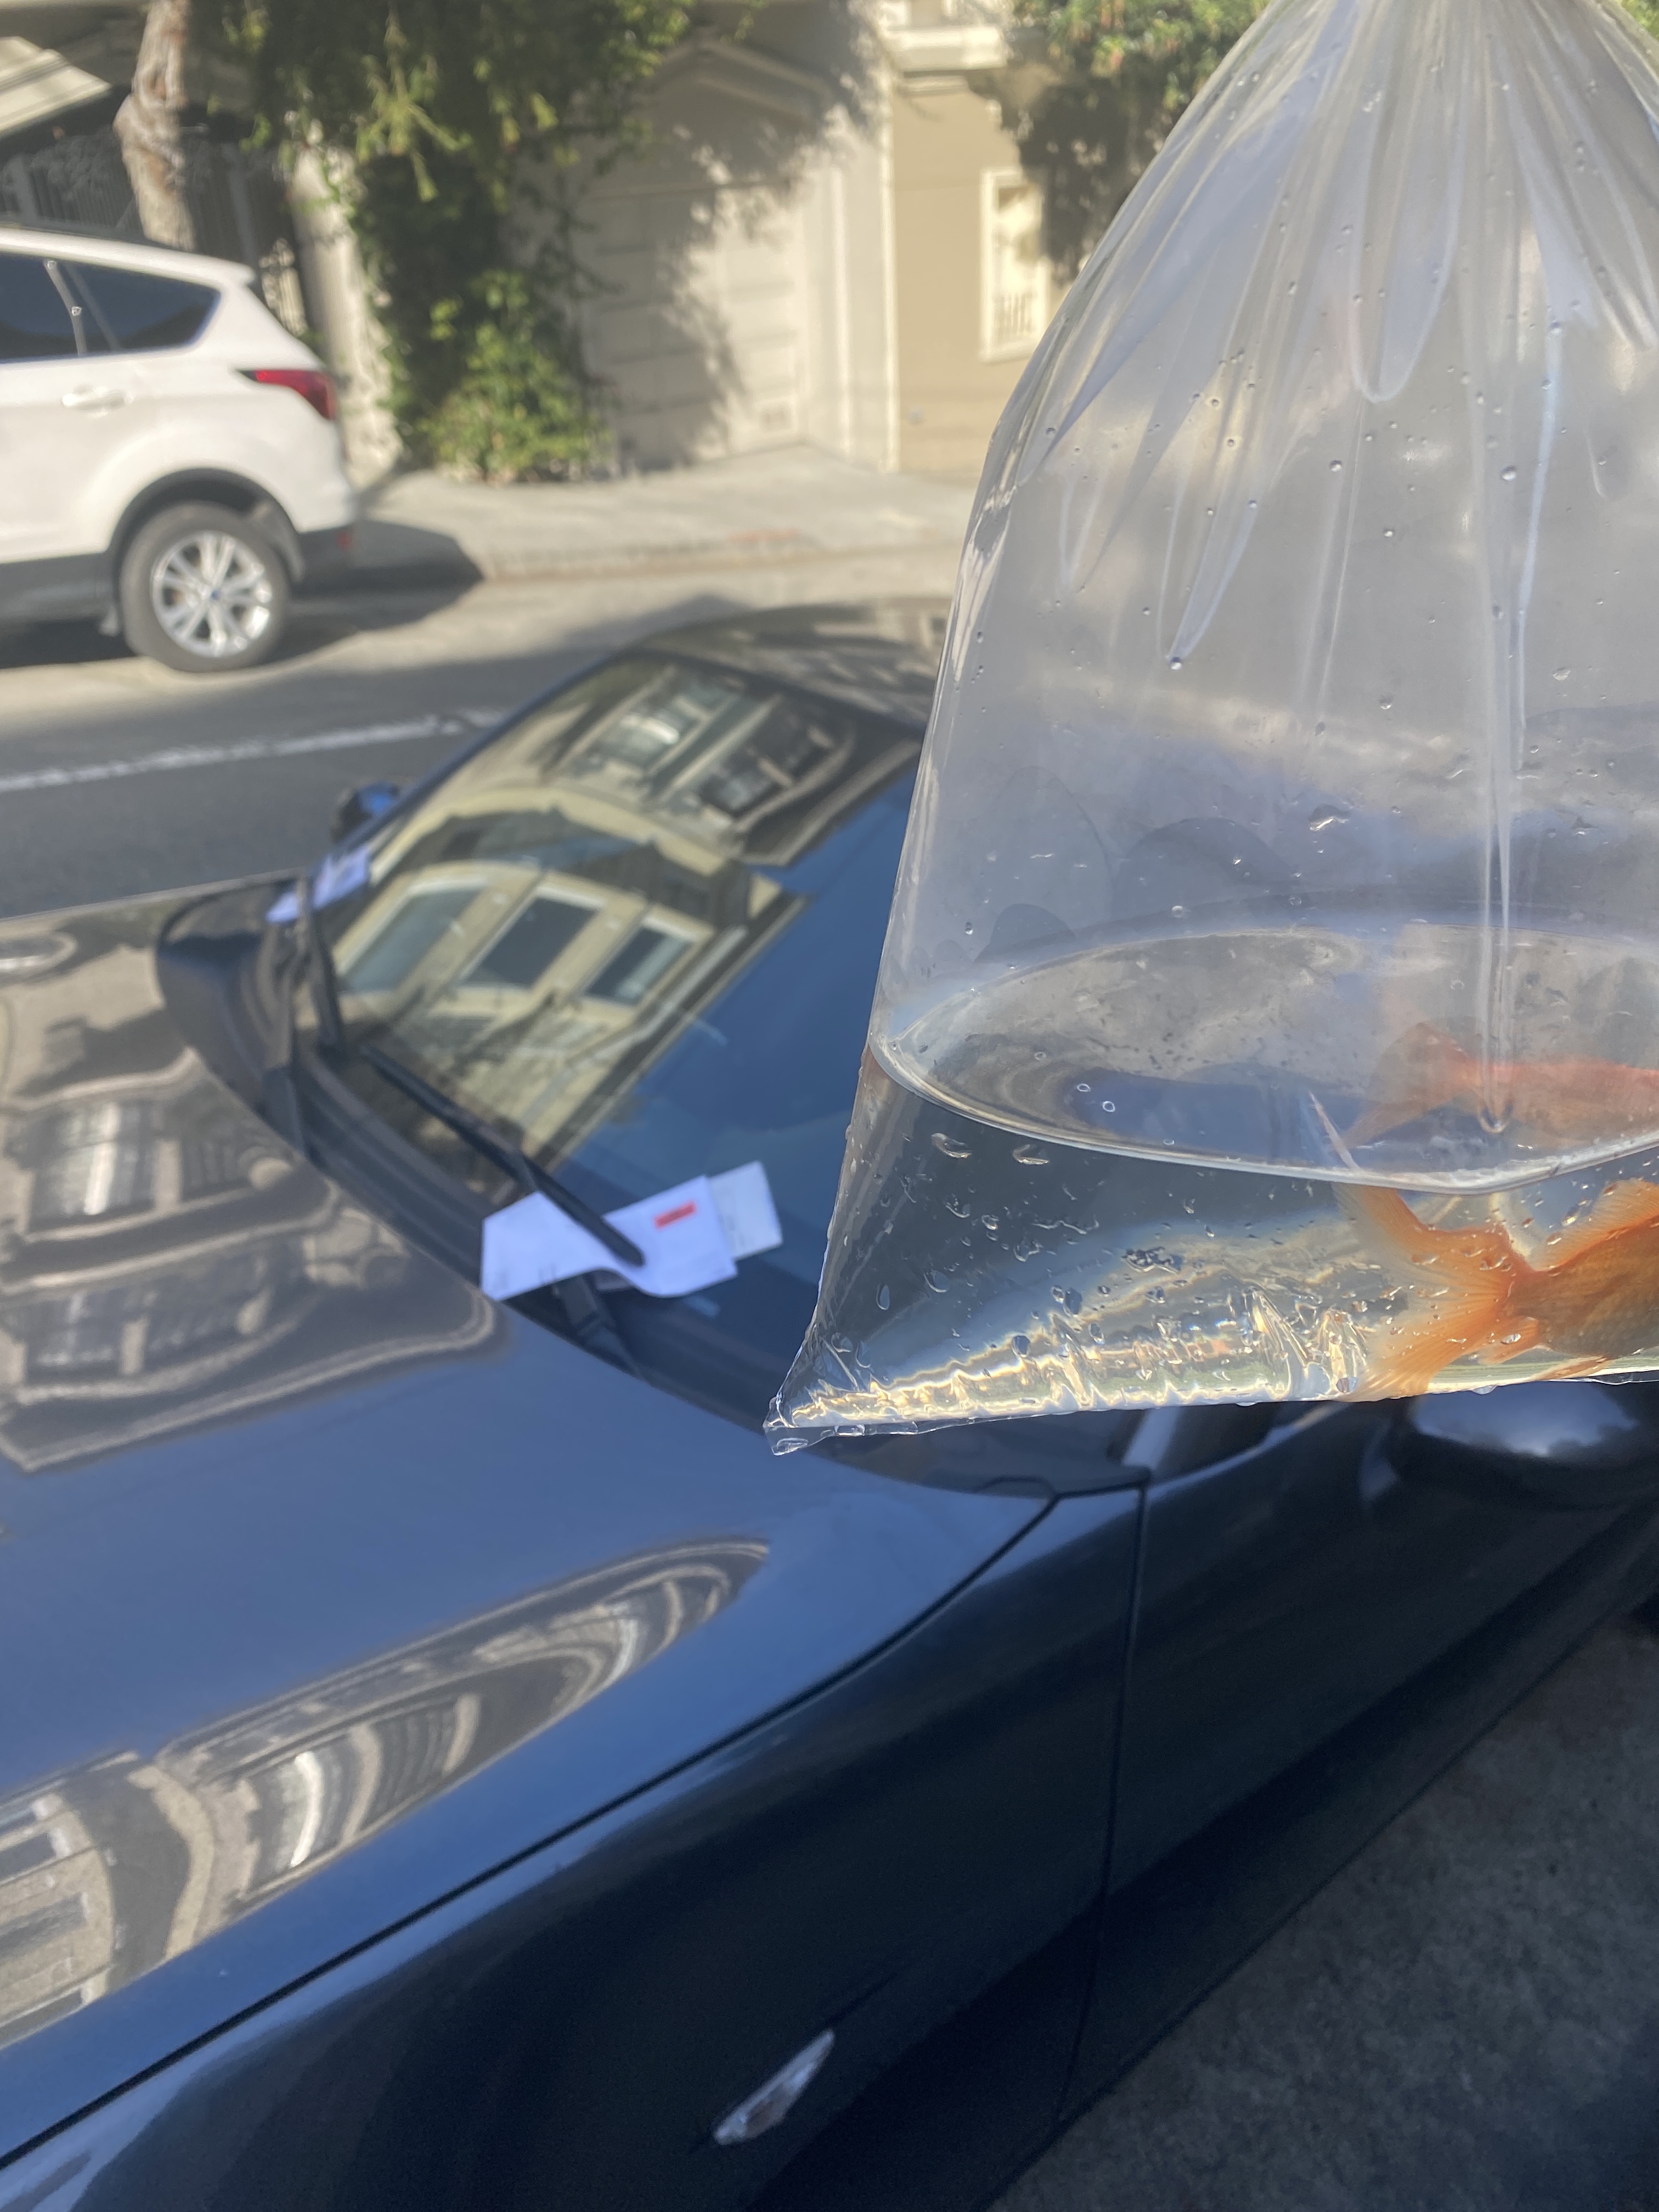

Jeff's Miata get's a parking ticket :( Say goodbye to $107.
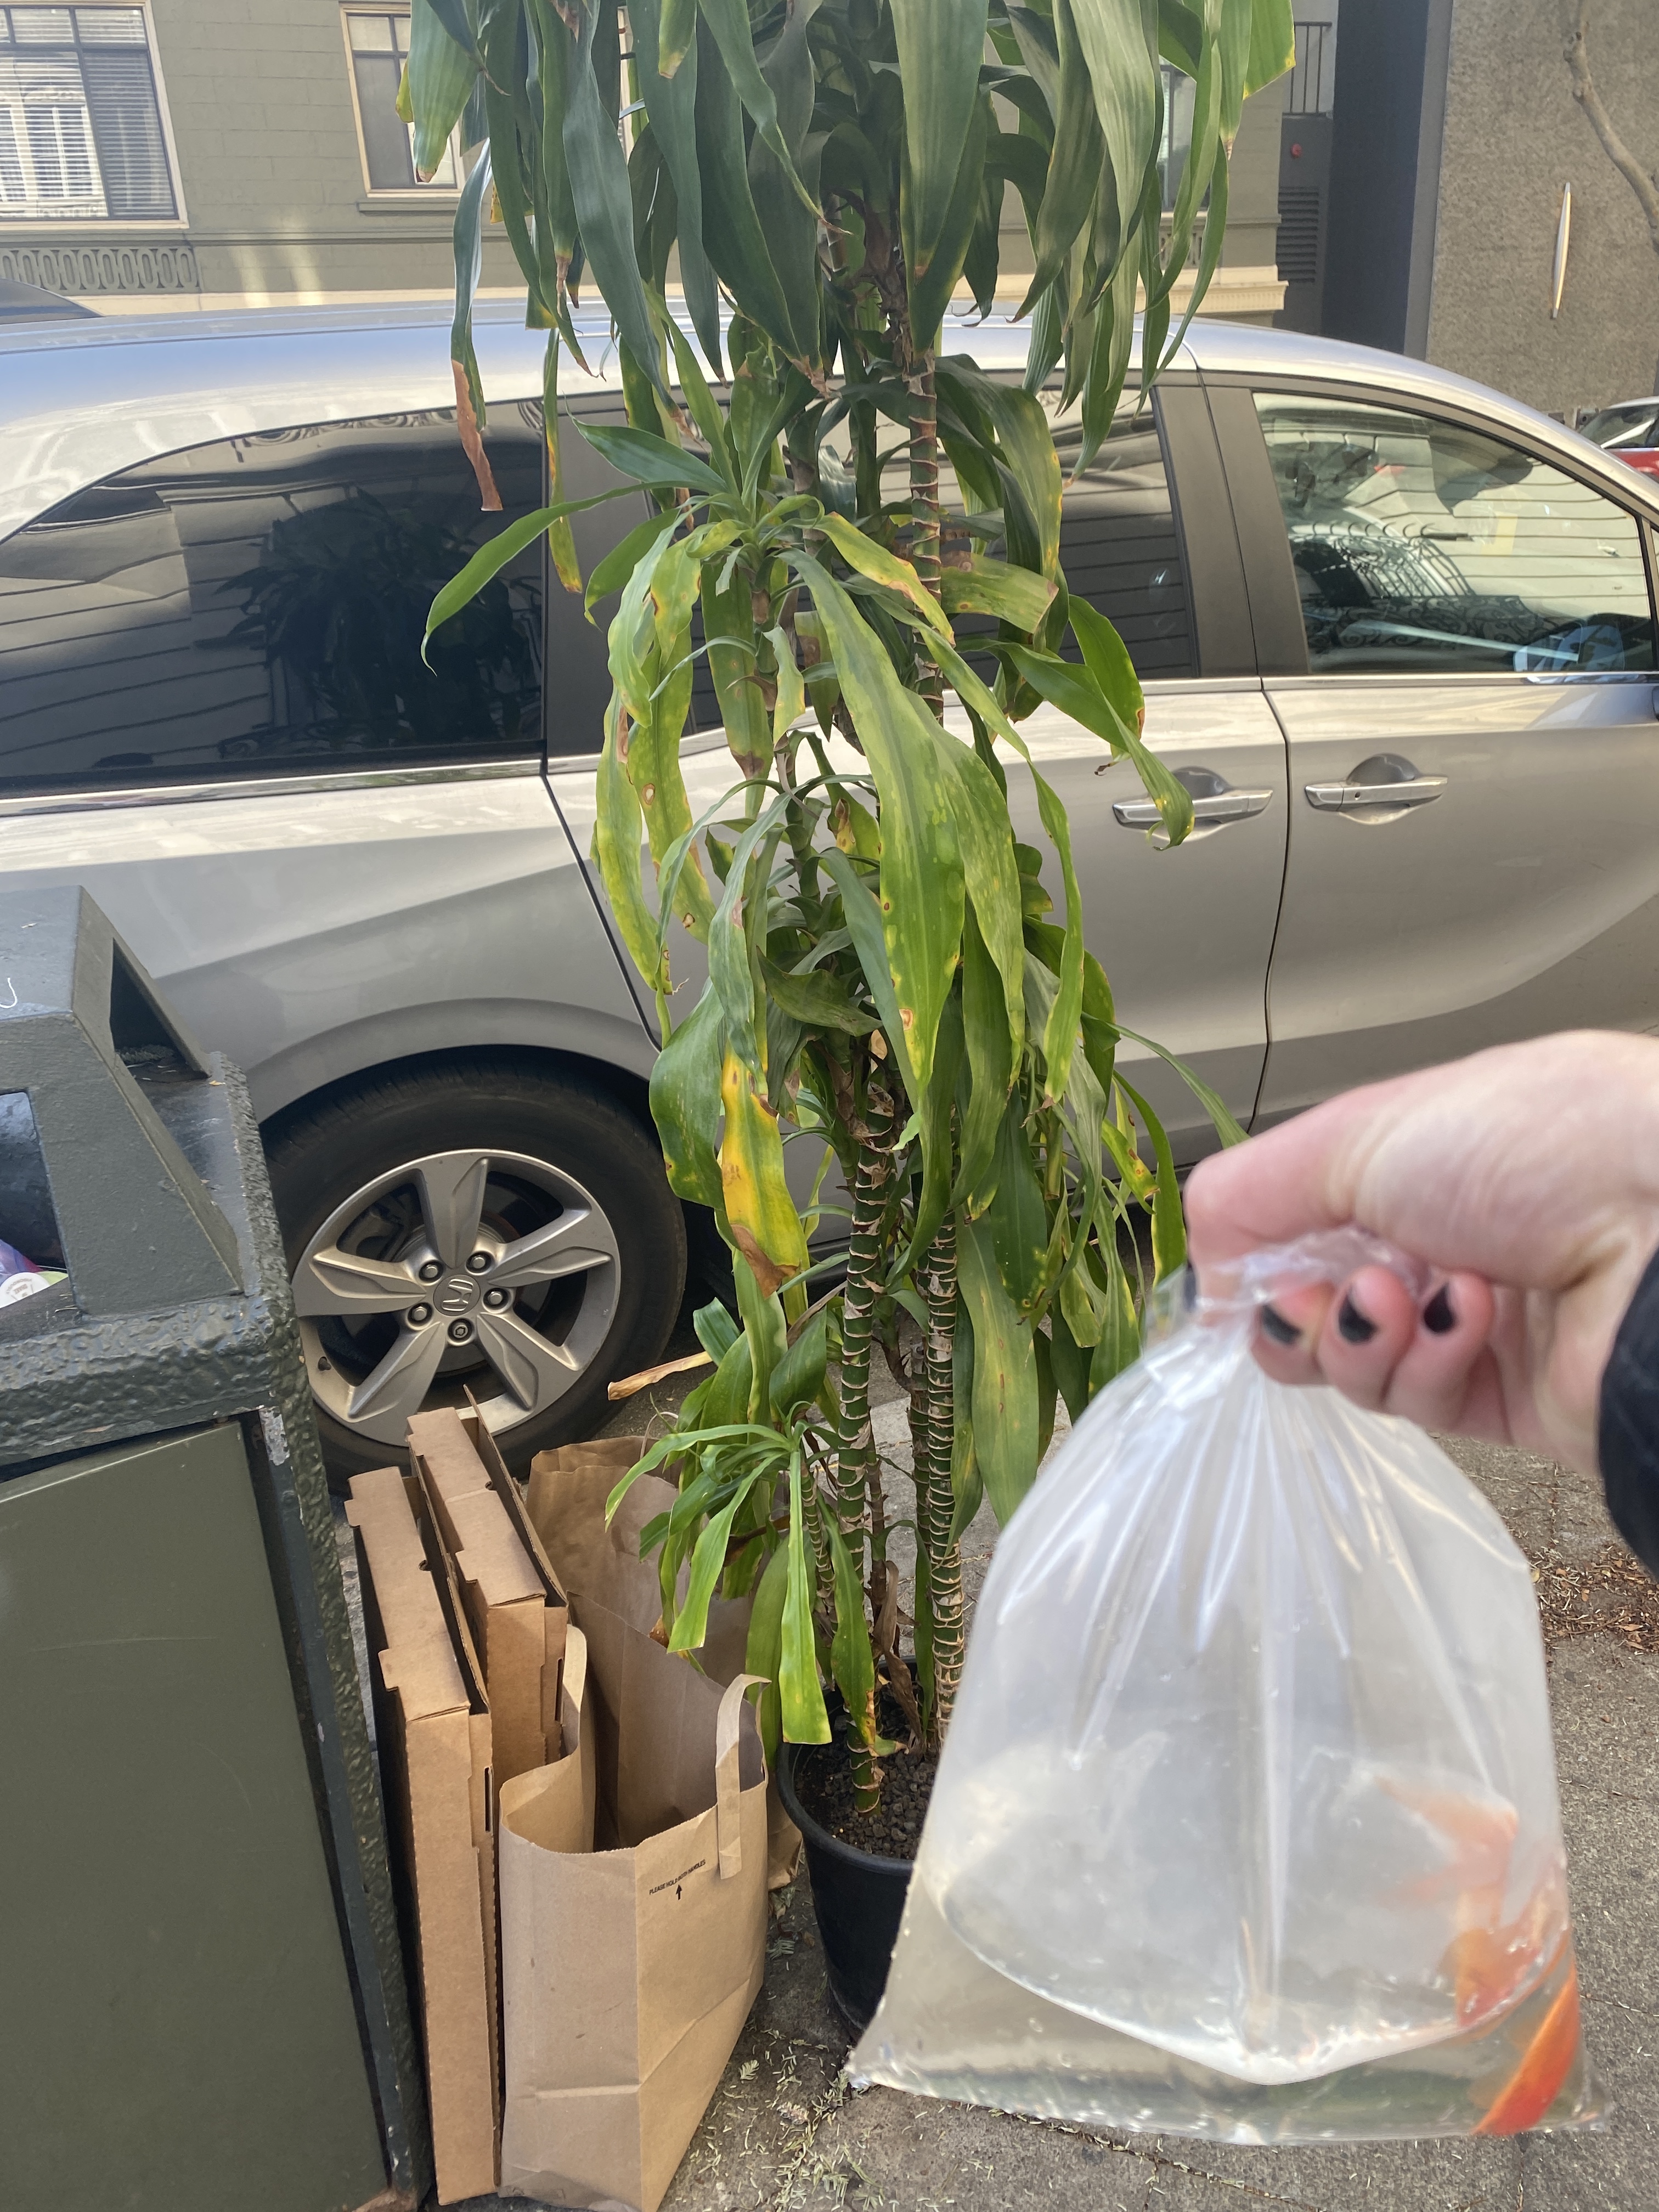
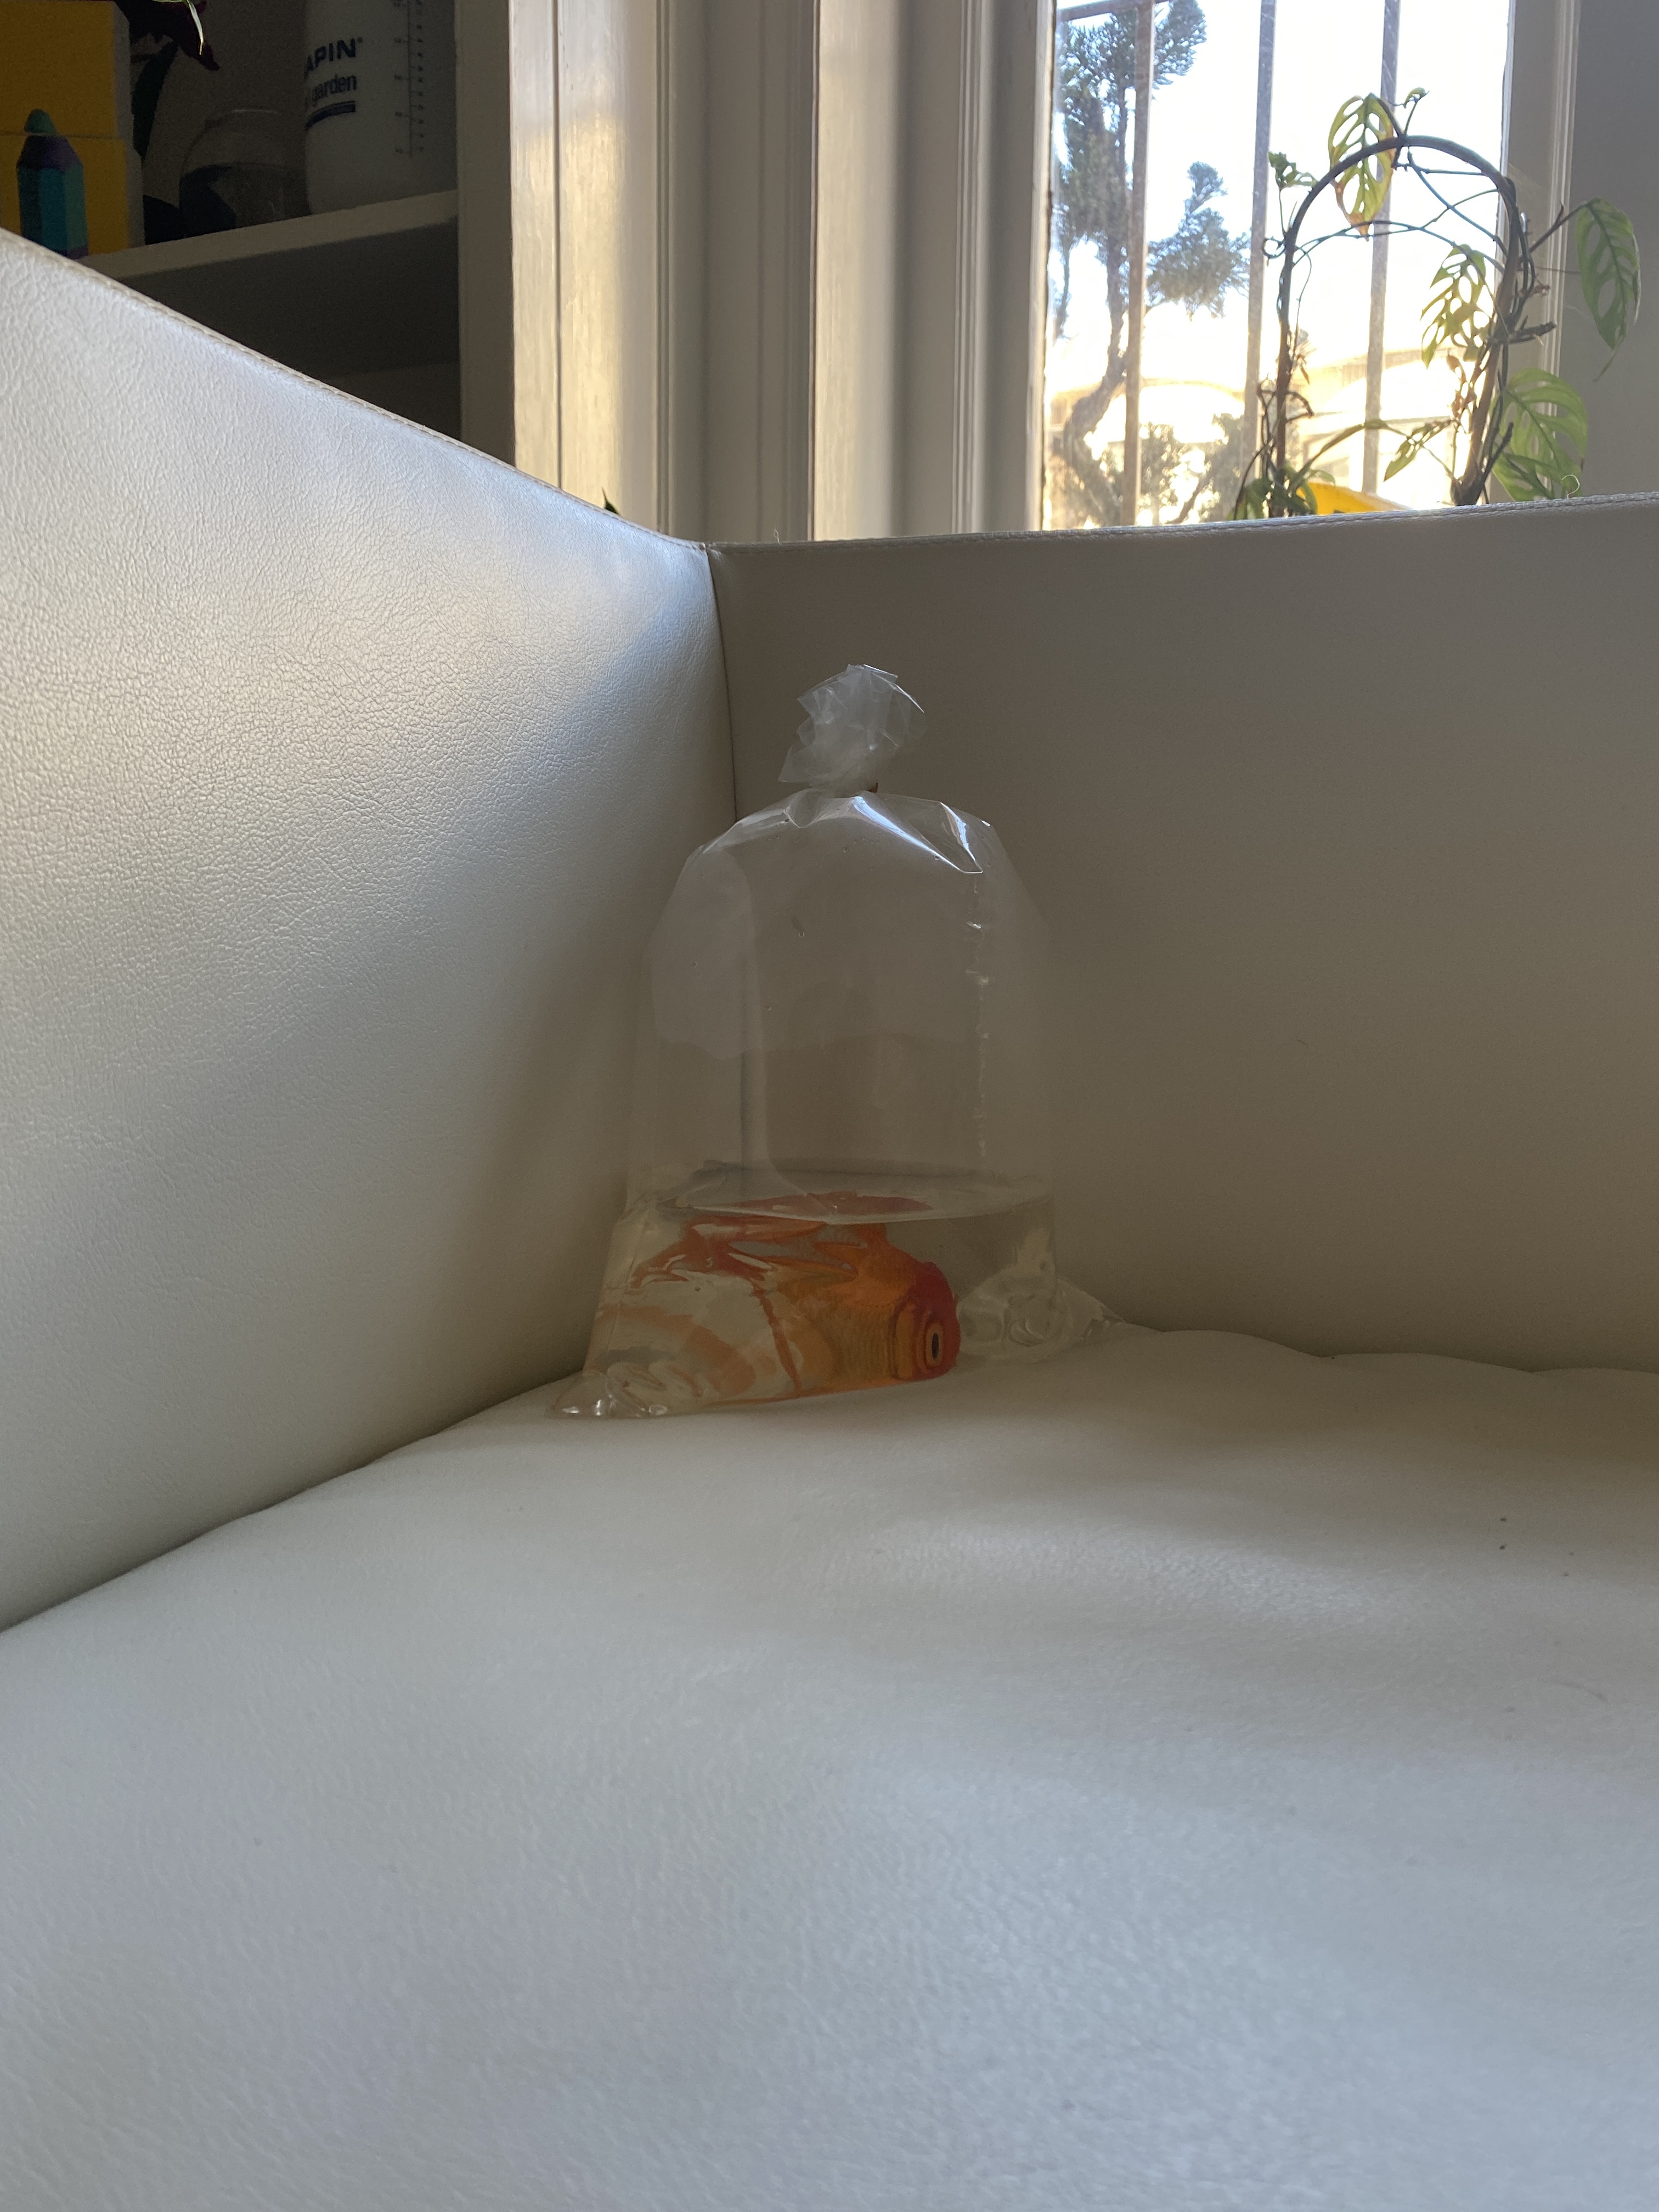
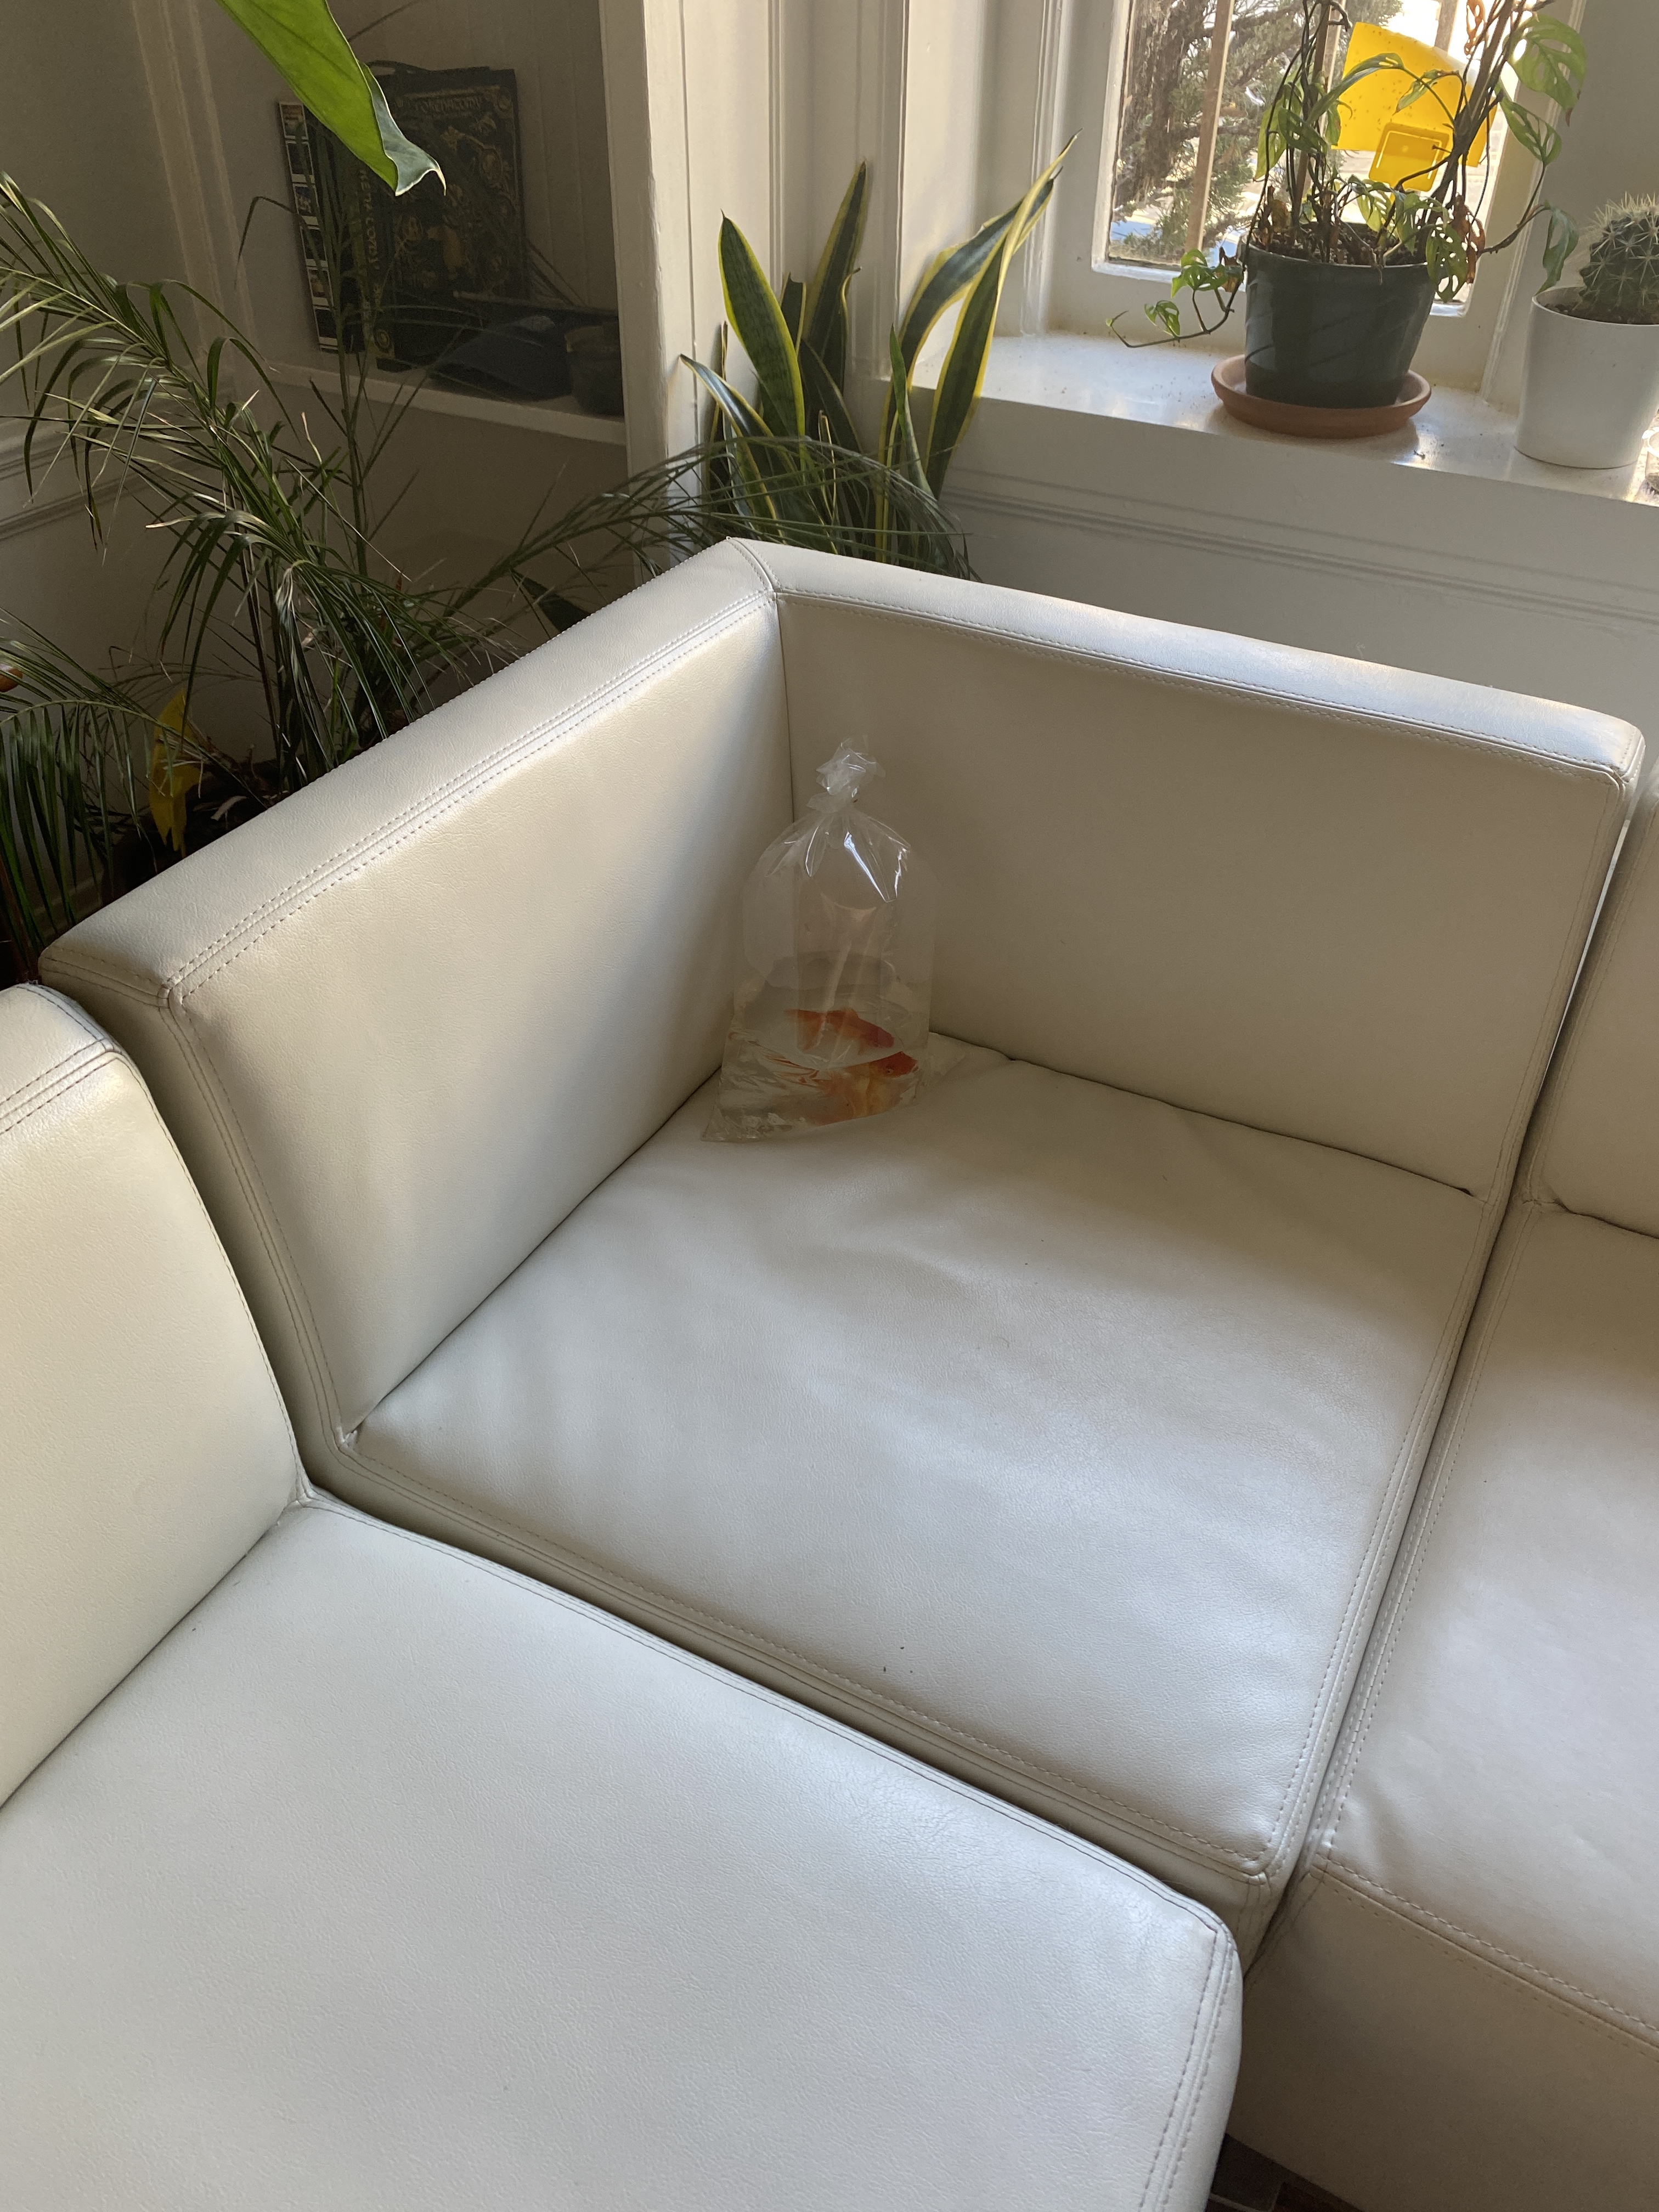
Jeff goes for a swim at the local fountain. Afterwards, he comes across potential new decor, but ultimately decides against it.
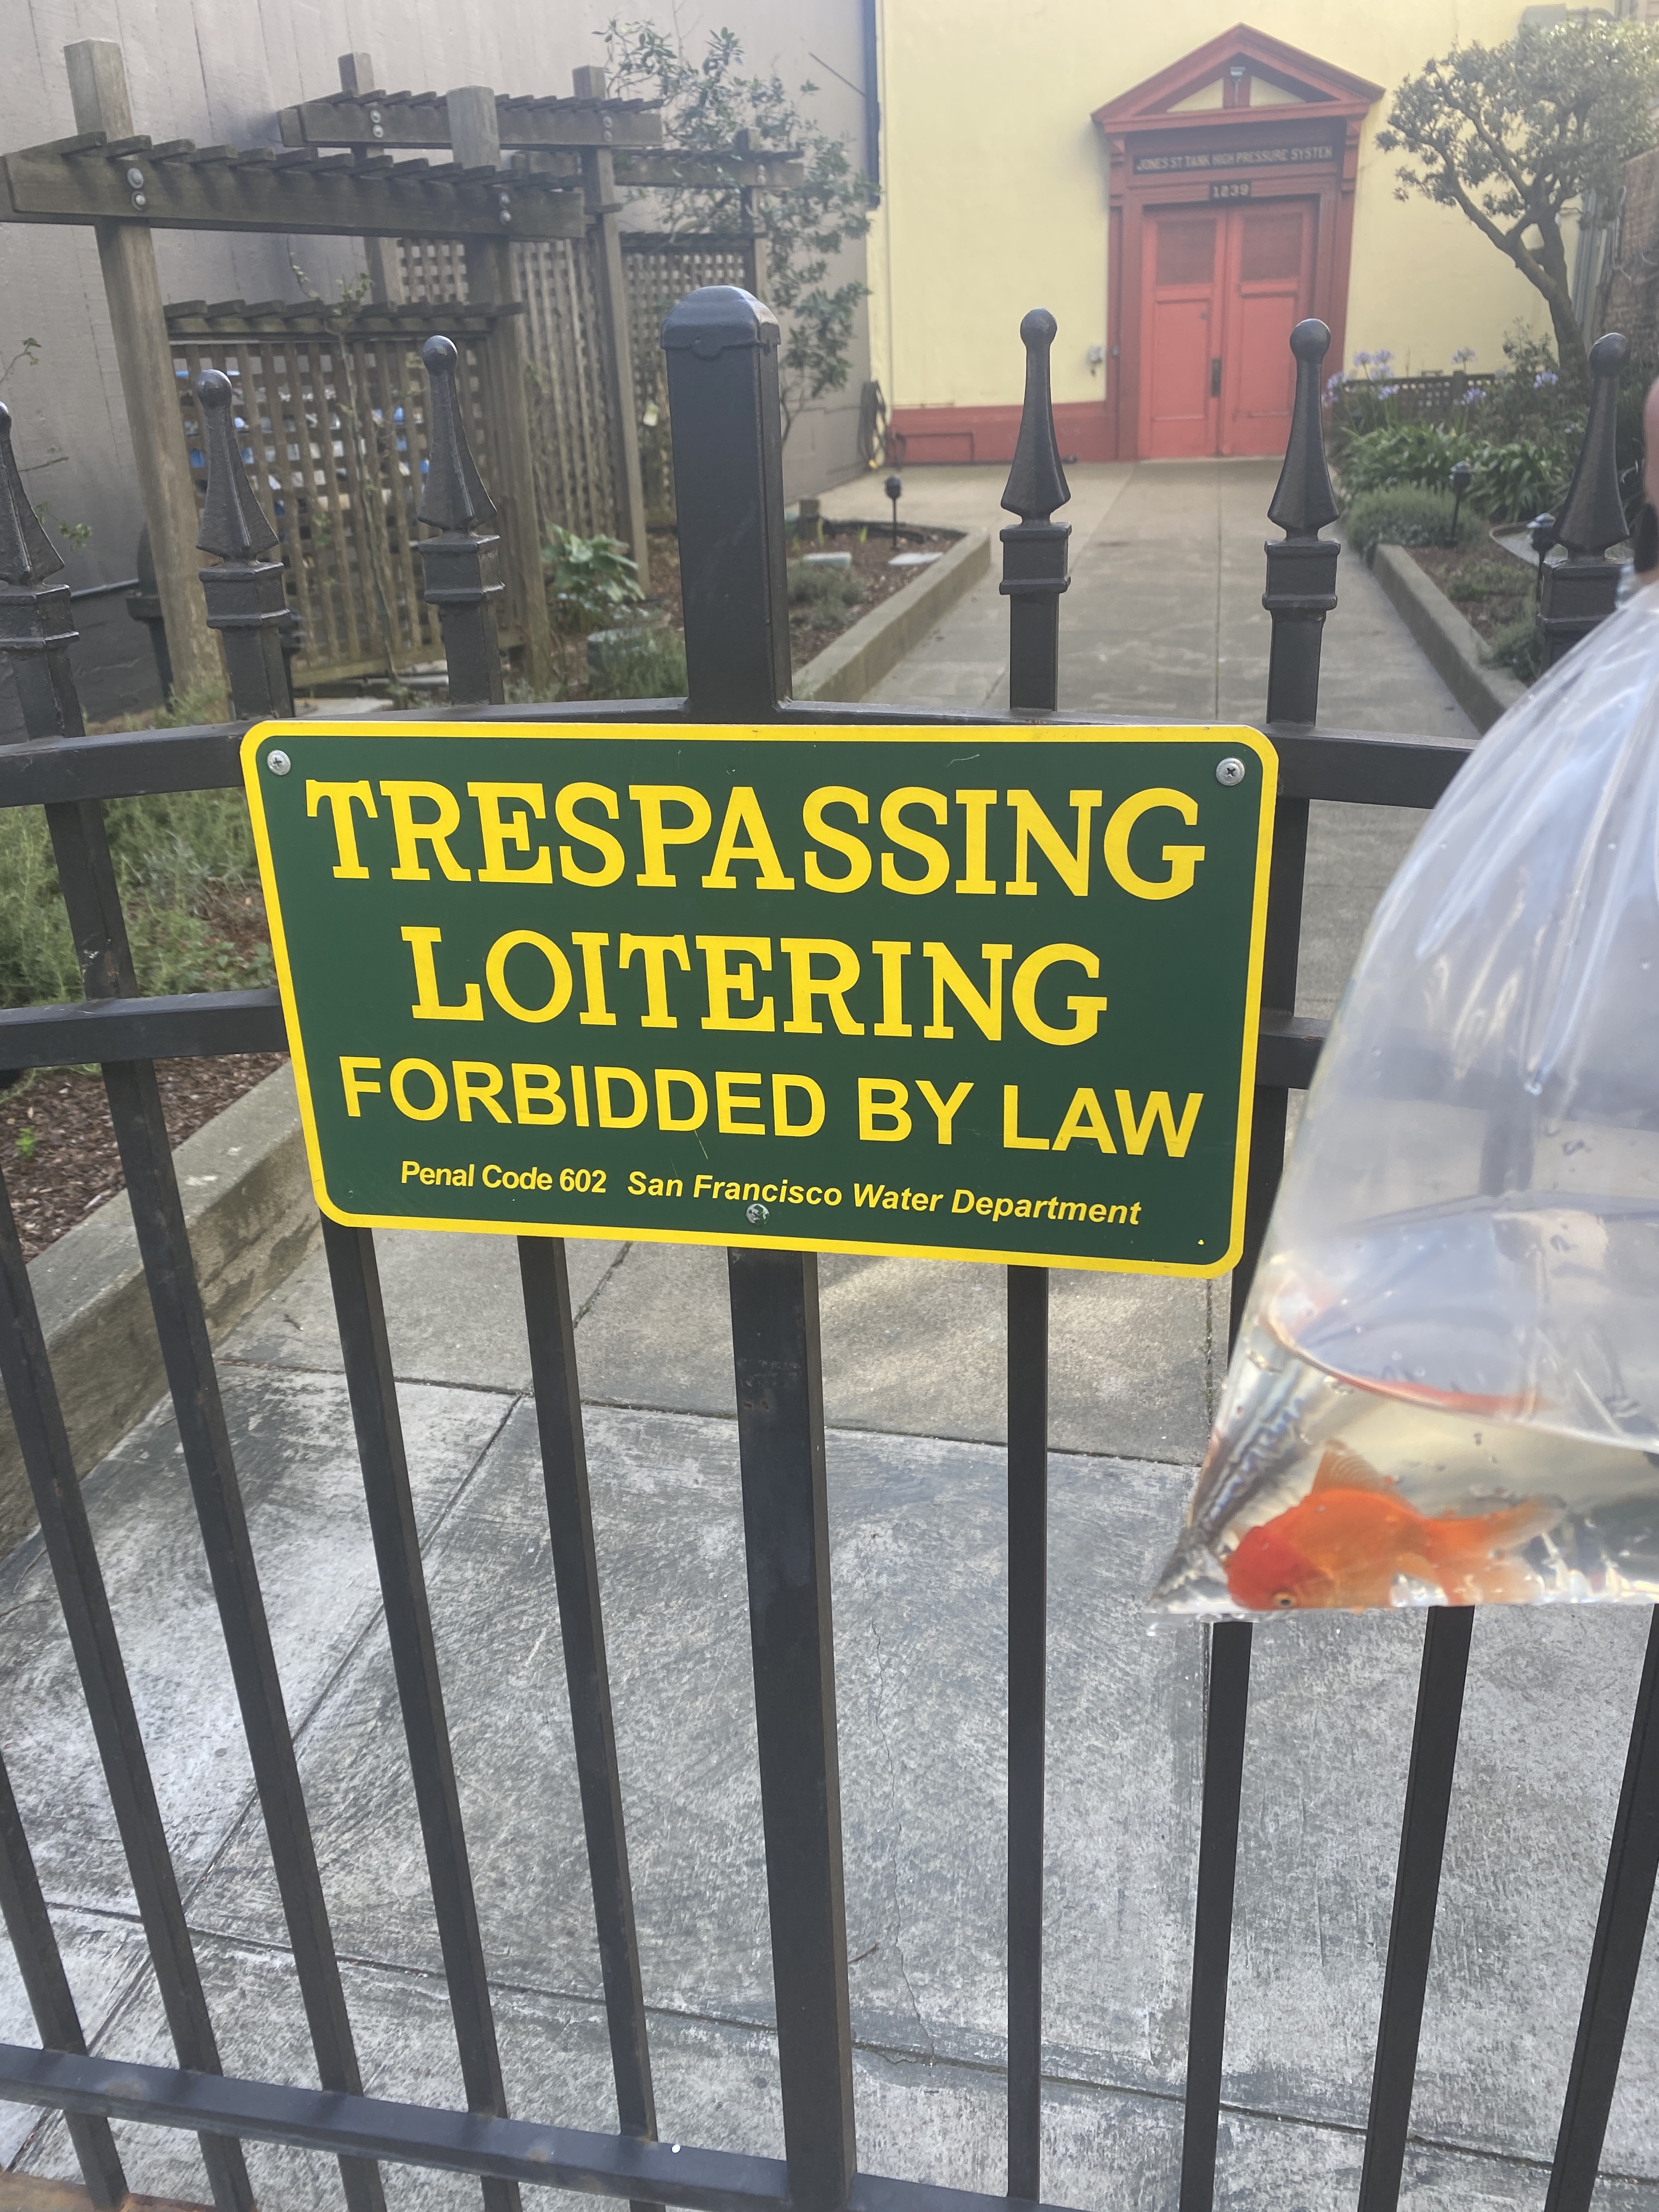
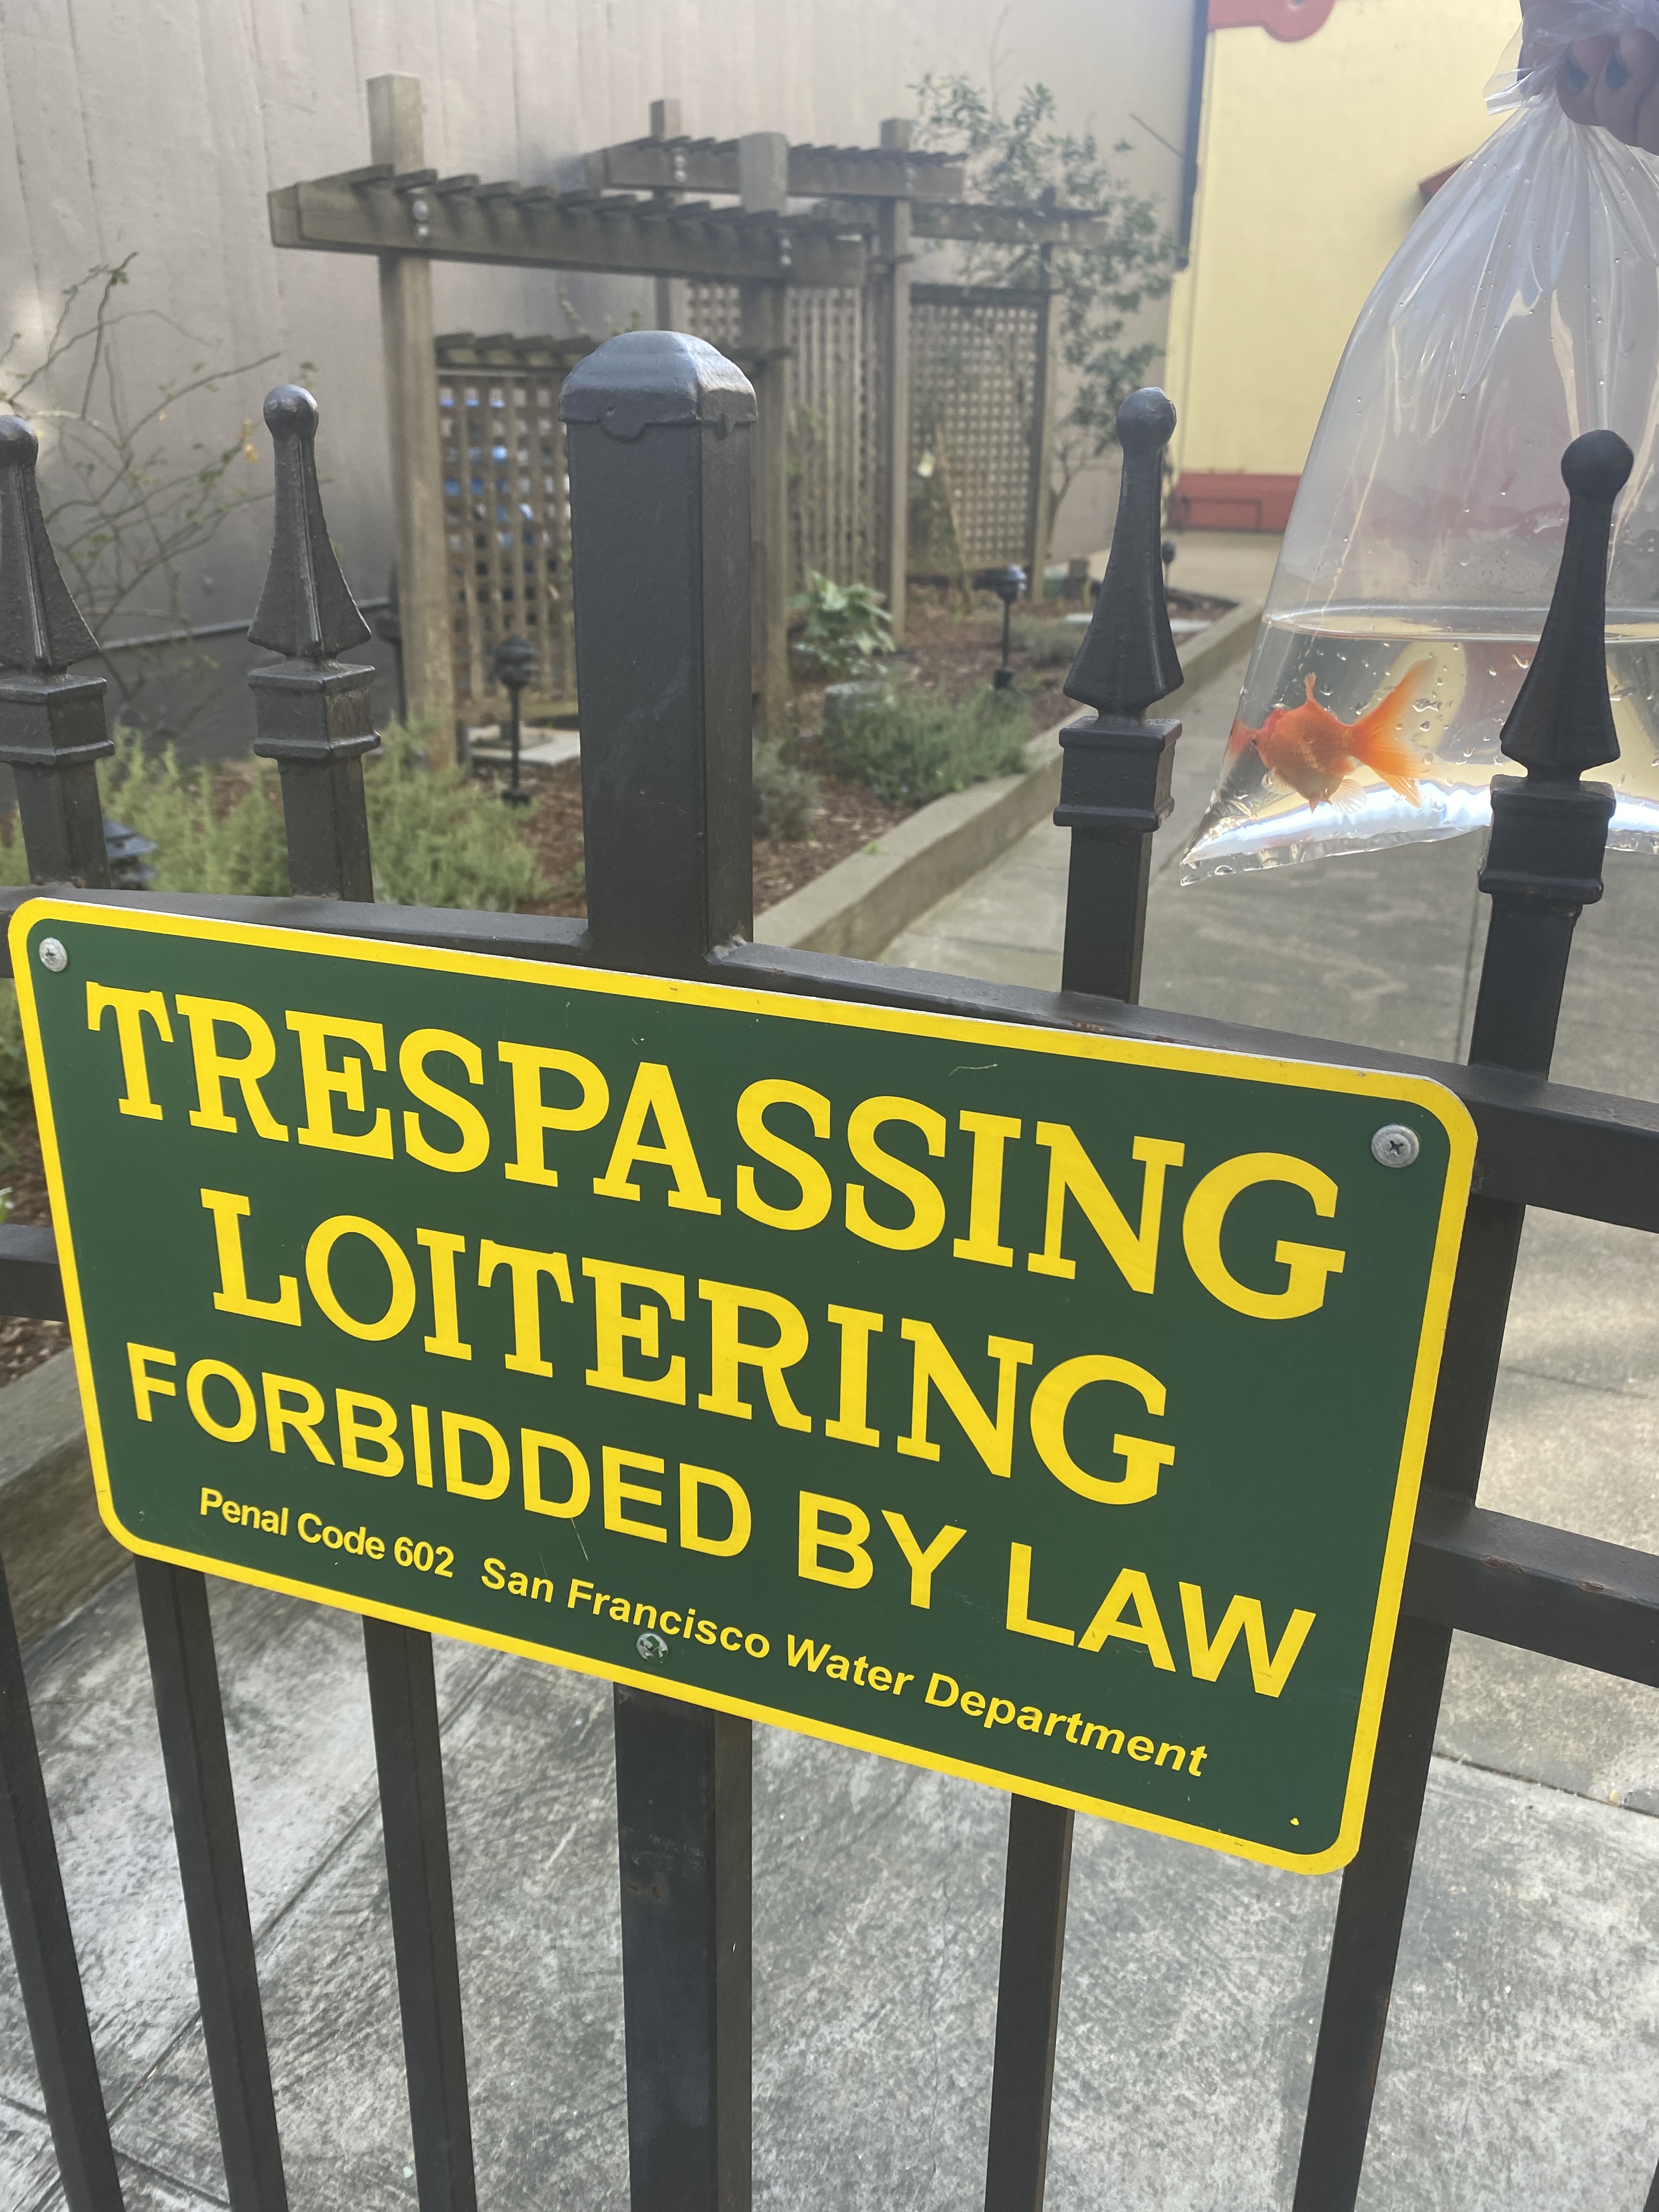
Jeff willfully trespasses and breaks the law. You can't stop this rebel.
Jeff gets home and takes a load off.
I attempt to film Jeff getting in his new tank, but can't do it with one hand.
I give an update on the project, and Jeff...
June 2022 - Taking a Break
Jeff's death definitely took the wind out of my sails. I was also at a stage where I was starting to experience some pretty severe burnout and depression from lack of fulfillment at work and getting constantly rejected in job interviews. I took a break from this project to focus on myself and taking care of my mental health. I hope to make more progress, but I also have other things that I am interested in working on. So for the forseeable future, I will be postponing this project until I finish/accomplish some other projects/tasks.
Zach Bellay published on
17 min, 3372 words